Workflow
This page will be dedicated to professional Final Cut Pro Workflows.
Final Cut Pro Workflow for Feature Films
Feature film editor Knut Hake has created an entire Notion page dedicated to Final Cut Pro Workflows for feature films.
Apple White Papers
- Apple ProRes RAW (April 2022)
- Apple ProRes (April 2022)
- Audio Roles in Final Cut Pro (November 2020)
- HDR and Wide Color Gamut in Final Cut Pro (November 2020)
- Manage Media with Final Cut Pro Libraries (November 2020)
- RED Workflows with Final Cut Pro (November 2020)
- Final Cut Pro X for Final Cut Pro 7 Editors (October 2019)
- Transition to Compressor 4.1 (December 2013)
- Final Cut Pro X for Final Cut Pro 7 Editors (September 2011)
Frame.io White Papers
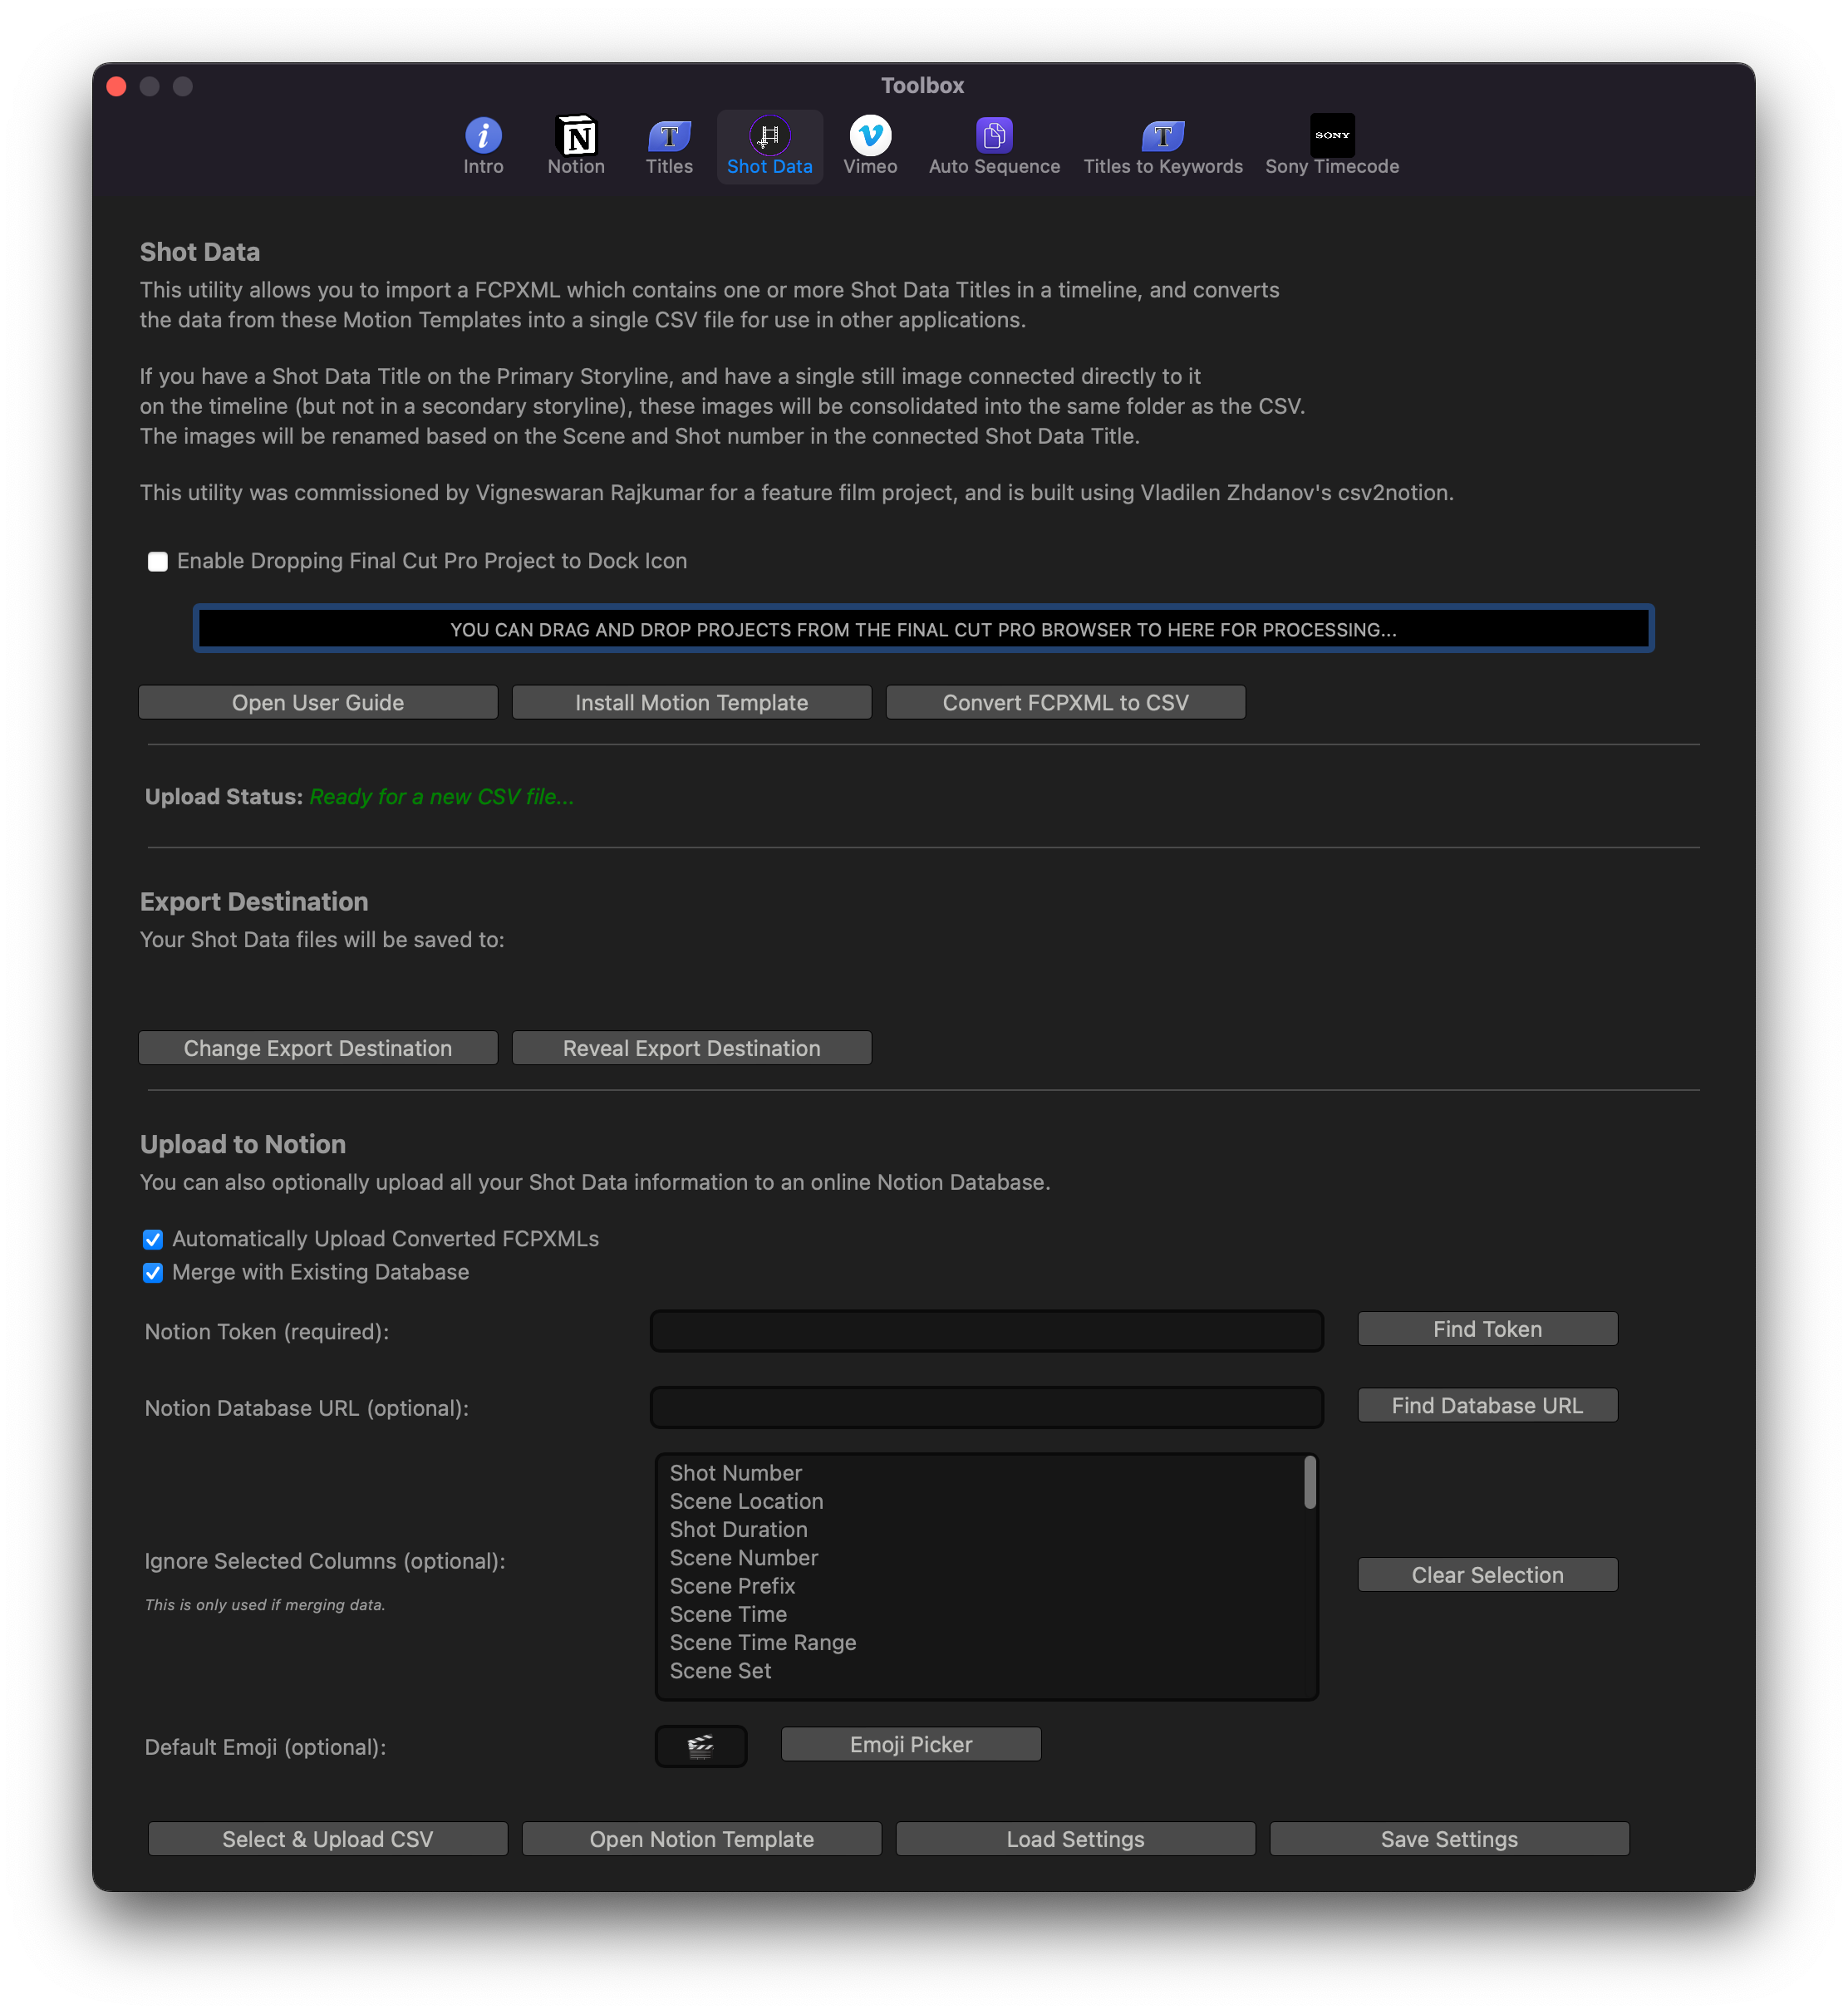
Shot Data
Vigneswaran Rajkumar has developed a unique workflow with Chris Hocking for filmmakers. The workflow uses CommandPost’s Shot Data Toolbox to create a Shot List & Storyboard Database from Final Cut Pro to Notion.
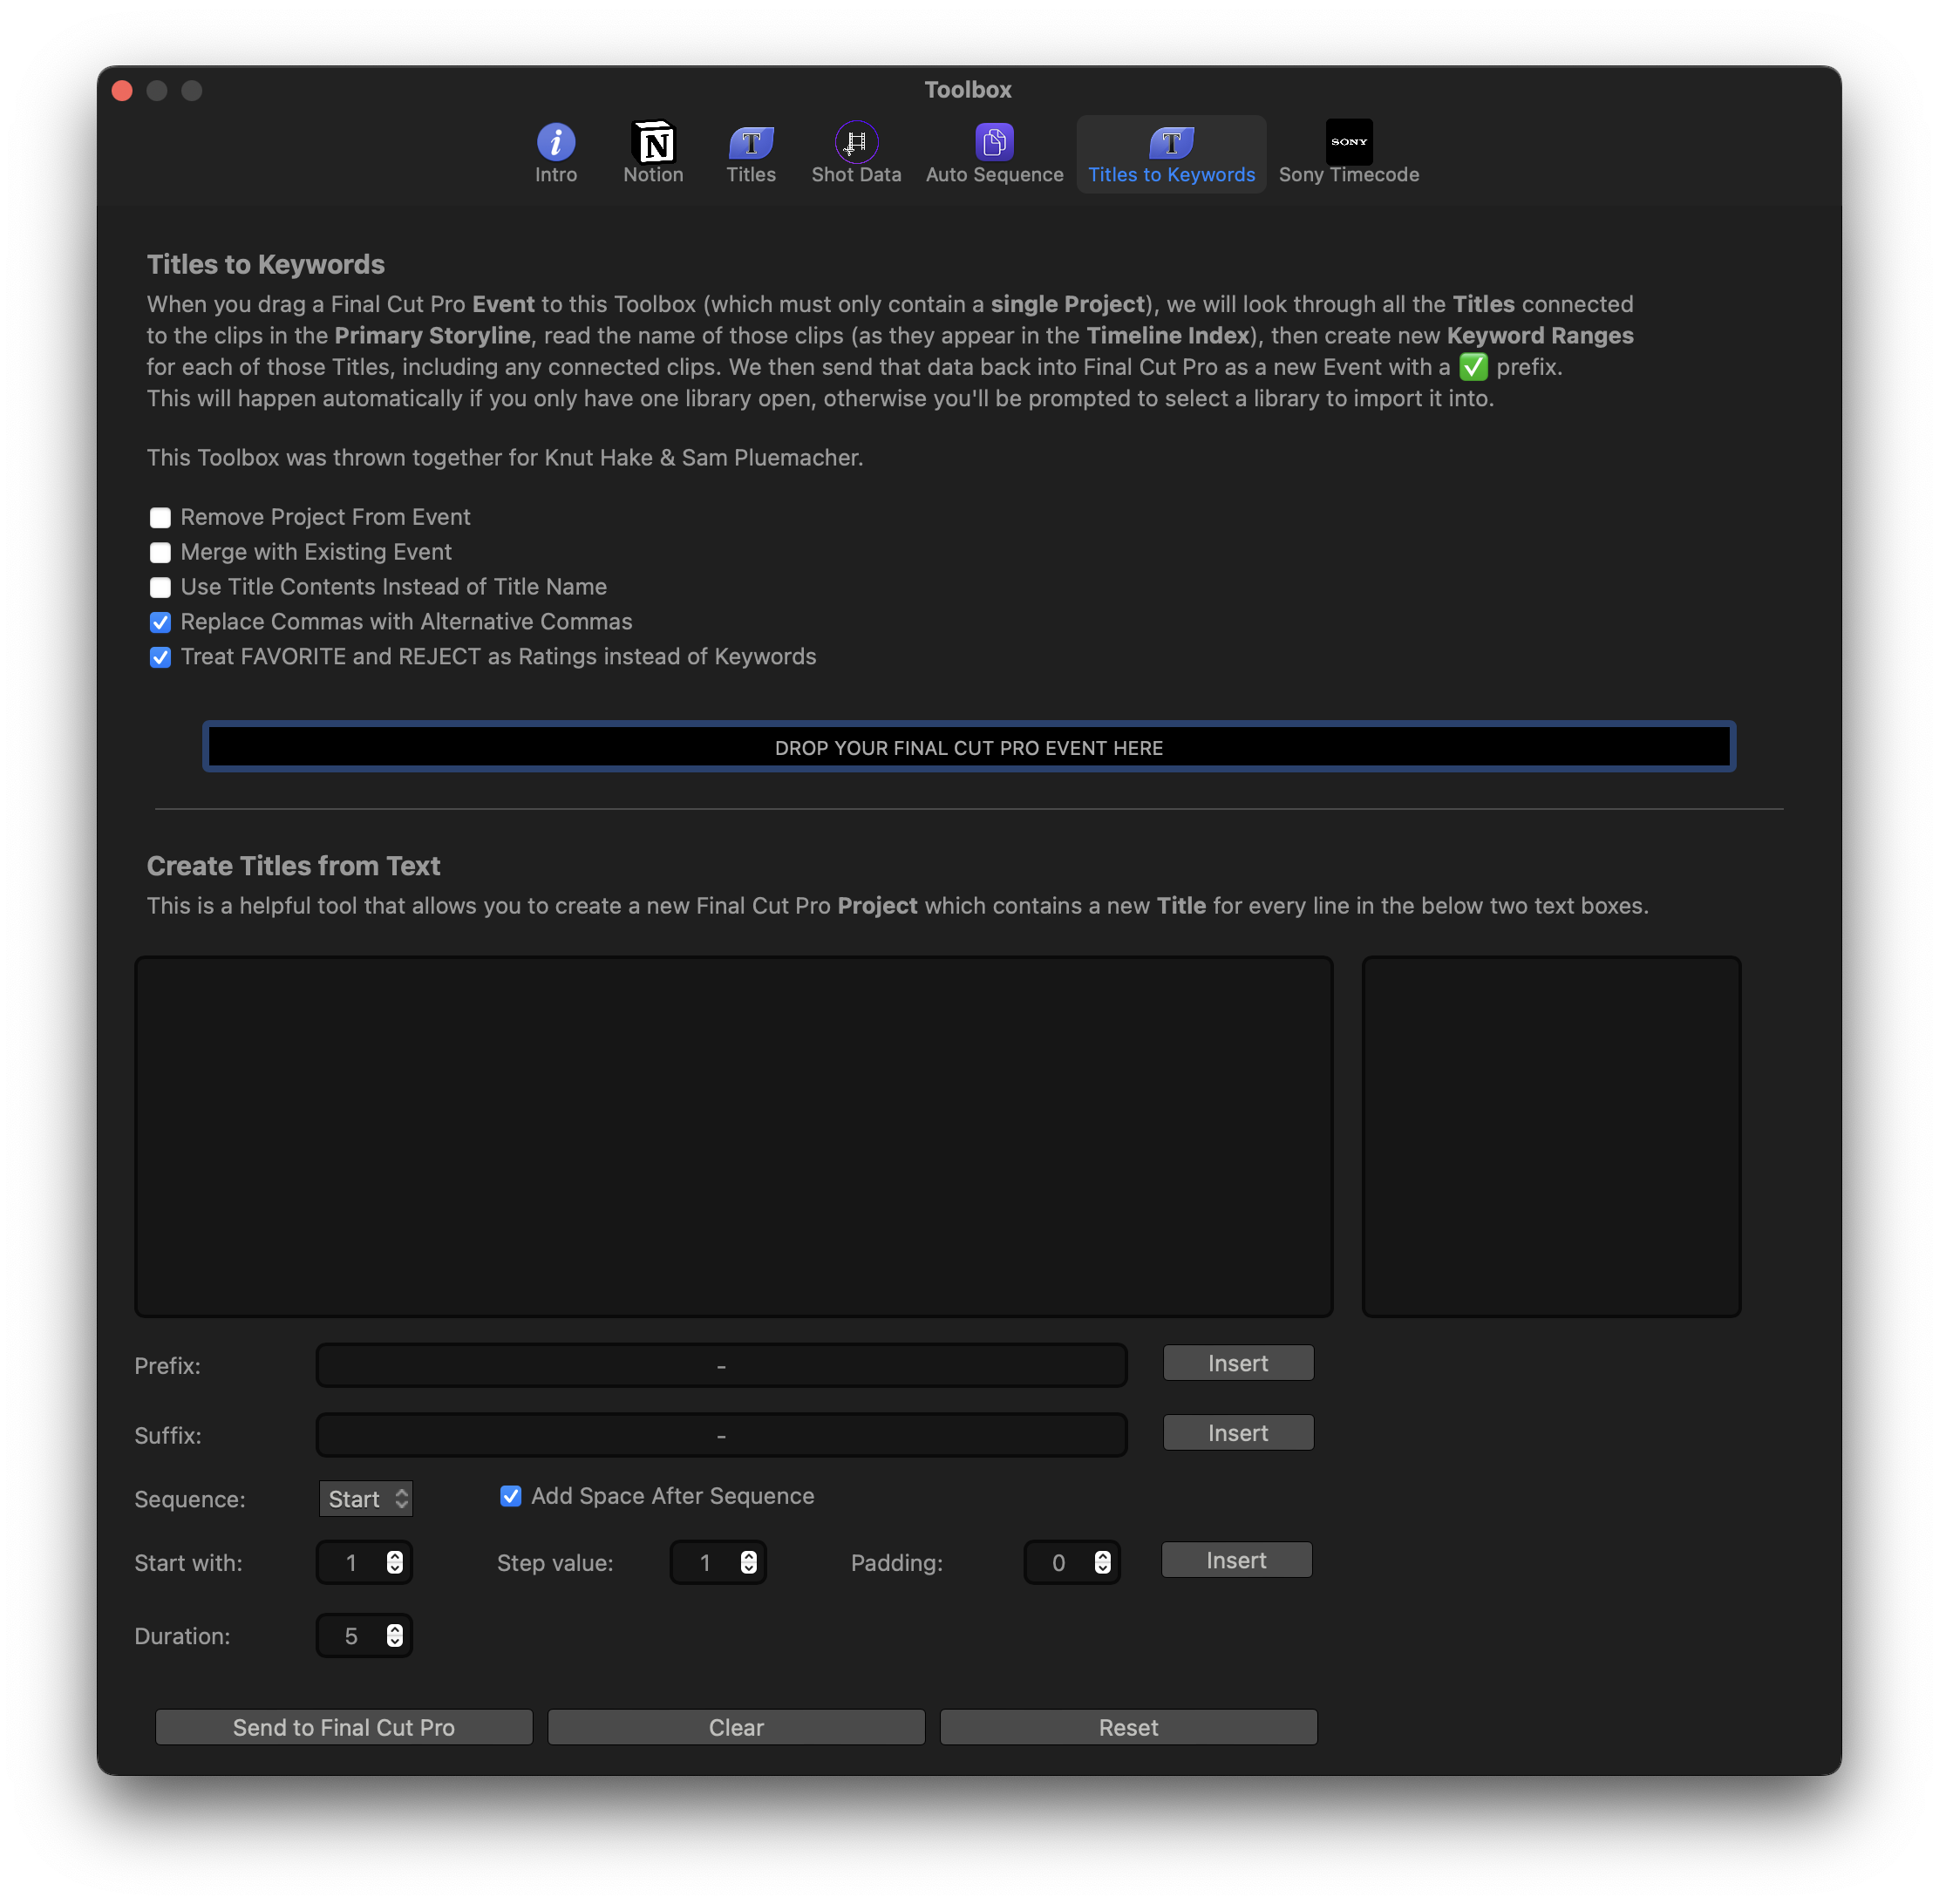
Titles to Keywords
CommandPost has as insanely powerful Toolbox called Titles to Keywords.
You can learn more in a Script-focused Feature Film Workflow for Final Cut Pro.
Best Practices
Apple's Final Cut Pro is a professional-grade, non-linear video editing software widely used for editing feature films, music videos, documentaries, and other forms of digital media. In this post, we will explore the best practices for using Final Cut Pro for long-form feature film editing. This will ensure your workflow is optimized, your output is professional, and your editing process is efficient.
Organise Your Workflow
Create a Sound Workflow Structure:
Before starting the editing process, it's crucial to establish a well-structured workflow. In the context of long-form feature films, this often involves breaking down your project into scenes or sequences, each with its own dedicated project file within Final Cut Pro. This allows for focused editing and simplifies collaboration, as different editors can work on different scenes simultaneously.
Consistent Naming Conventions:
Consistency is key to smooth editing, especially for large projects like feature films. Use consistent naming conventions for your clips, sequences, and projects. This will make it much easier to locate and identify specific assets as your project grows.
Leverage Metadata:
Final Cut Pro allows users to input and leverage metadata for clips, such as scene number, shot number, take number, and more. You can also add custom metadata. Using metadata effectively can greatly enhance organization and searchability within your project.
Understanding RAM Requirements
One crucial aspect of achieving optimal performance with Final Cut Pro revolves around understanding and addressing the software's RAM requirements. In particular, running FCP on Apple silicon (Apple's own line of processors) requires careful consideration. As all new Macs now use Apple silicon, it's important to get this right.
Apple Silicon and Unified Memory:
Unlike traditional computer architecture, where the CPU and GPU have separate memory (RAM and VRAM), Apple Silicon uses a unified memory architecture. This means that the CPU and GPU share the same pool of memory. As a result, your RAM has to serve the needs of both processing and graphics tasks.
For long-form feature film editing in Final Cut Pro, this has several implications:
-
Greater RAM demands: Feature films require handling high-resolution footage, multiple video tracks, complex effects, and color grading, among others. These tasks can put significant strain on your RAM.
-
Multitasking needs: If you are using other demanding apps alongside Final Cut Pro, such as other creative apps, your RAM needs will be even higher.
-
Importance of choosing the right Mac model: When buying an Apple Silicon Mac, you can't upgrade the RAM later, unlike with some previous Intel-based Mac models. So, it's important to consider your RAM needs upfront.
How Much RAM Do You Need?
As a baseline, Apple recommends a minimum of 8GB RAM for Final Cut Pro:
4GB of RAM (8GB recommended for 4K editing, 3D titles and 360° video editing)
However, for long-form feature film editing, you'll likely need more.
-
16GB RAM: This should be considered the minimum for professional work, such as editing feature films. It will allow for smooth editing of 4K footage and some flexibility for multitasking.
-
32GB RAM or higher: If you're working with 6K, 8K, or multiple streams of 4K video, or if you use lots of effects, consider 32GB or even 64GB of RAM. These larger RAM options will also provide greater flexibility for heavy multitasking and future-proof your setup as software demands increase over time.
At LateNite we're primarily using MacBook Pro's (2021 16-inch, Apple M1 Max, 64GB RAM, 3TB SSD), and they're rock solid.
While the unified memory architecture in Apple Silicon offers advantages such as increased efficiency and speed, it also places greater demands on your system's RAM. Therefore, when planning to use Final Cut Pro for long-form feature film editing on an Apple Silicon Mac, consider opting for at least 16GB of RAM, or even 32GB or 64GB for more complex projects and improved future-proofing. Remember, it's better to have a bit more RAM than you need, rather than not having enough when you need it most.
Understanding Drive Requirements
In 2023, you should definitely be removing slow spinning disks from your editing workflow entirely. (You might still choose to use them for backup.)
Choosing the Right Storage for Final Cut Pro: SSDs Over Spinning Disks:
An often underappreciated factor that can significantly impact your video editing workflow is the type of storage you use. When it comes to editing in Final Cut Pro, especially long-form feature film editing, opting for a Solid State Drive (SSD) over a traditional Hard Disk Drive (HDD) can make a significant difference.
Understanding HDDs vs SSDs:
HDDs, or hard disk drives, are traditional storage devices that use mechanical, moving parts to read and write data. They are made up of spinning disks, hence the name "spinning disks." HDDs are typically slower and less reliable (due to potential mechanical failure), but they usually offer more storage space for a lower price.
On the other hand, SSDs, or solid-state drives, are storage devices that use flash memory (similar to your smartphone or USB thumb drive) to store data. Because there are no moving parts, SSDs are significantly faster and more reliable than HDDs. However, they are also typically more expensive per gigabyte.
The Advantages of SSDs for Final Cut Pro
- Faster Read/Write Speeds: SSDs offer dramatically faster data transfer rates compared to HDDs. This means that video files can be read, copied, and written much quicker, which is critical when dealing with large, high-resolution video files typical in feature film editing.
- Quicker Rendering and Exporting: The faster speeds of SSDs also translate to quicker rendering and exporting times in Final Cut Pro. This is particularly important in a professional setting, where time is often of the essence.
- Improved Multitasking: SSDs are better at handling multiple tasks simultaneously, such as playing back multiple video streams, which is common in multicam editing or when working with complex timelines.
- Greater Reliability: Because they have no moving parts, SSDs are less likely to suffer mechanical failures, making them more reliable than HDDs. This is critical when working on important projects like feature films, where data loss can be disastrous.
Practical Tips for Using SSDs with Final Cut Pro:
While SSDs are clearly advantageous for video editing, it's important to use them strategically to balance performance and cost:
- Working Drive: If you can't afford a large SSD, consider at least getting a smaller one to use as a 'working drive'. You can store your current project on the SSD for fast performance, then move finished projects to an HDD for long-term storage.
- External SSDs: High-capacity external SSDs have become increasingly affordable. They can be an excellent solution for expanding your storage space without having to replace your internal drive.
- Manage Storage Space: SSDs typically have less space than HDDs. Be diligent about deleting rendered files, proxies, and other temporary files that Final Cut Pro generates during editing to free up space.
While HDDs may be more cost-effective in terms of raw storage space, the speed, and reliability benefits offered by SSDs make them a superior choice for use with Final Cut Pro, especially for demanding tasks like long-form feature film editing.
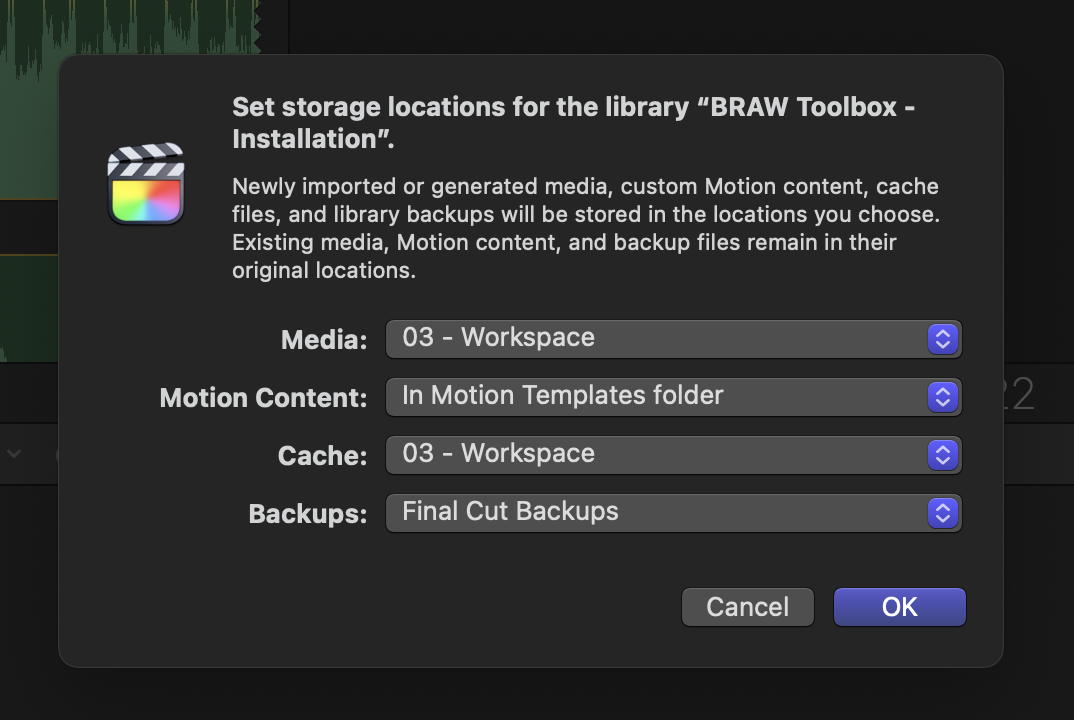
Storage Locations
To keep library sizes as small as possible (which makes backing them up and sharing them easier), we always recommend keeping your media and cache external to the library.
Storing your media inside the library is an option for solo editors who do not work collaboratively, but external media offers more power and flexibility.
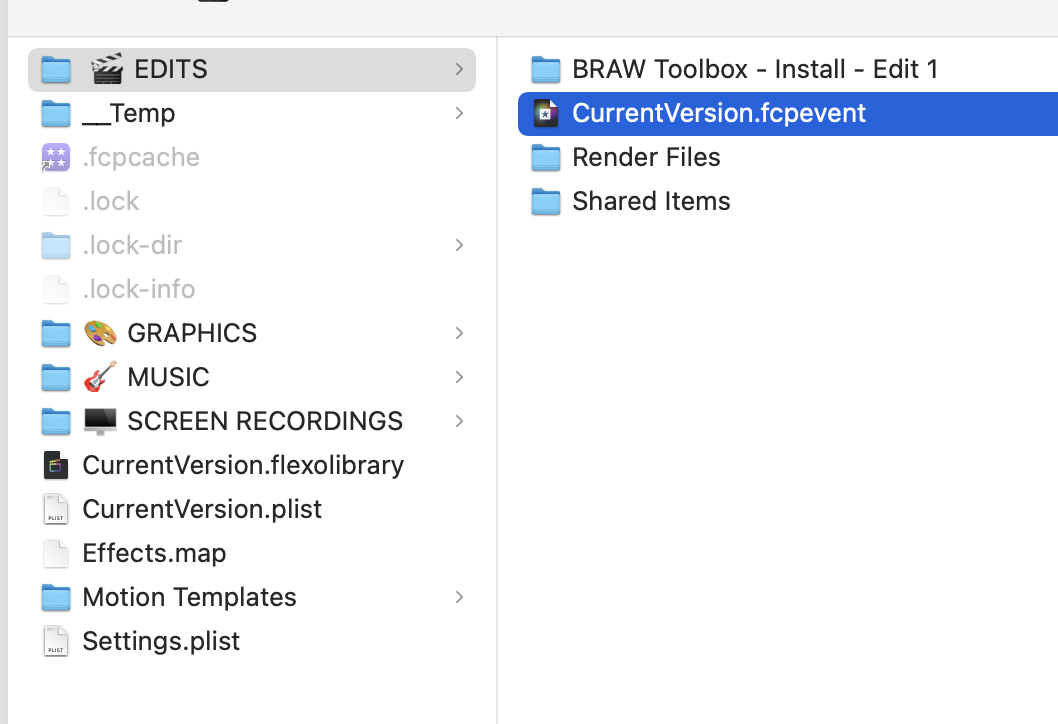
Library Organisation
Each event in Final Cut Pro is its own Core Data database.
You can learn more about the library structure.
Given this, we recommend splitting up your media into multiple events, rather than putting all your media in a single event powered by a single database.
We recommend using emojis in event names, to differentiate the list of events more clearly.
For example, this is from a 5 x 30min broadcast television special:
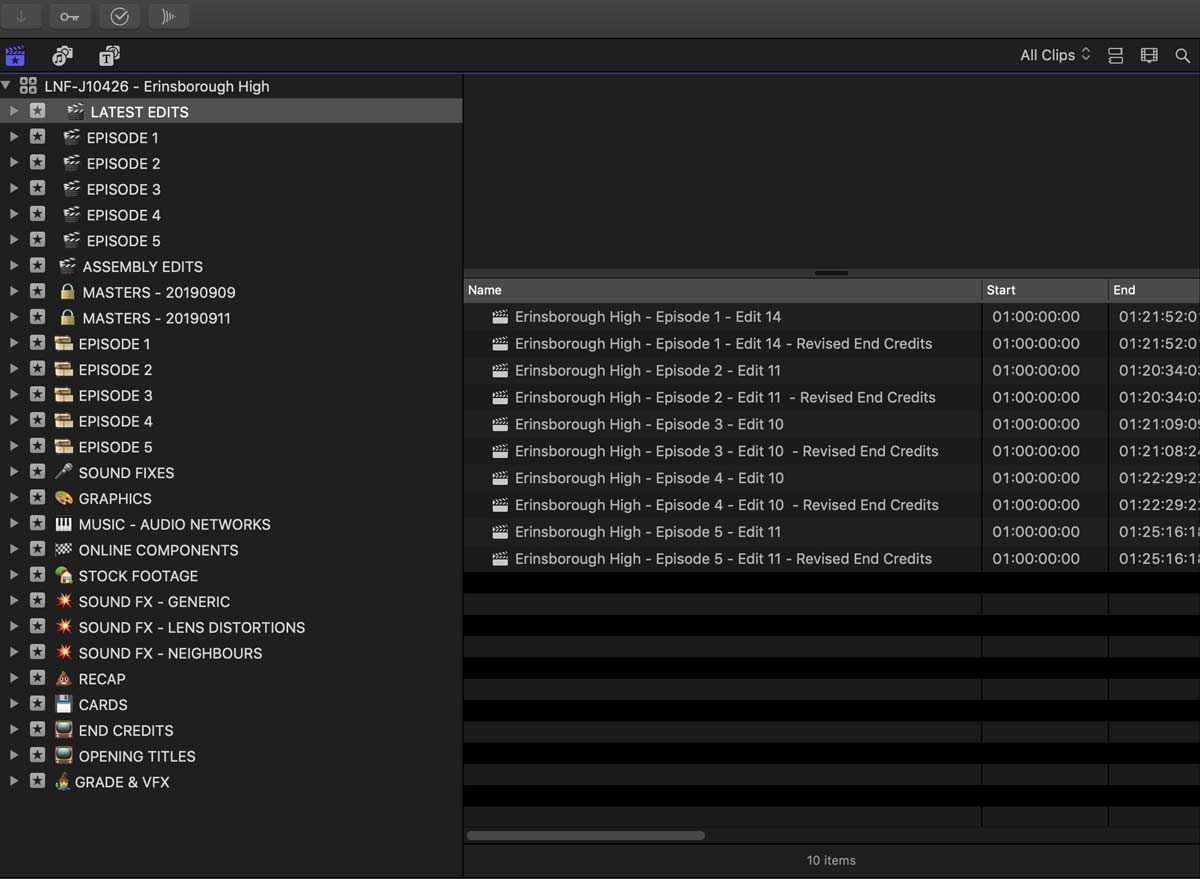
You can learn more about Chris Hocking's workflow.
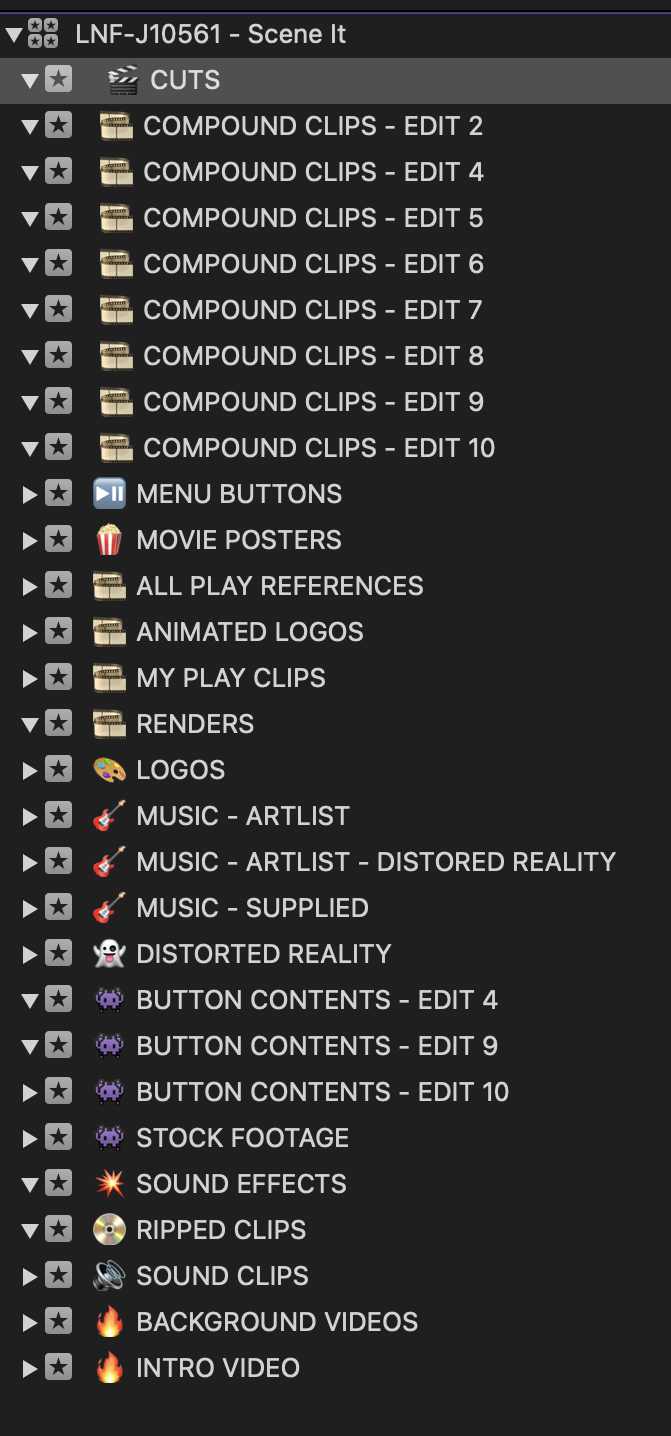
Here's an example of a library for a job where all the user interface designs were build in Final Cut Pro for a game:
Here's an example of a library for a basic corporate edit:

If you're working on a very heavy feature film, your current feature length timeline should be in its own event.
Avoid Snapshots
Snapshots are the devil. You're much better off using something like PostLab.
When you duplicate a project as a snapshot, Final Cut Pro embeds copies of compound or multicam “parent” clips in the duplicate, so any changes to other instances of those clips do not affect the duplicate.
Generally speaking, when you're working with a long-form project, all of your media is generally a Multicam Clip (because you're syncing with external audio) — so each time you create a Snapshot you're essentially creating a duplicate of all the clips metadata.
When you create a Snapshot, Final Cut Pro generates copies of your used clips and any connected clips, including titles, effects, compound clips, and multicam clips. All of these elements contribute to the overall size of the Snapshot.
While Snapshots can be a valuable tool for preserving your project's state at a specific point in time, excessive use can have a significant impact on your library size and performance. This can in turn affect Final Cut Pro's performance.
An overly large Final Cut Pro library can lead to several issues:
- Reduced System Performance: A bloated library can slow down Final Cut Pro's performance, making it less responsive and lengthening render and export times.
- Limited Storage Space: If your library size becomes excessively large, it can occupy a substantial portion of your available storage space. This can be particularly problematic if you're working with limited storage capacities, such as on a laptop with a small SSD.
- Back-up Challenges: Large libraries can also be more challenging to back up, as they require more storage space and more time to copy to your backup drive.
Edit with Proxy Media
Long-form editing, particularly at high resolutions (4K, 8K), can be quite demanding on system resources. To ensure a smooth editing experience, Final Cut Pro offers a 'proxy workflow'. This allows you to create lower-resolution versions (proxies) of your footage for editing. Once the editing is complete, you can easily switch back to the original high-resolution files for final output.
Use the Magnetic Timeline
The Magnetic Timeline is one of the unique features of Final Cut Pro. It offers a trackless approach to editing, allowing clips to automatically slide into place and avoid clip collisions and sync problems. This is particularly useful in feature film editing, where you may be juggling hundreds or even thousands of clips.
Master Your Tools and Shortcuts
Final Cut Pro offers a wide range of tools for tasks such as trimming, re-timing, and applying effects. Mastering these tools, along with the keyboard shortcuts for commonly used functions, can significantly speed up your editing process.
Leverage Final Cut Pro's Multicam Editing
If your film includes footage from multiple cameras, Final Cut Pro's Multicam editing feature can be a major time-saver. It allows you to sync up to 64 angles of video footage using audio waveforms, timecode, or markers. Once synced, you can cut between angles in real time while watching the multicam viewer.
Use Compound Clips and Roles for Organisation & Efficiency
Compound Clips allow you to bundle separate clips together into a single clip, which can then be edited as one. This is useful for managing complex sequences or visual effects compositions.
Roles in Final Cut Pro allow you to label and organize different types of audio such as dialogue, effects, and music. When exporting, you can output multiple versions of your mix (such as stereo and surround) or a file with separated roles for further mixing or mastering.
Keep Regular Backups
Given the scale and importance of feature film projects, it's essential to keep regular backups of your work. Final Cut Pro's built-in backup tool makes this process easy and automatic. Backups can be accessed from the File > Open Library > From Backup command, but they can also be found in the Finder, in Home > Movies > Final Cut Backups > LIBRARYNAME.
Conclusion
Final Cut Pro is a powerful tool for long-form feature film editing, but like any tool, its effectiveness depends on how it's used. By adopting these best practices, you can ensure that your editing process is efficient, your workflow is smooth, and the end result is a feature film of professional quality. Remember, the key to successful film editing is a combination of technical skill, organization, creativity, and storytelling.
Want to contribute? Learn more here!