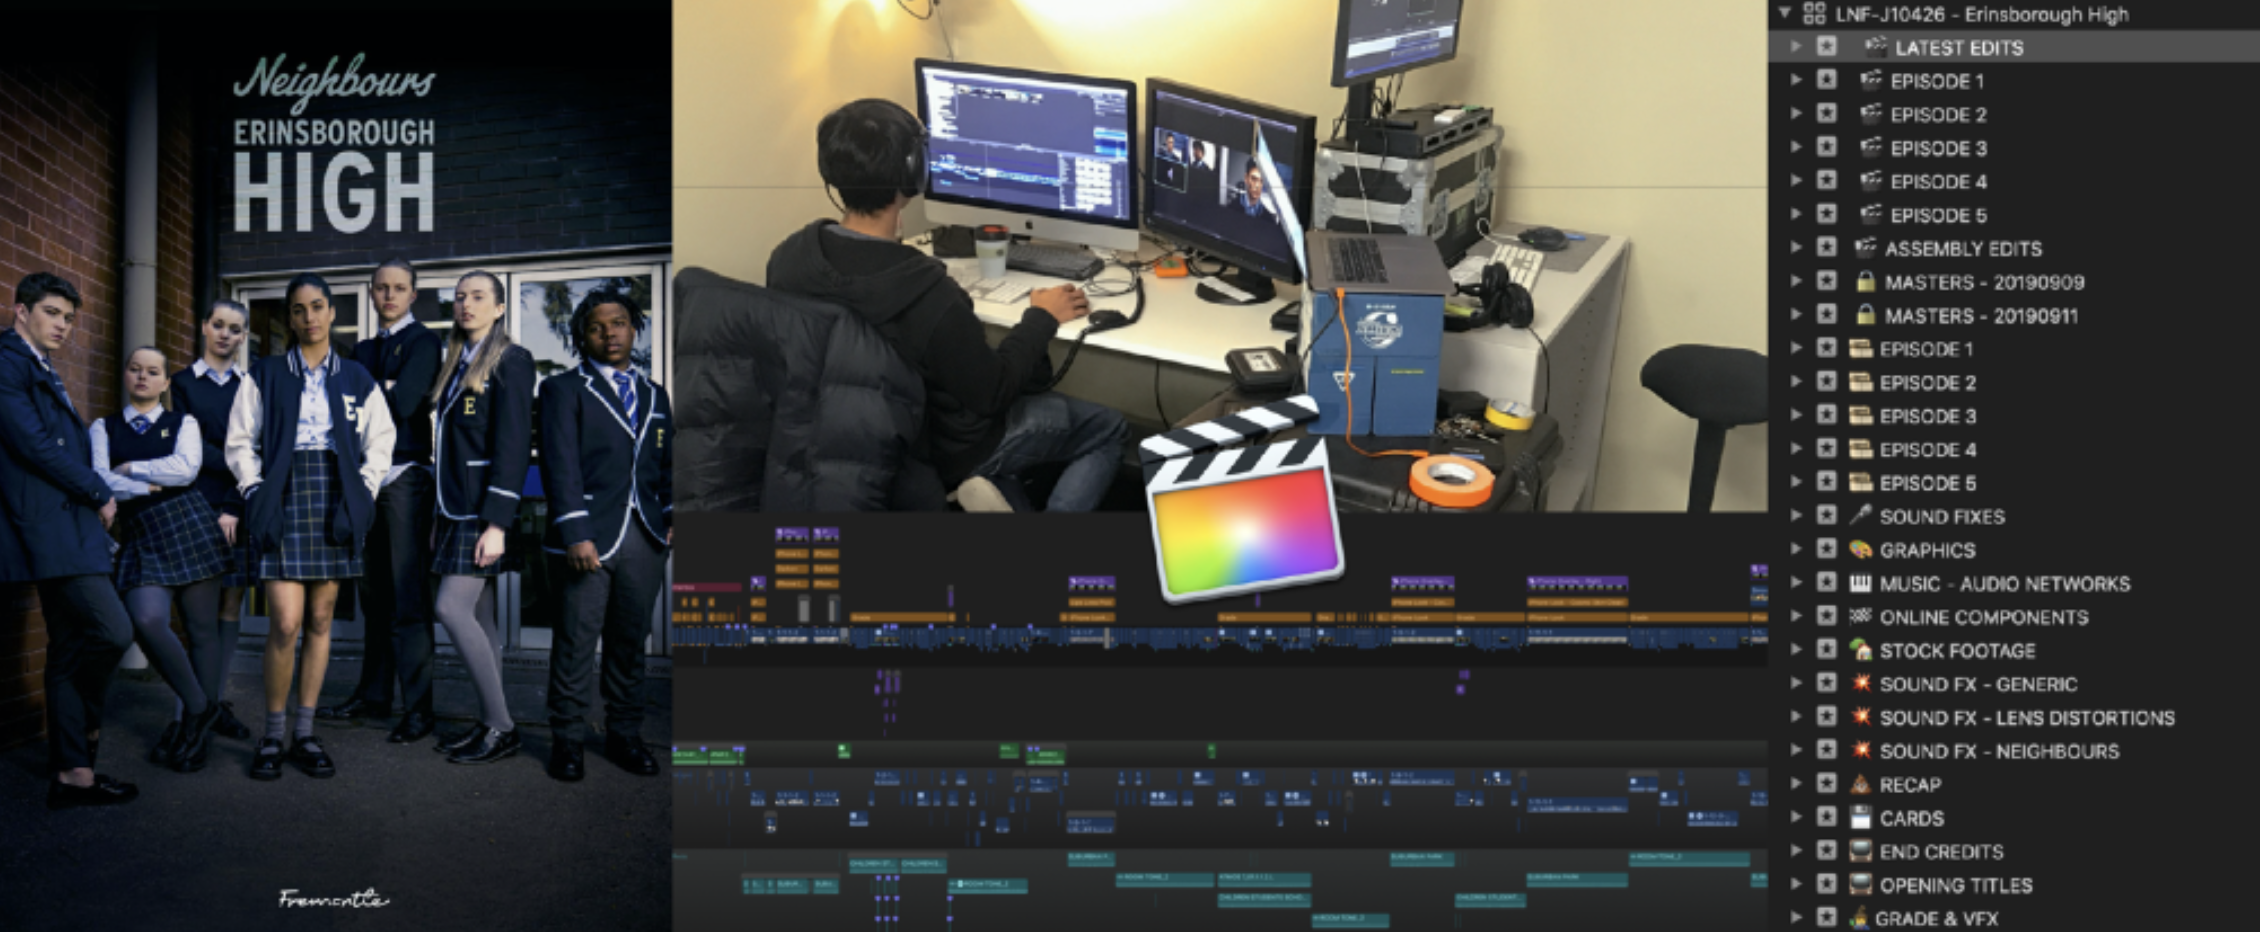
Neighbours - Erinsborough High
Written by Ronny Courtens.
This article was originally written for fcp.co in 2018.
Ronny Courtens has kindly allowed us to release it on FCP Cafe. Thank you!
Thank you to Tyler Nelson for formatting for FCP Cafe!
Chris Hocking from LateNite Films explains how his team used Final Cut Pro to edit, mix, grade, and deliver the much anticipated series "Neighbours - Erinsborough High" for Fremantle Australia.
Neighbours is the longest-running drama series on Australian television, celebrating its 35th Anniversary in 2020. It is produced by Fremantle and still today is viewed by a global audience of millions, making it one of Australia's most successful media exports.
It has been a stepping stone for Australia’s biggest Hollywood names and musicians such as Kyle Minogue, Guy Pearce, Jason Donovan, Margot Robbie, Delta Goodrem, Alan Dale, Jesse Spencer, Eliza Taylor-Cotter, Natalie Imbruglia and Holly Valance, just to name a few.
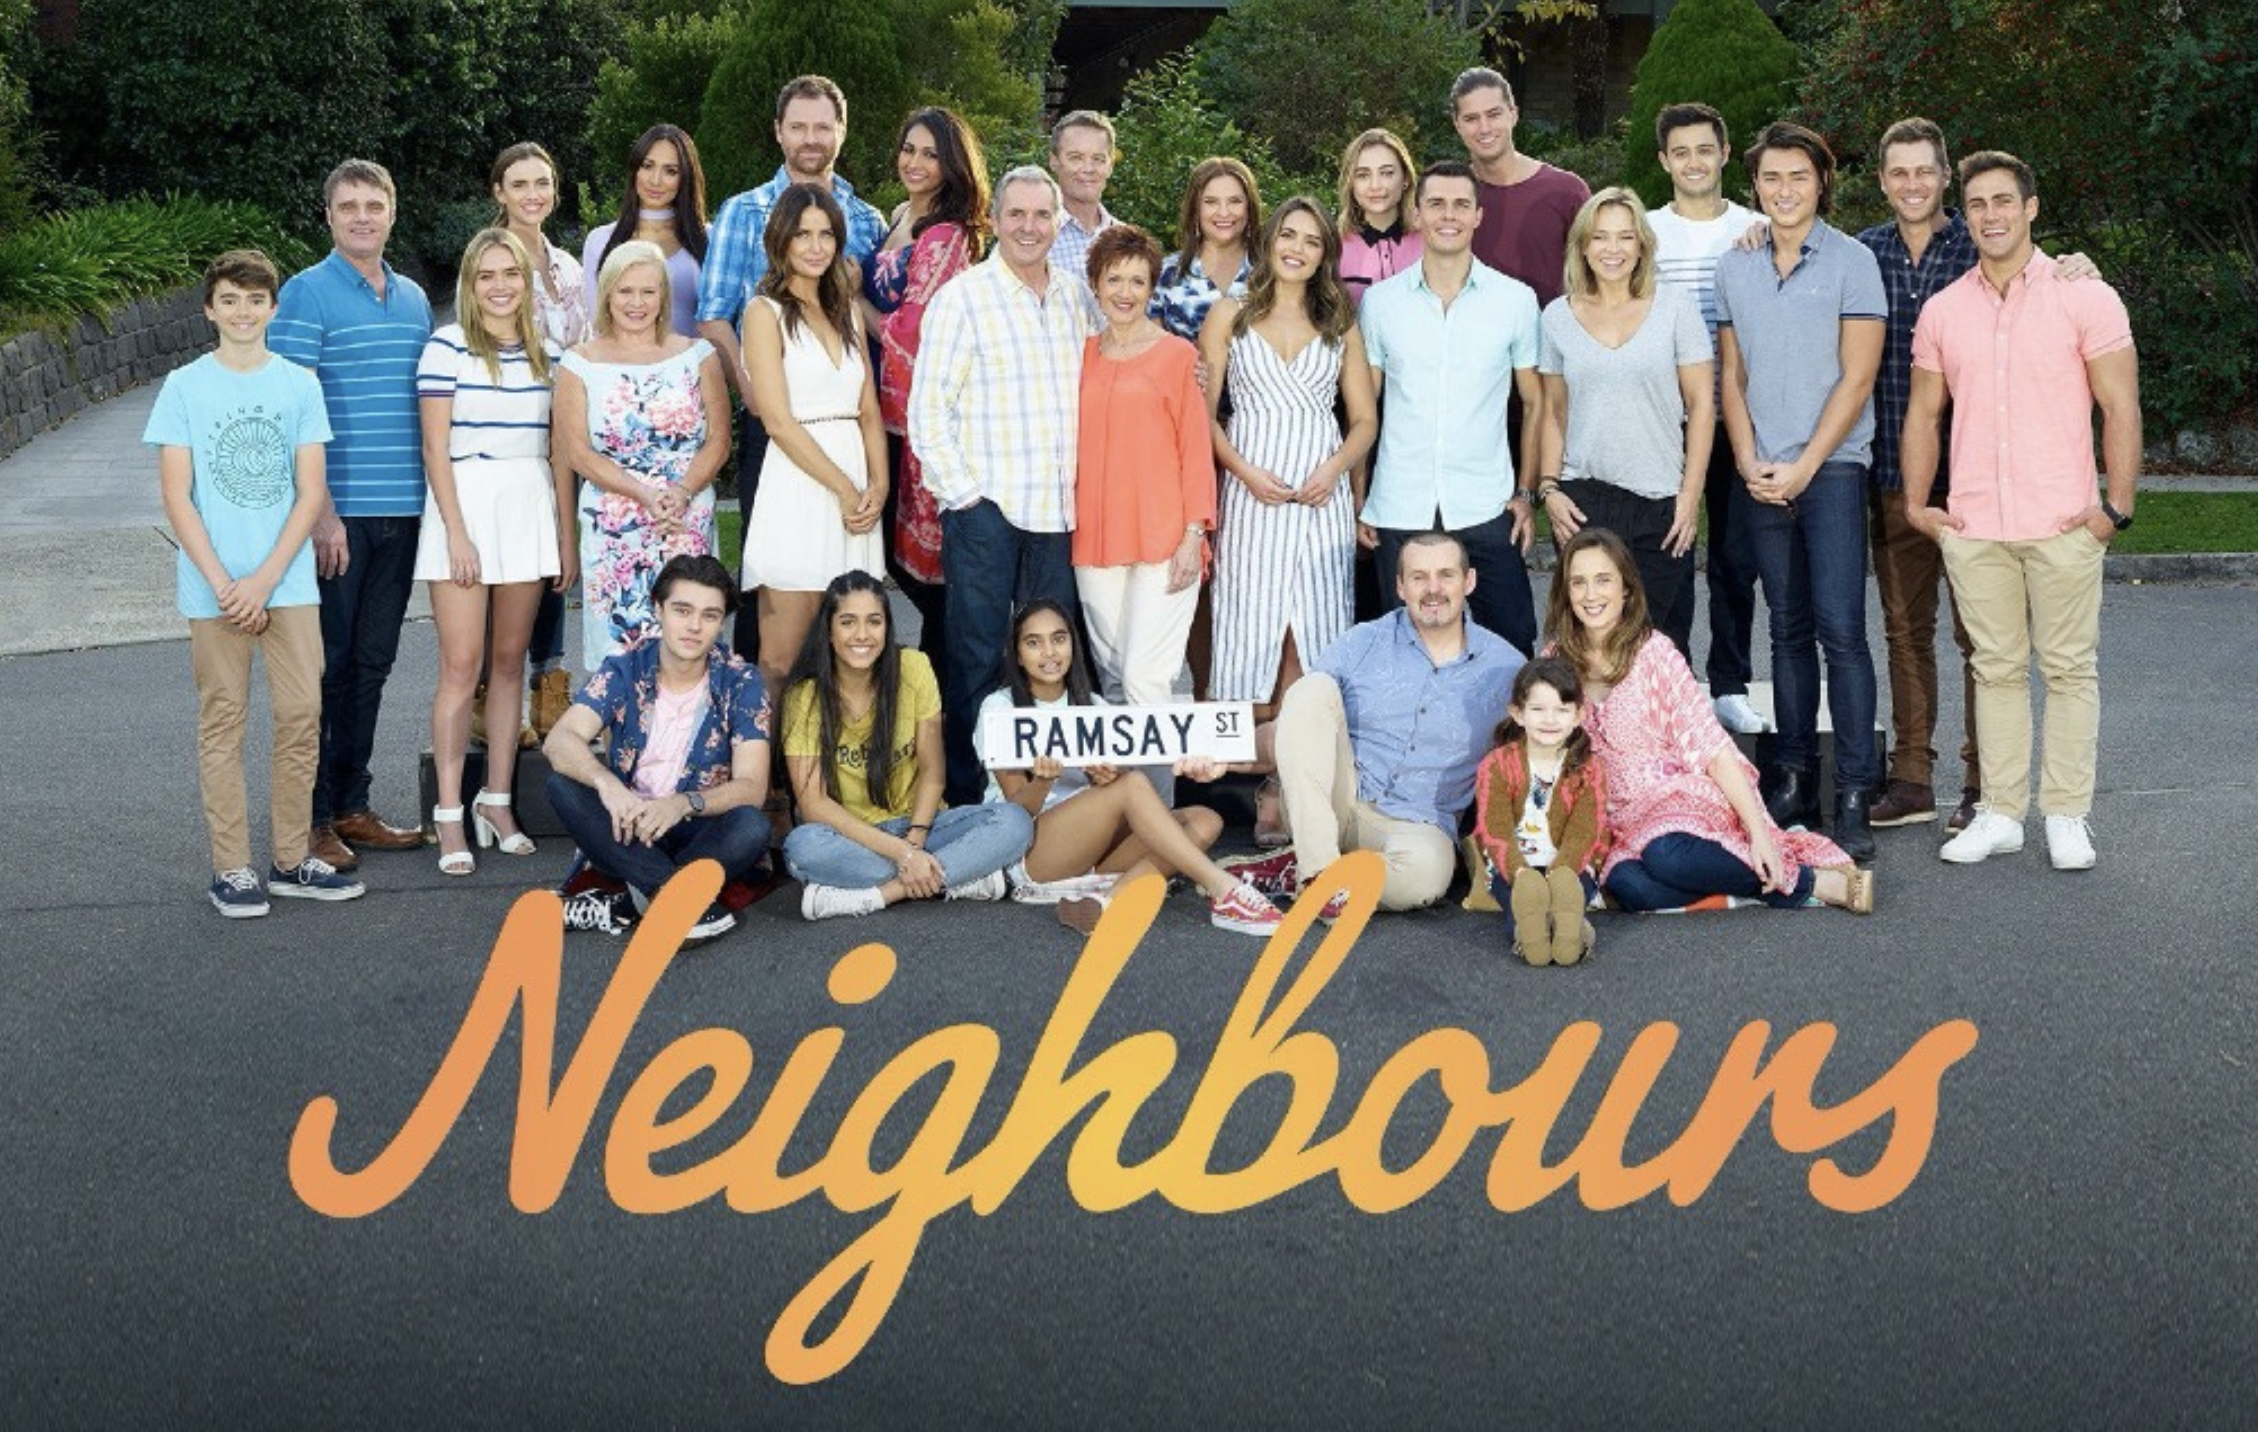
The series follows the highs and lows of the residents of Erinsborough, a fictional suburb of Melbourne, Victoria, providing an entertaining reflection of today’s diverse community.
In 2018, Neighbours recognized the newly introduced marriage equality bill with the first same-sex wedding and this year introduced to the regular cast the first transgender character played by actor and trans advocate Georgie Stone. Neighbours screens locally on Network TEN’s Peach channel and 10 Play and is among the highest rating programs on Channel 5 in the UK.
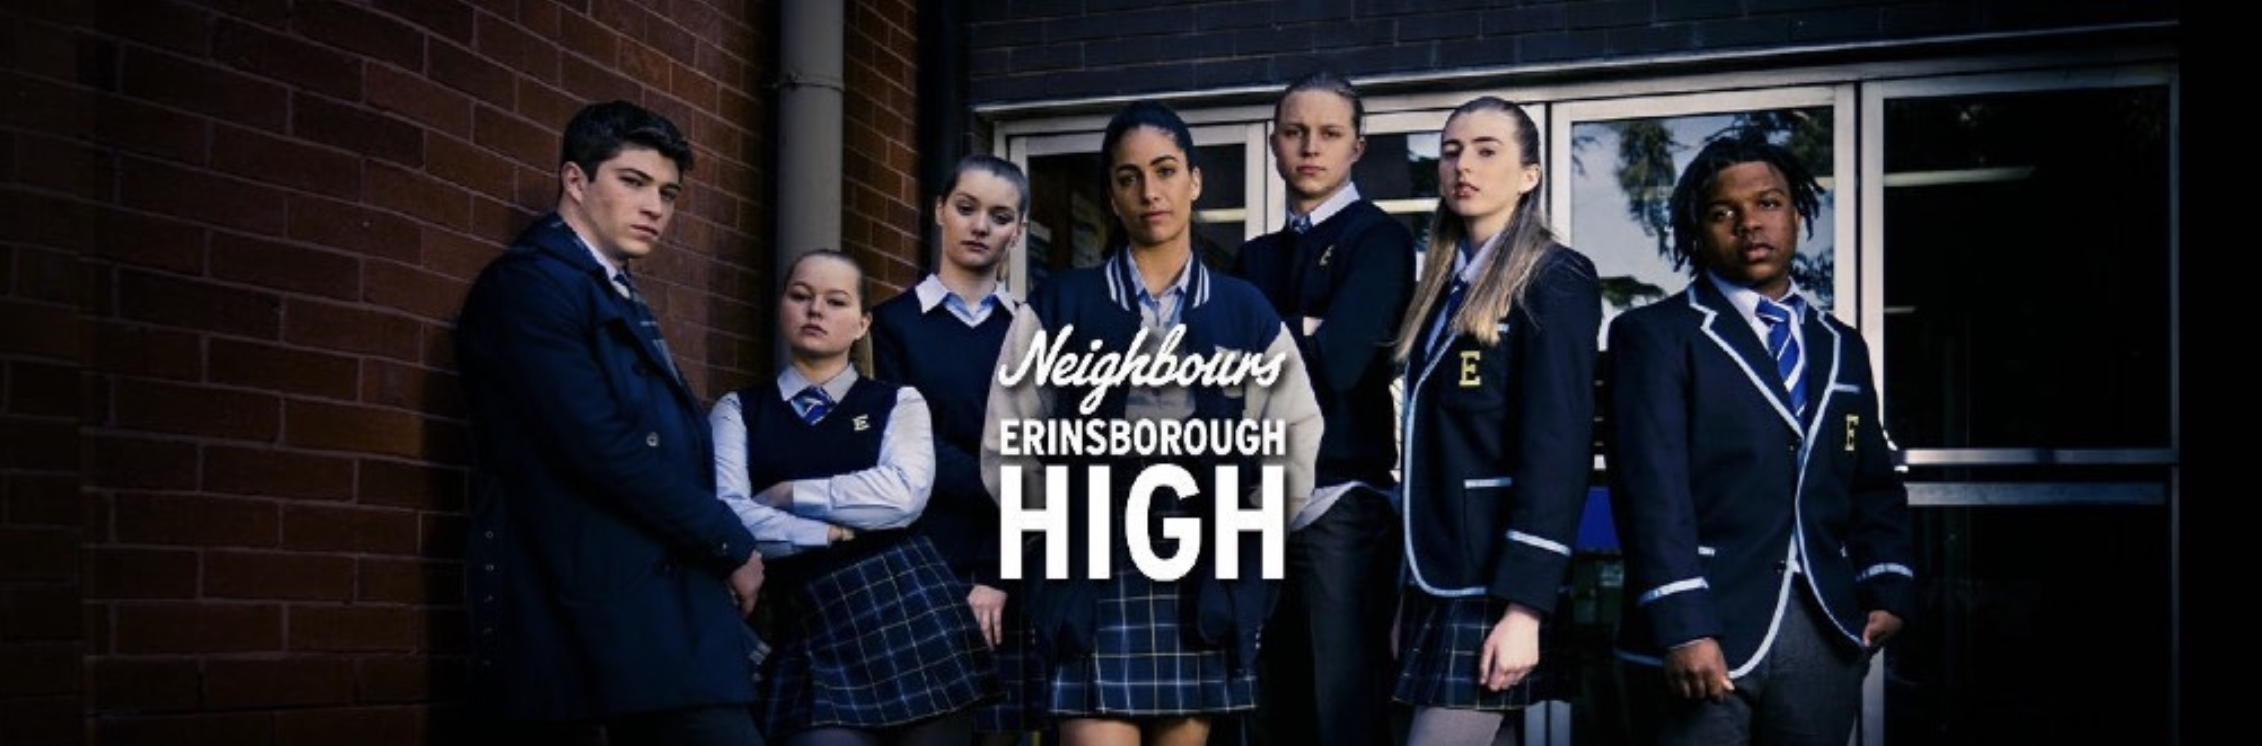
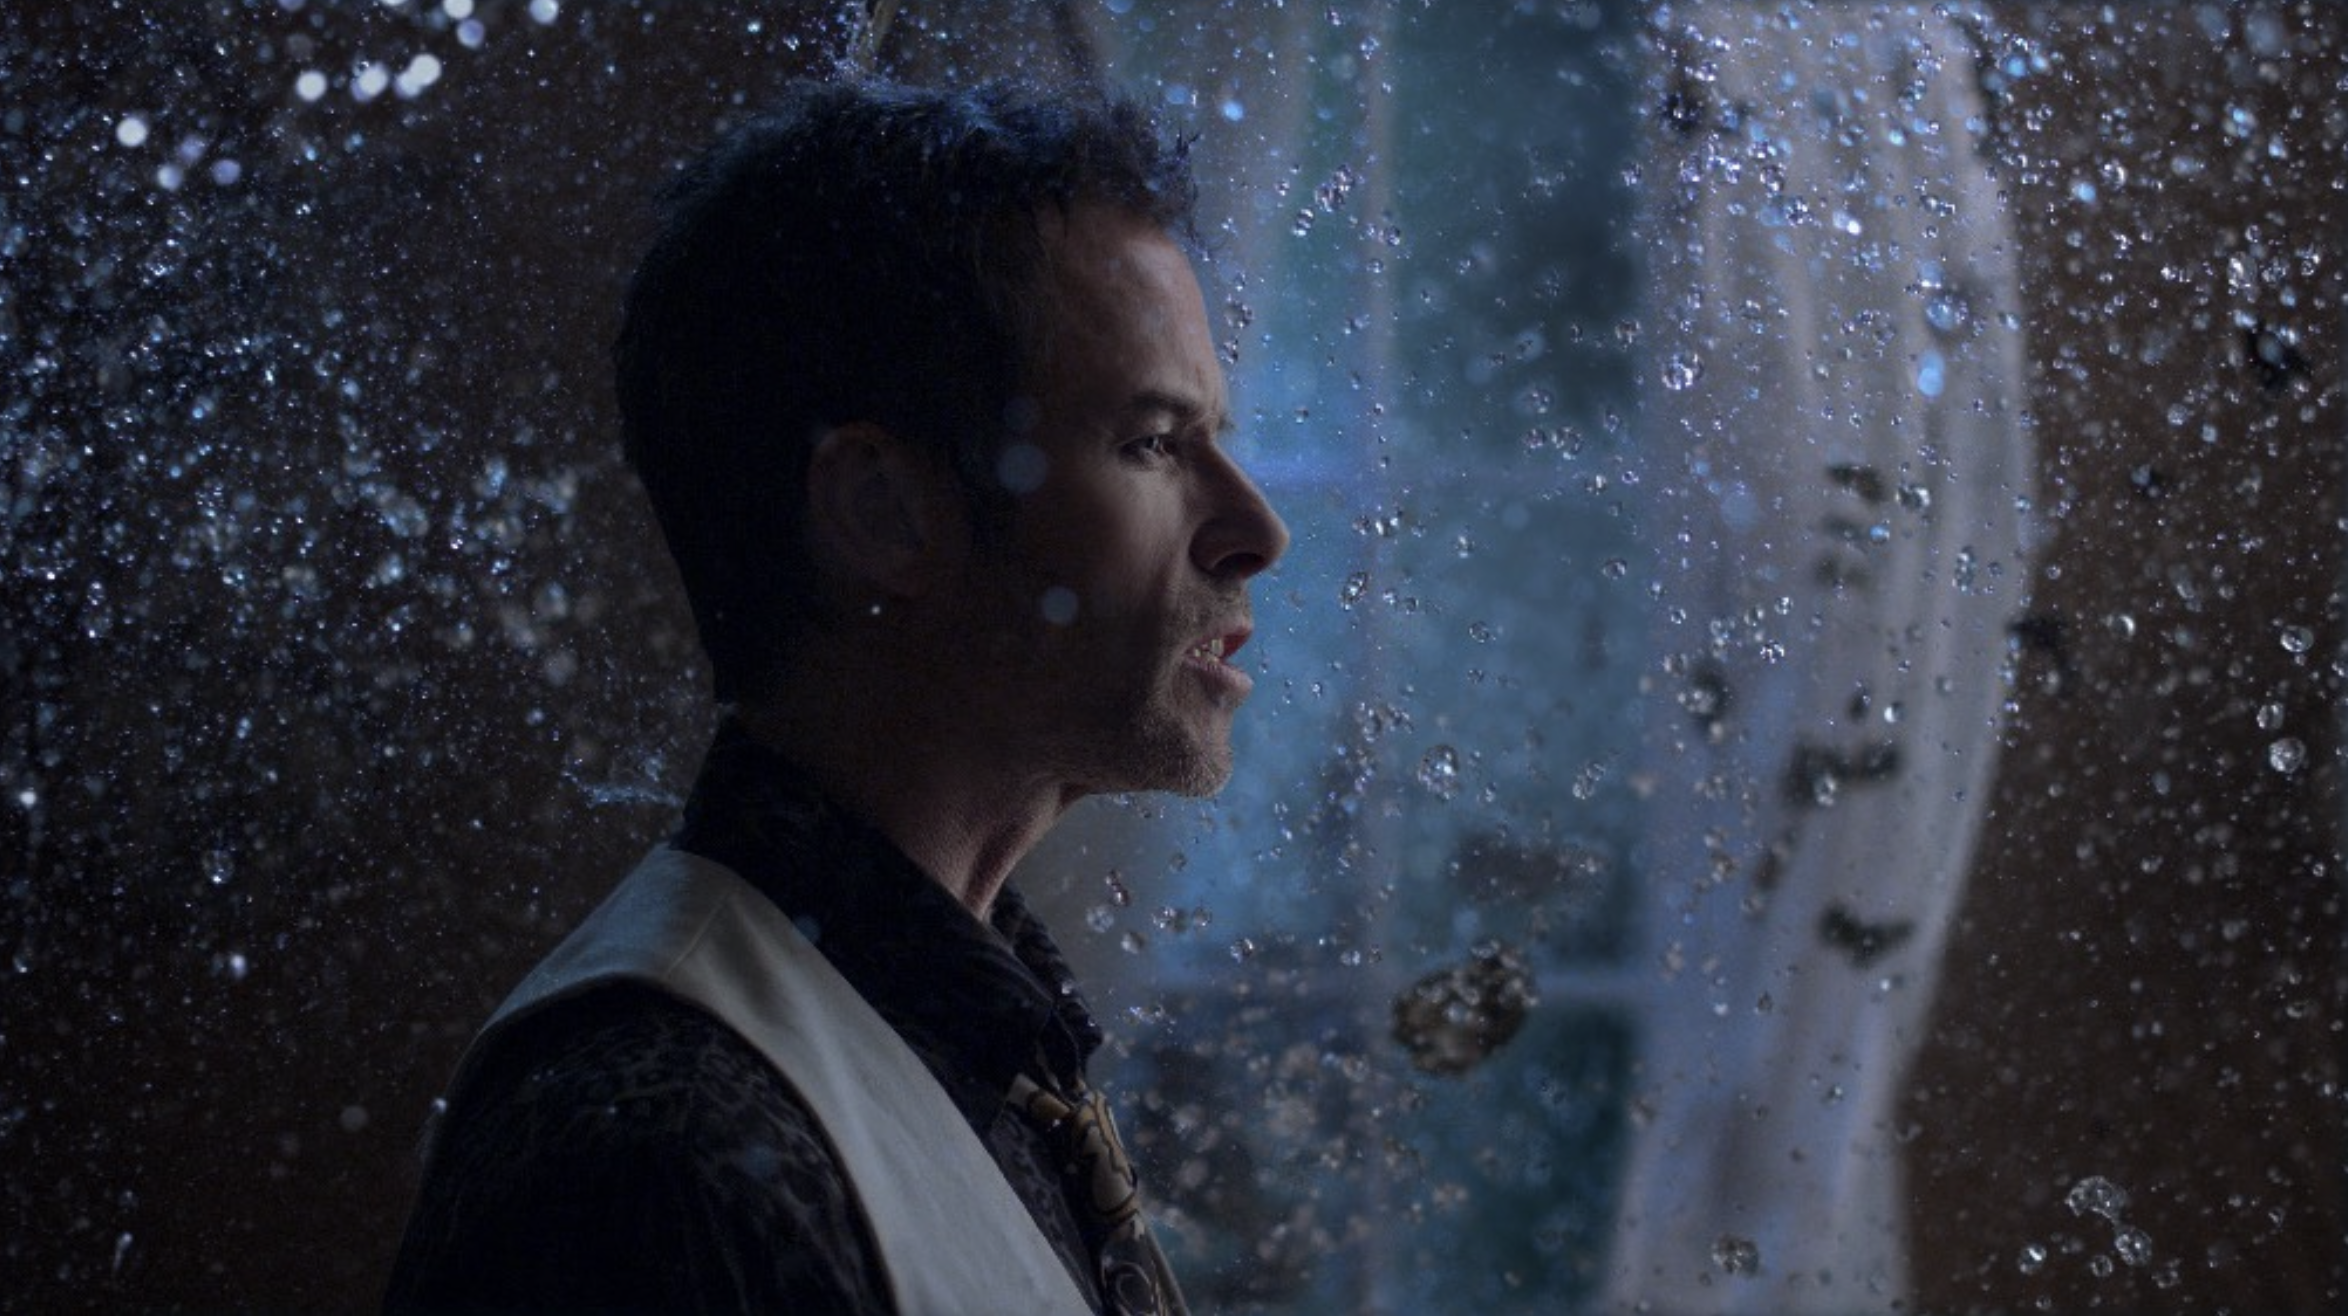
For this year, Fremantle developed a 5-part spin-off series titled “Neighbours: Erinsborough High”, delving deeper into the lives of the teen characters at Erinsborough High with more complex storylines reflective of issues faced by teens universally. Creator Jason Herbison and Series Producer Natalie Lynch stepped away from the traditional look and tone of Neighbours, creating a darker look and broody feel.
The cast is a mix of regulars from the main series and new faces, along with some students and teachers who've previously only appeared on the main show in a guest capacity. The series runs in parallel to the main show, as the disappearance of a Year 12 student during the exam period leads to some surprising revelations from the students.

When we heard that this series was edited and finished in Final Cut Pro by LateNite Films, I decided to sit down with Chris Hocking, one of the founders the company and also the creator of the free and open source automation tool 'CommandPost'. We will talk in detail about how they used Final Cut Pro to not only edit the entire series, but also handle the grade, the sound design, and the final delivery. Enjoy!
Chris Hocking has been working in the entertainment industry professionally since he was fourteen – although he’s been hanging around backstage since as long he could remember. His first proper job was operating animatronics for a BBC kids show, before moving on to lighting design for live productions which has taken him all around Australia as well as Taiwan, South Africa and New Zealand. He was previously the Post Production Supervisor at Melbourne’s award winning editing house The Butchery, and finishing house The Refinery. He’s the founder and General Manager at LateNite Films, and has both producing and editing credits on a wide variety of projects including high profile music videos, television series, documentaries and feature films.
How did you get involved in this project?
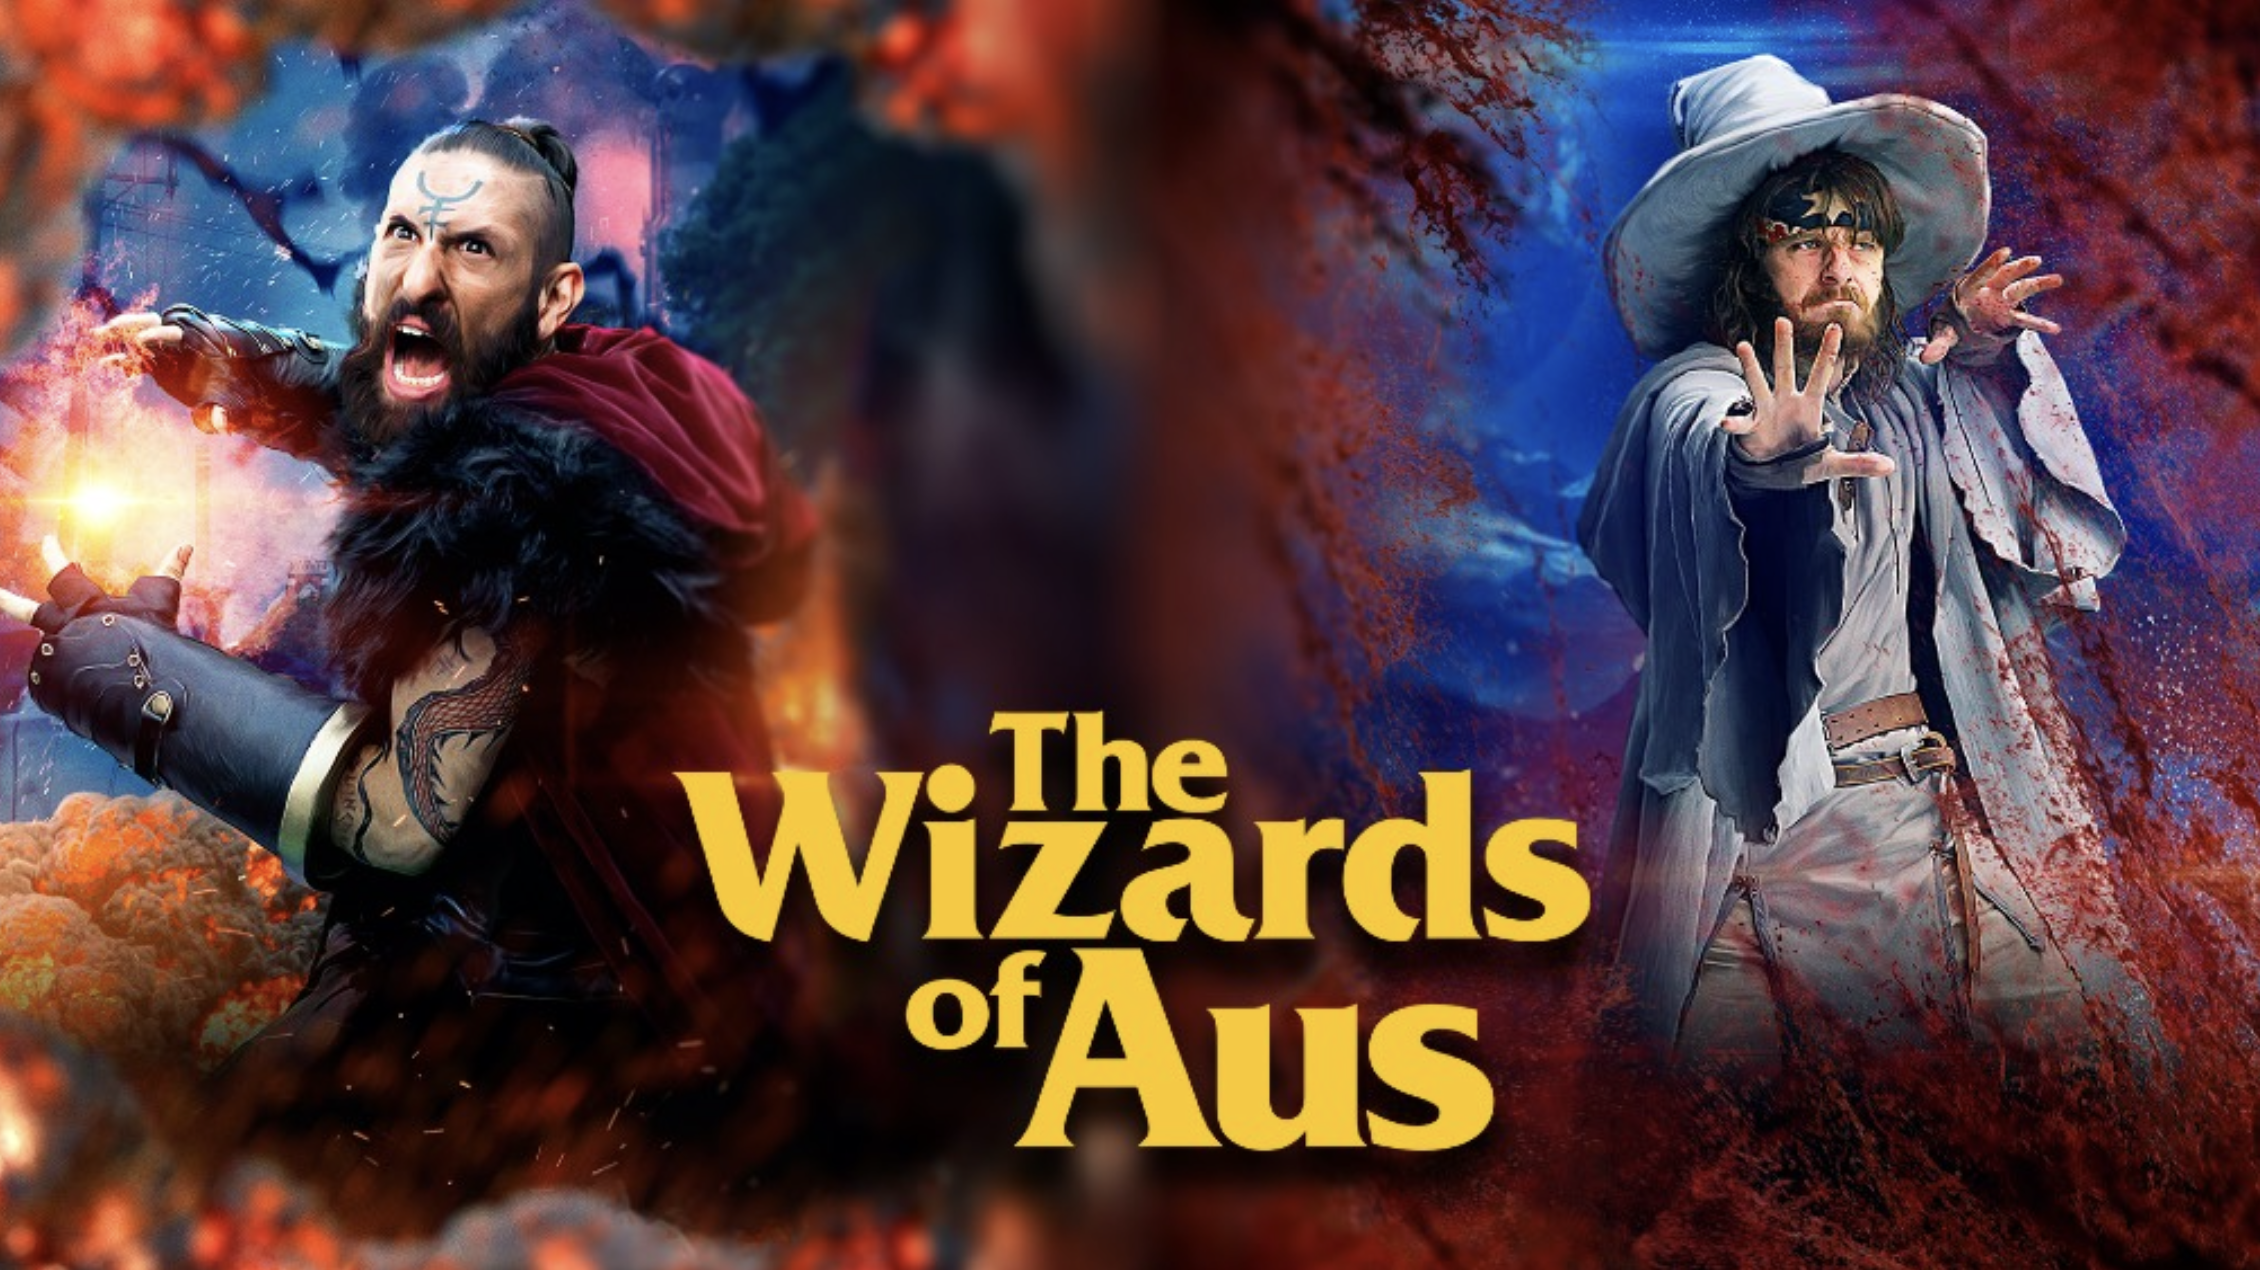
Our company LateNite Films has had close ties with Neighbours for a number of years. My business partner Nicholas Colla is currently directing a block of the main show and his wife (and LateNite writer director/producer) Nicolette Minster wrote Episode 1 of this spin-off series. When Neighbours producers Natalie Lynch & Natalie Mandel were in the planning stages for Erinsborough High, they reached out to us to get a quote for the visual effects and colour grading for the series because they loved our work on The Wizards of Aus - a series we did a few years back that premiered as 3 x 30’ episodes for television and later released as a 6-part web-series on YouTube.
The Neighbours team produces 259 episodes a year for the main show. From story plotting to on-screen It takes six months, and from filming to on-screen it’s 11 weeks. They assemble rushes daily, then have a 2-3 day directors cut, and a 1-2 day producers lock-off for the offline. As you can imagine their post team is pretty much always flat out, so adding an additional 5 half-hour episodes was obviously going to put a lot of additional stress on their already busy department.
The original plan was for the in-house Neighbours post team to handle data wrangling and offline editing using Media Composer at their studios in Nunawading, then we’d tackle grade, sound, online and delivery. As we learned more about the series, we explained the advantages of taking the whole post production process external.
When we first started toying with the idea of taking over the entire post workflow for this series, we knew that the only way we’d agree to do it is if we had the freedom to use Final Cut Pro as our tool of choice - as opposed to Avid Media Composer, which is used on the main show. I’m very used to an Avid workflow and whilst I love certain aspects about it, I feel way more creative when I use Final Cut Pro.
Luckily, the producers gave us a huge amount of freedom and trust to use whatever tools we wanted, and allowed us to design our own workflow. We started chatting with the team in May, by July it was agreed that LateNite would handle the full post production workflow using Final Cut Pro.
To me, “driving” Final Cut Pro feels the same as taking control of an Autodesk Flame or Smoke - you truly feel like an artist and a musician, where the tools can keep up with your mental thought process.
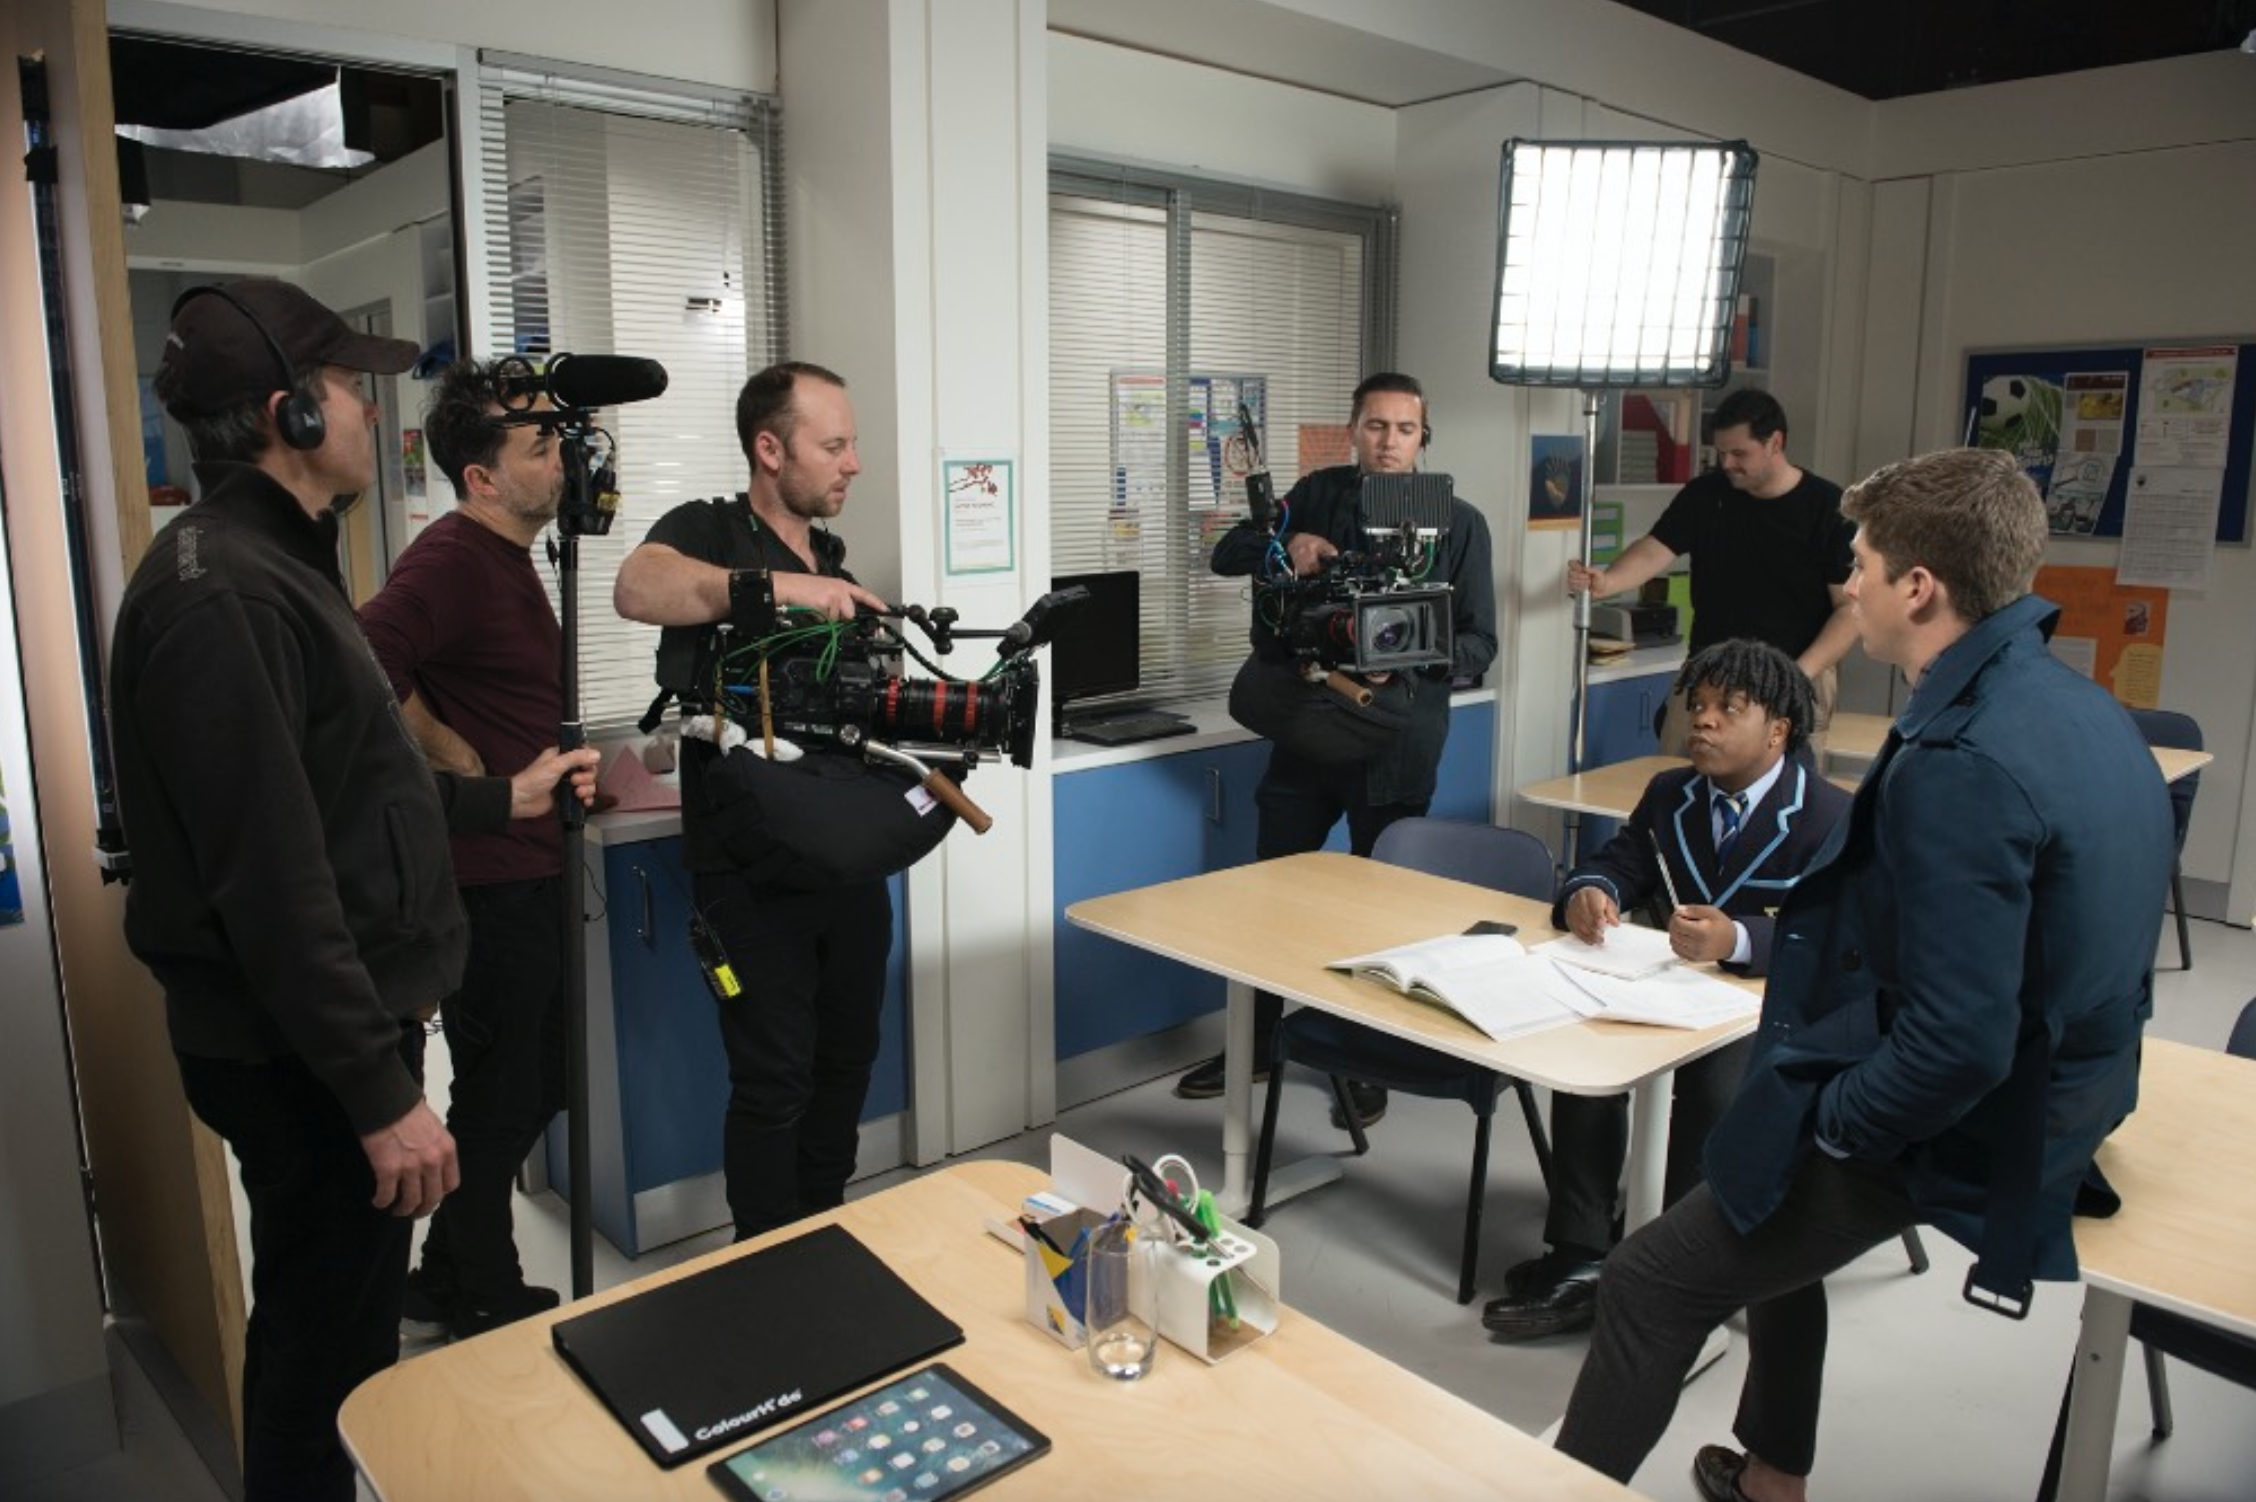
The shoot was 2 days of exteriors with minimal crew, 5 days in the studio, and 1 day of exterior pickups. Everything was on the studio grounds, with the exception of an afternoon shooting at an actual school across the road from the studio.
The show was shot on two Sony FS7s. Majority of the footage was shot to 1920x1080 ProRes @ 25fps, however for the occasional 50fps shot, they switched over to recording to an out-board Odyssey 7Q+, also in ProRes, as the camera can’t capture 50fps in ProRes natively. We’re very much used to shooting 4K or 8K, and it wouldn’t have had any impact on our post workflow, but it was decided to just shoot HD to stay consistent with the main show.

The sound recordist (the legendary John McKerrow) was using a Sound Devices 788T which was timecode synced to both cameras using Tentacle Sync’s. We made sure the sound recordist accurately labelled all tracks, and did circle takes where appropriate. We’d use a EPISODE-SCENE SHOT-TAKE filename, which we’d later use in FCP to label our rushes.
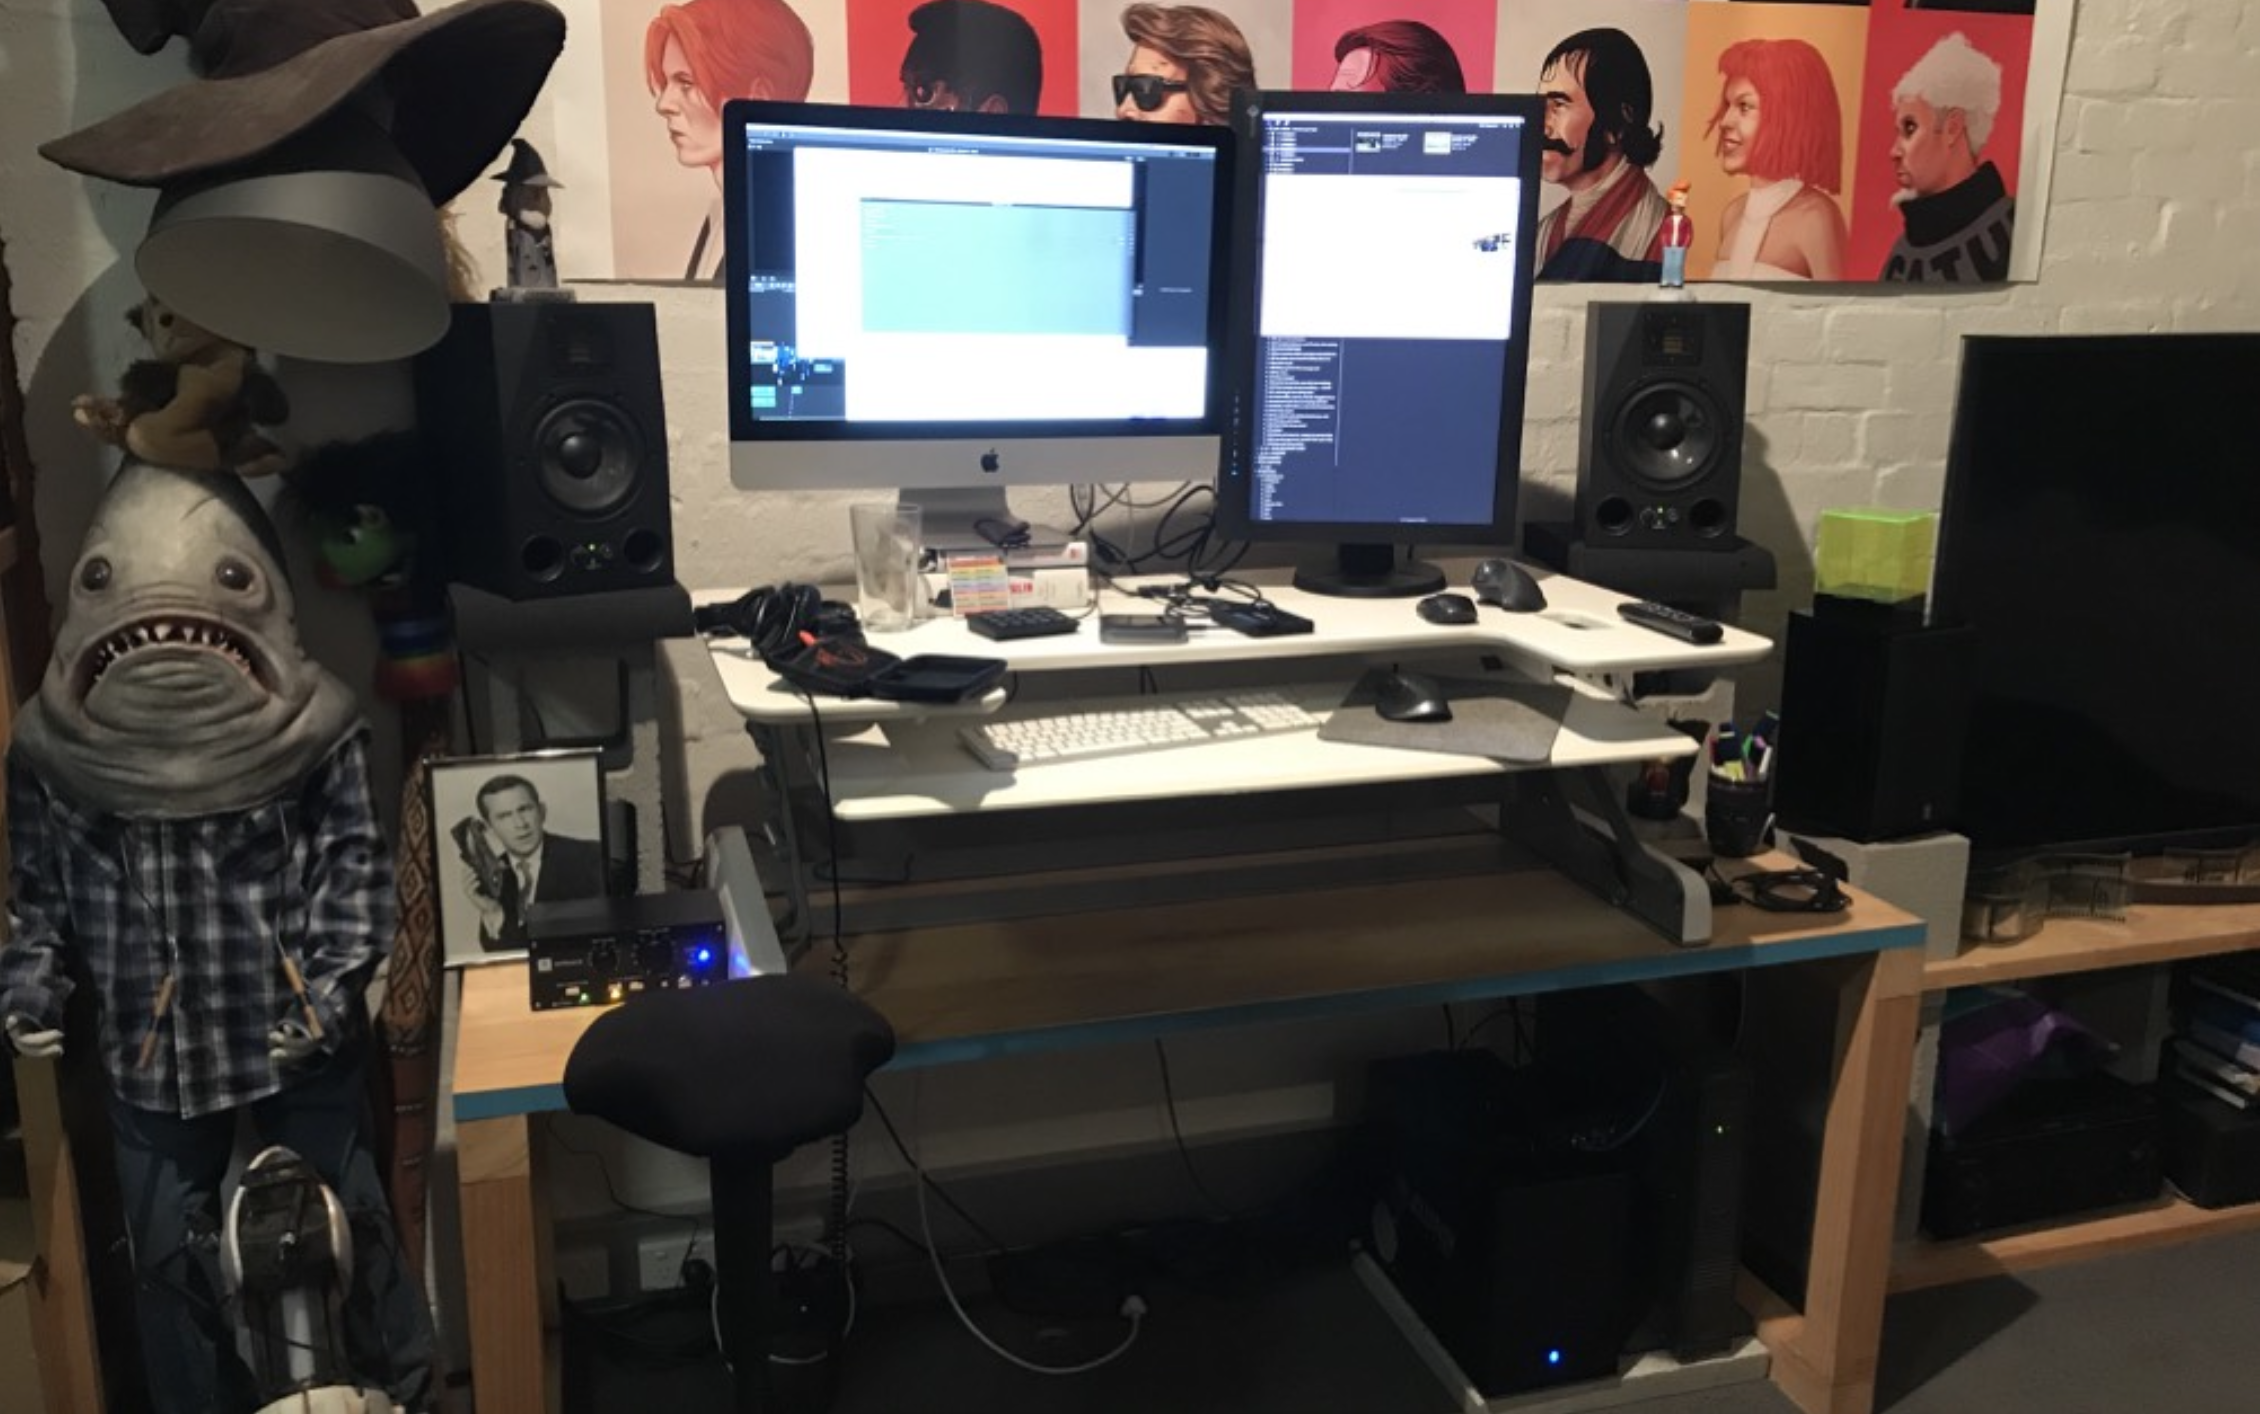
Our in-house LateNite colourist and editing guru, Kevin Luk was on-set with me for the shoot, and we were setup in one of the spare production offices. I originally was going to setup a standing desk on one of our Magliner trolleys - but I ended up loaning that to the production team to make transporting gear around the studio easier, so I improvised.
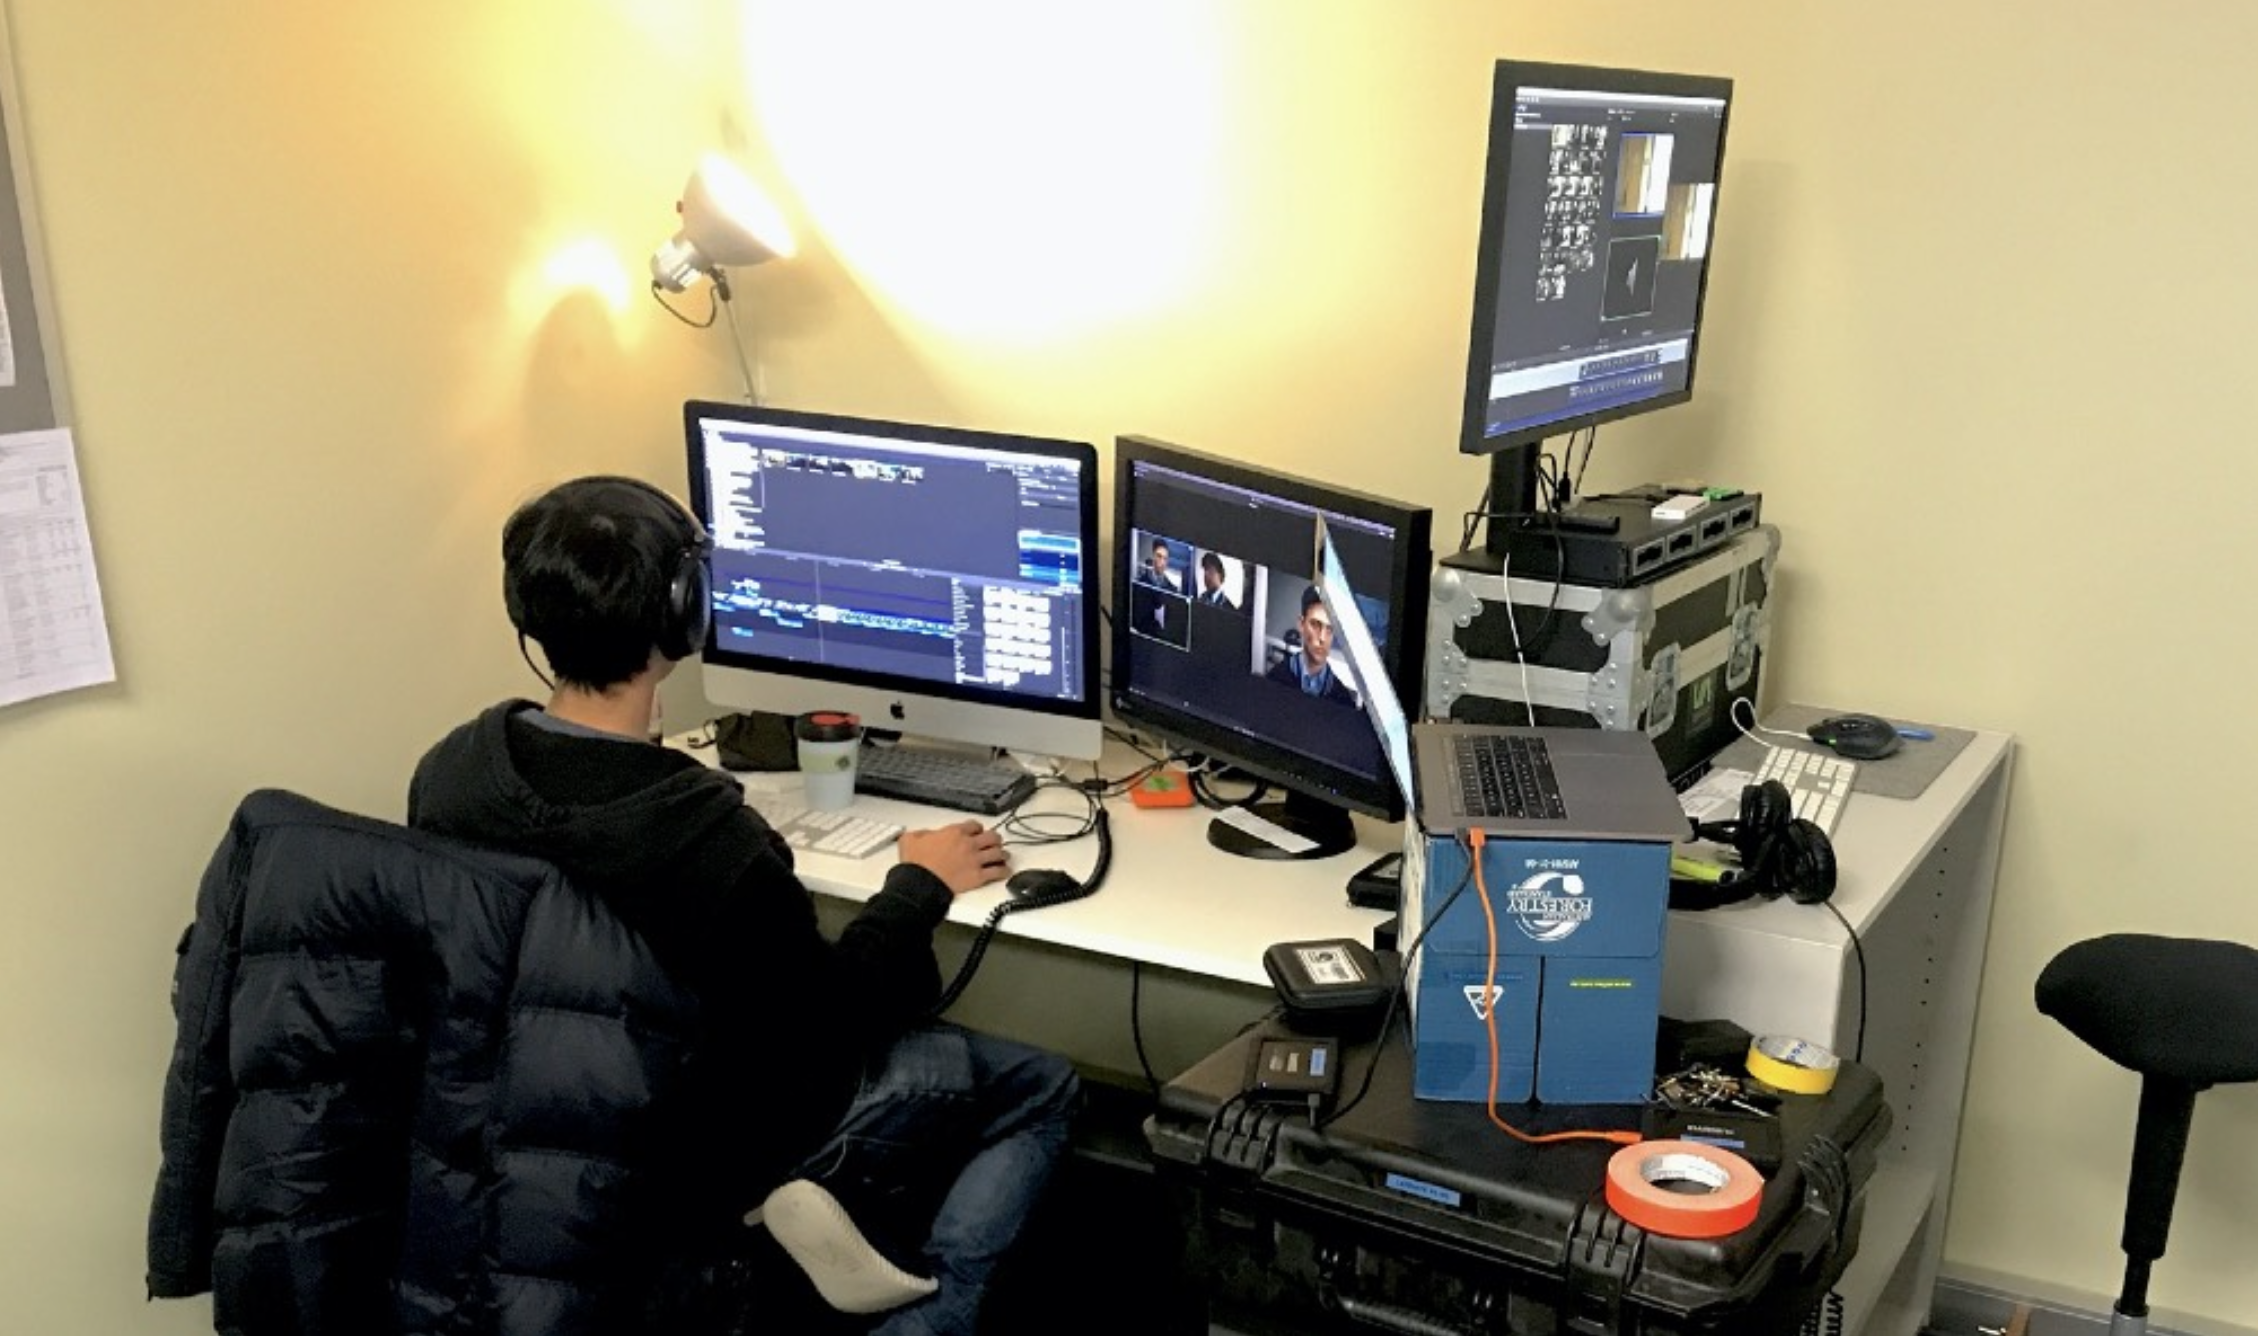
Kevin was working off a 5K iMac, and I was working off my MacBook Pro connected to an 5K LG. Our main storage was an OWC Jellyfish Mobile connected via 10GbE to both Mac’s. The Jellyfish was literally just sitting behind our iMac. The fact that it’s very powerful yet so quiet and easy to transport (thanks to its top handle), makes it an ideal on-set shared storage system.
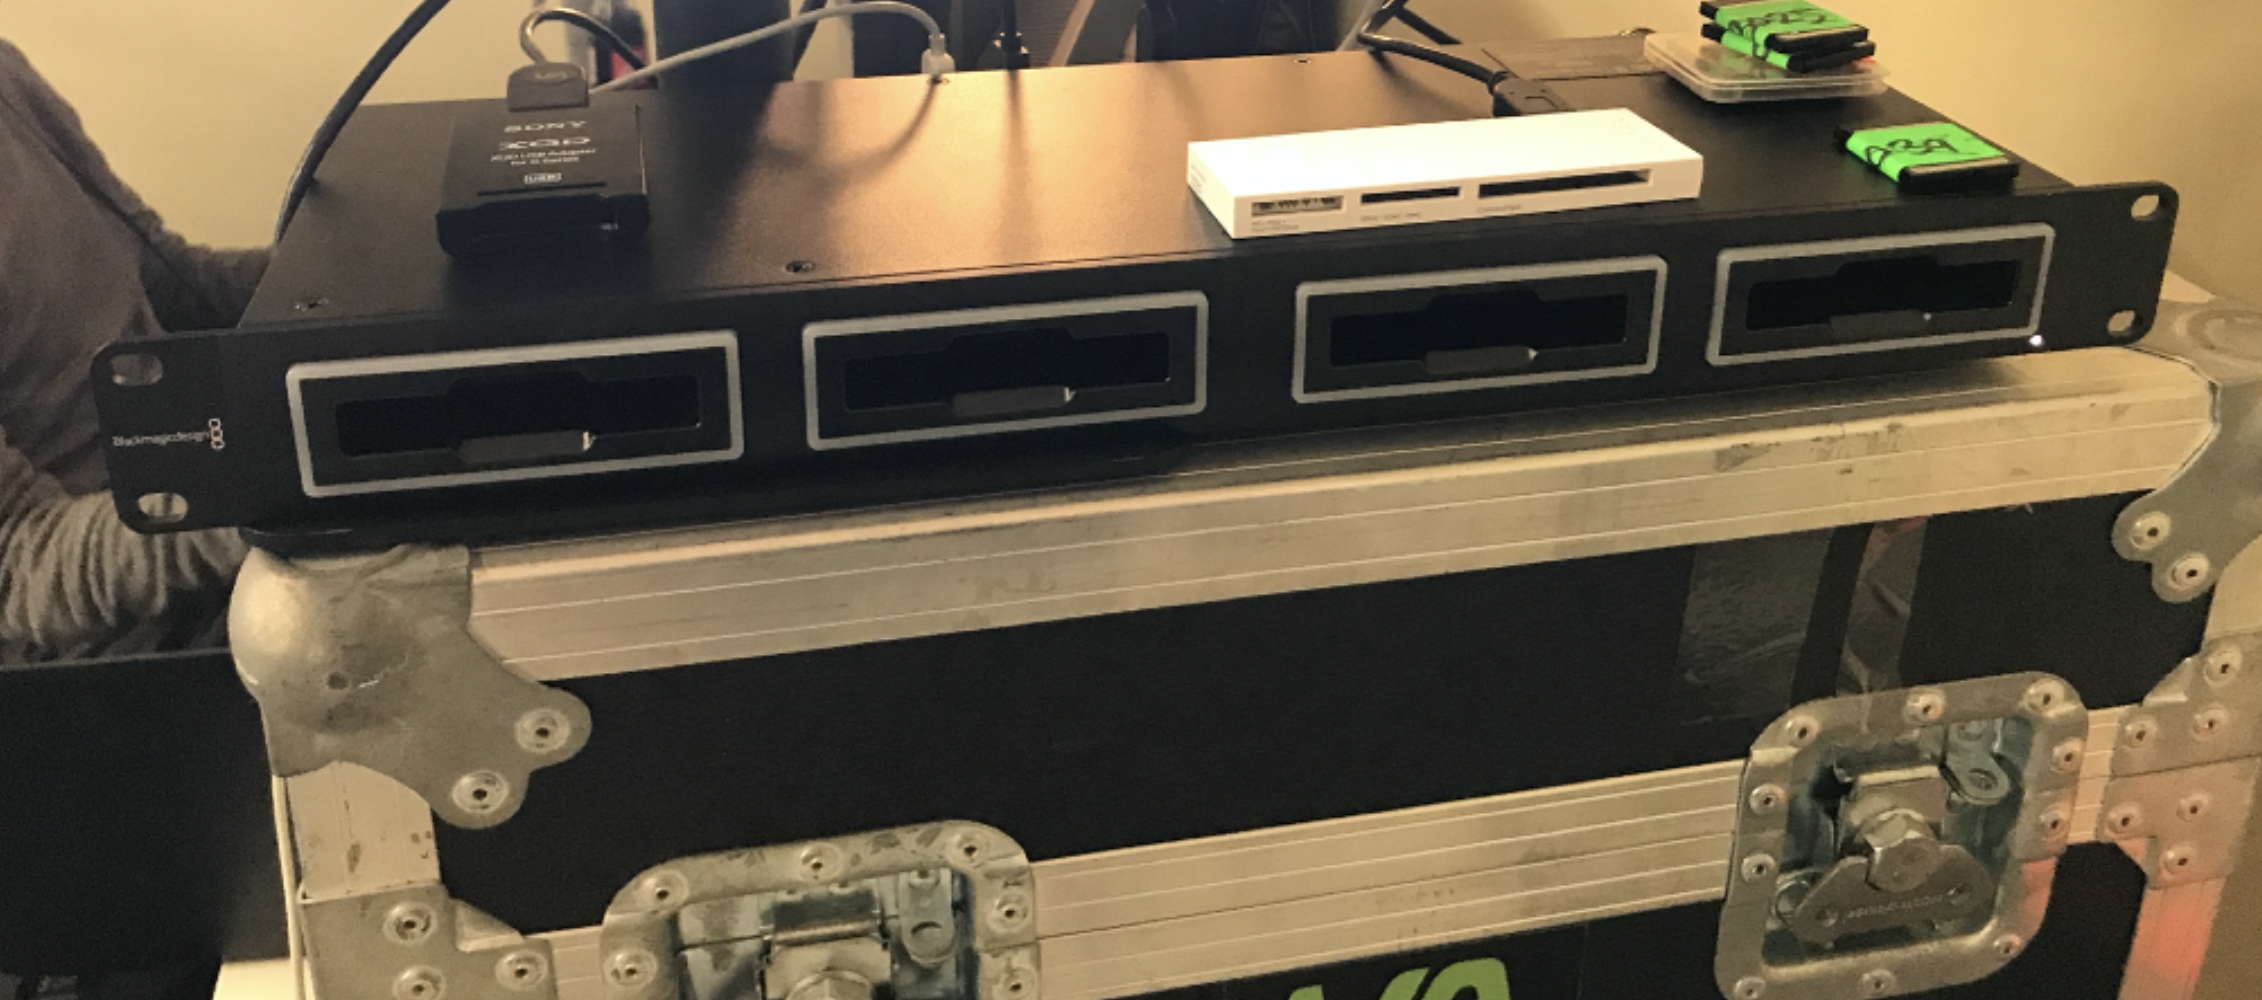
We tried to do as many regular card dumps as we could - generally around 6 a day. Because we were all in the same location, I would get a text message from the Script Supervisor when they were close to wrapping a scene, and I would walk up ready to collect the two camera cards, and a sound card. I’d then take it back to our little lair, and use Hedge to backup the cards to two 4TB SSDs and to the Jellyfish.
We used a Blackmagic MultiDock 10G via USB-C for dumping the Odyssey SSDs, and a USB3 reader for dumping the XQD cards. The Sound Devices cards came to us as CF cards.
If you haven’t already read Bradley’s amazing article comparing all the popular offload software solutions - I highly recommend it. Bradley is an extremely knowledgeable camera assistant and DIT who has worked with us on numerous jobs. Whilst he wholeheartedly recommends Silverstack, I got to spend a bit of time with the Hedge team at NAB earlier in the year, and I’m happy with my decision to continue to use it as my preferred off-load tool. It’s fast, simple, rock-solid and has a beautiful modern UI.
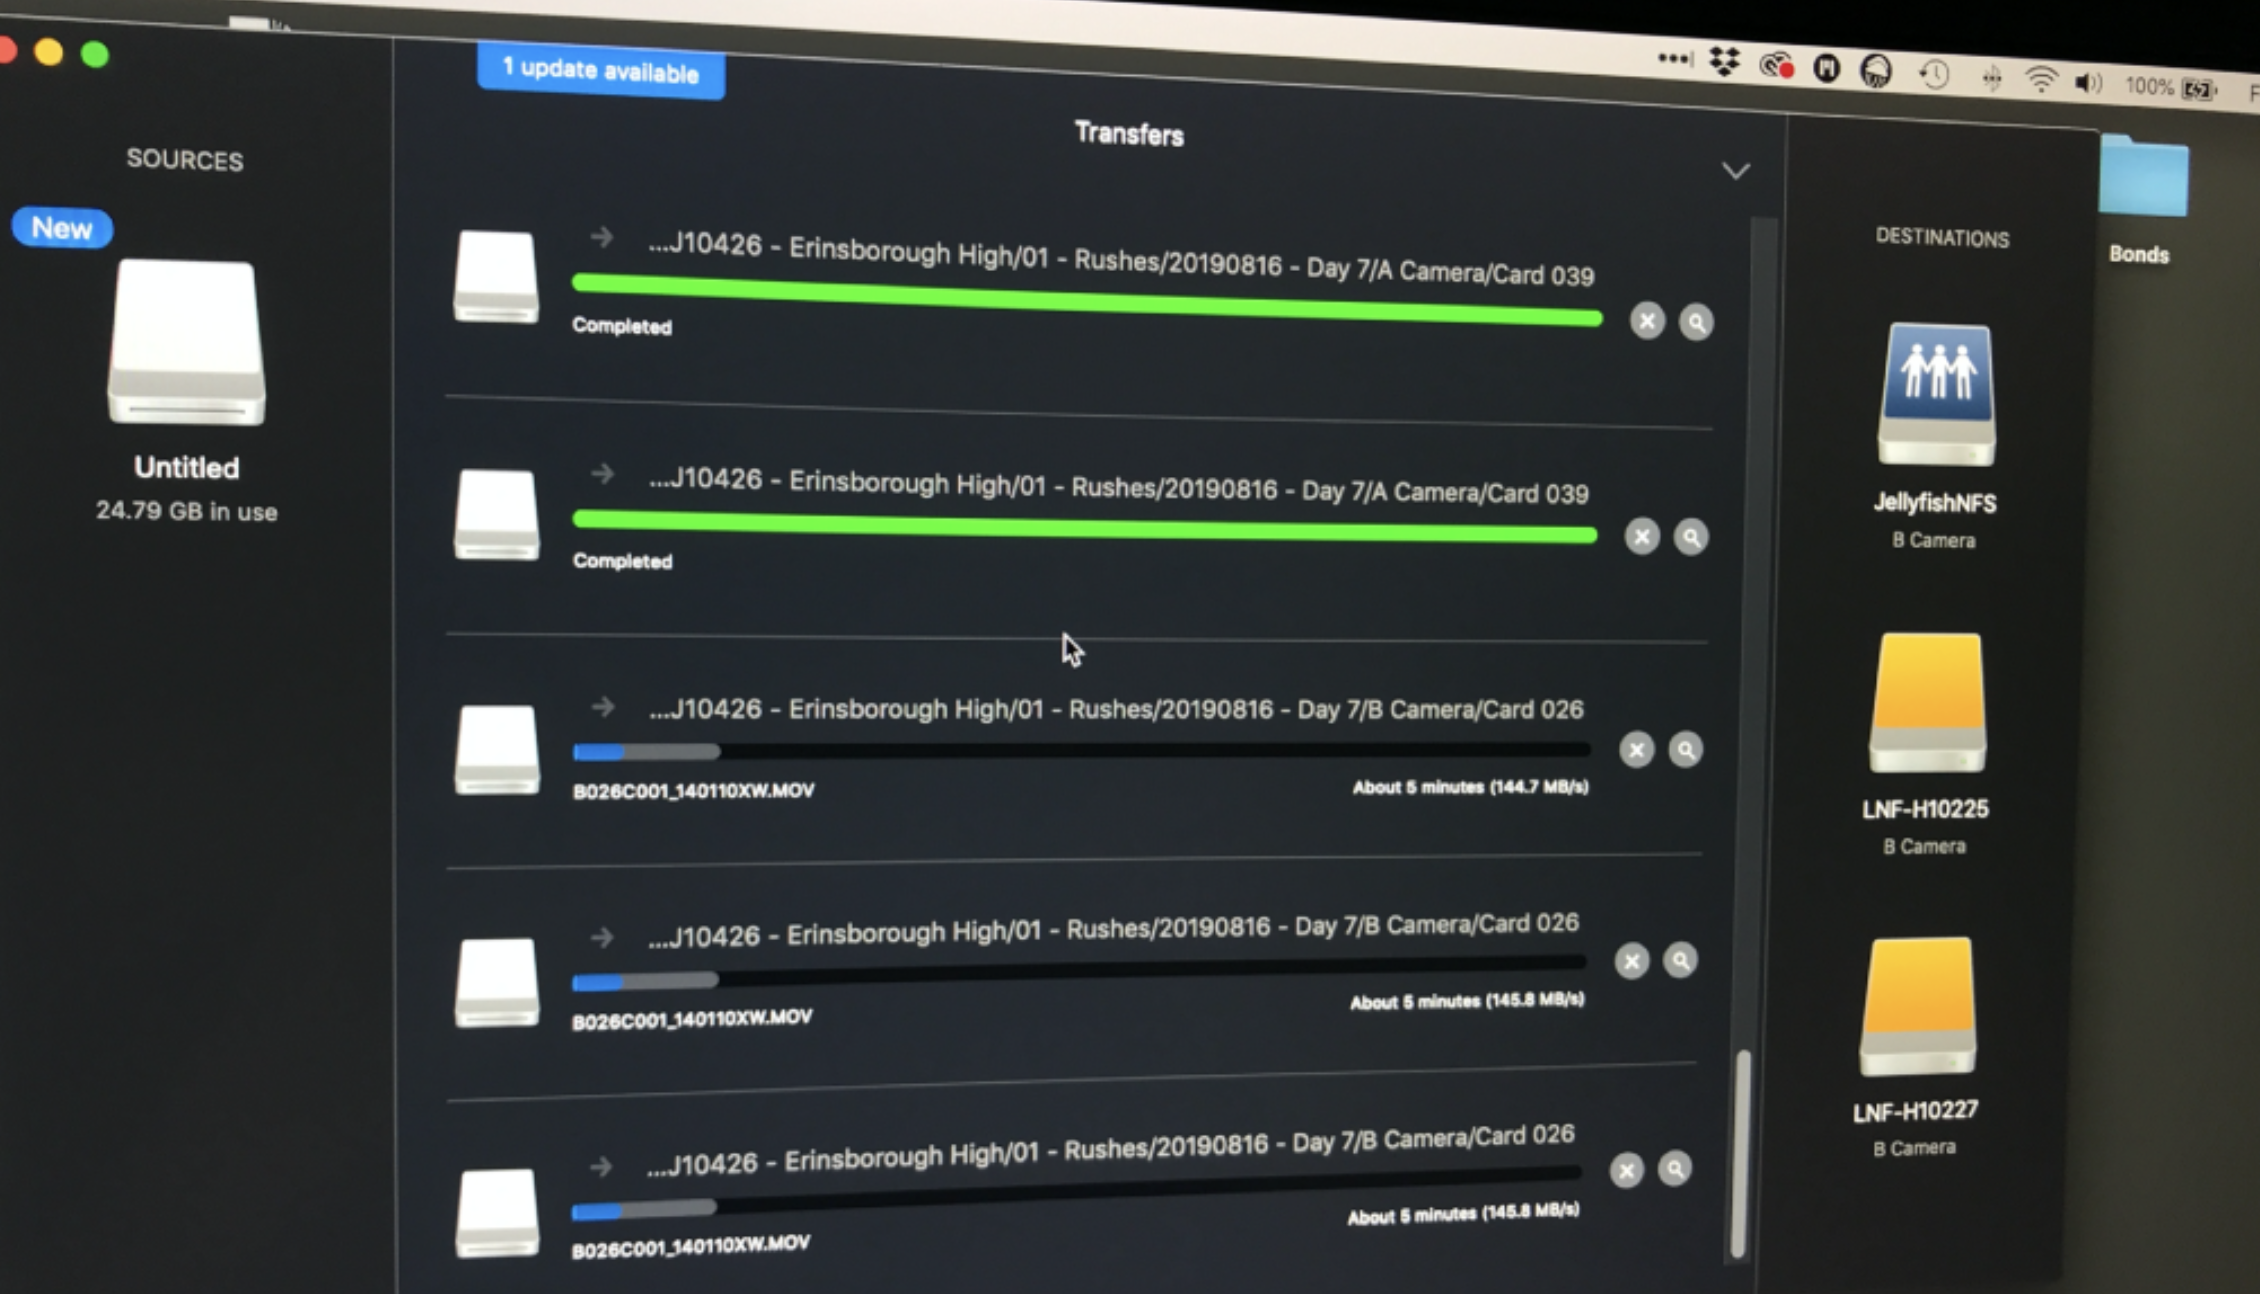
The Jellyfish was our “master” drive, and the two 4TB SDDs were our backups. Each night both Kevin and myself would take a drive home for safety, and I would backup my drive to another hard drive overnight.
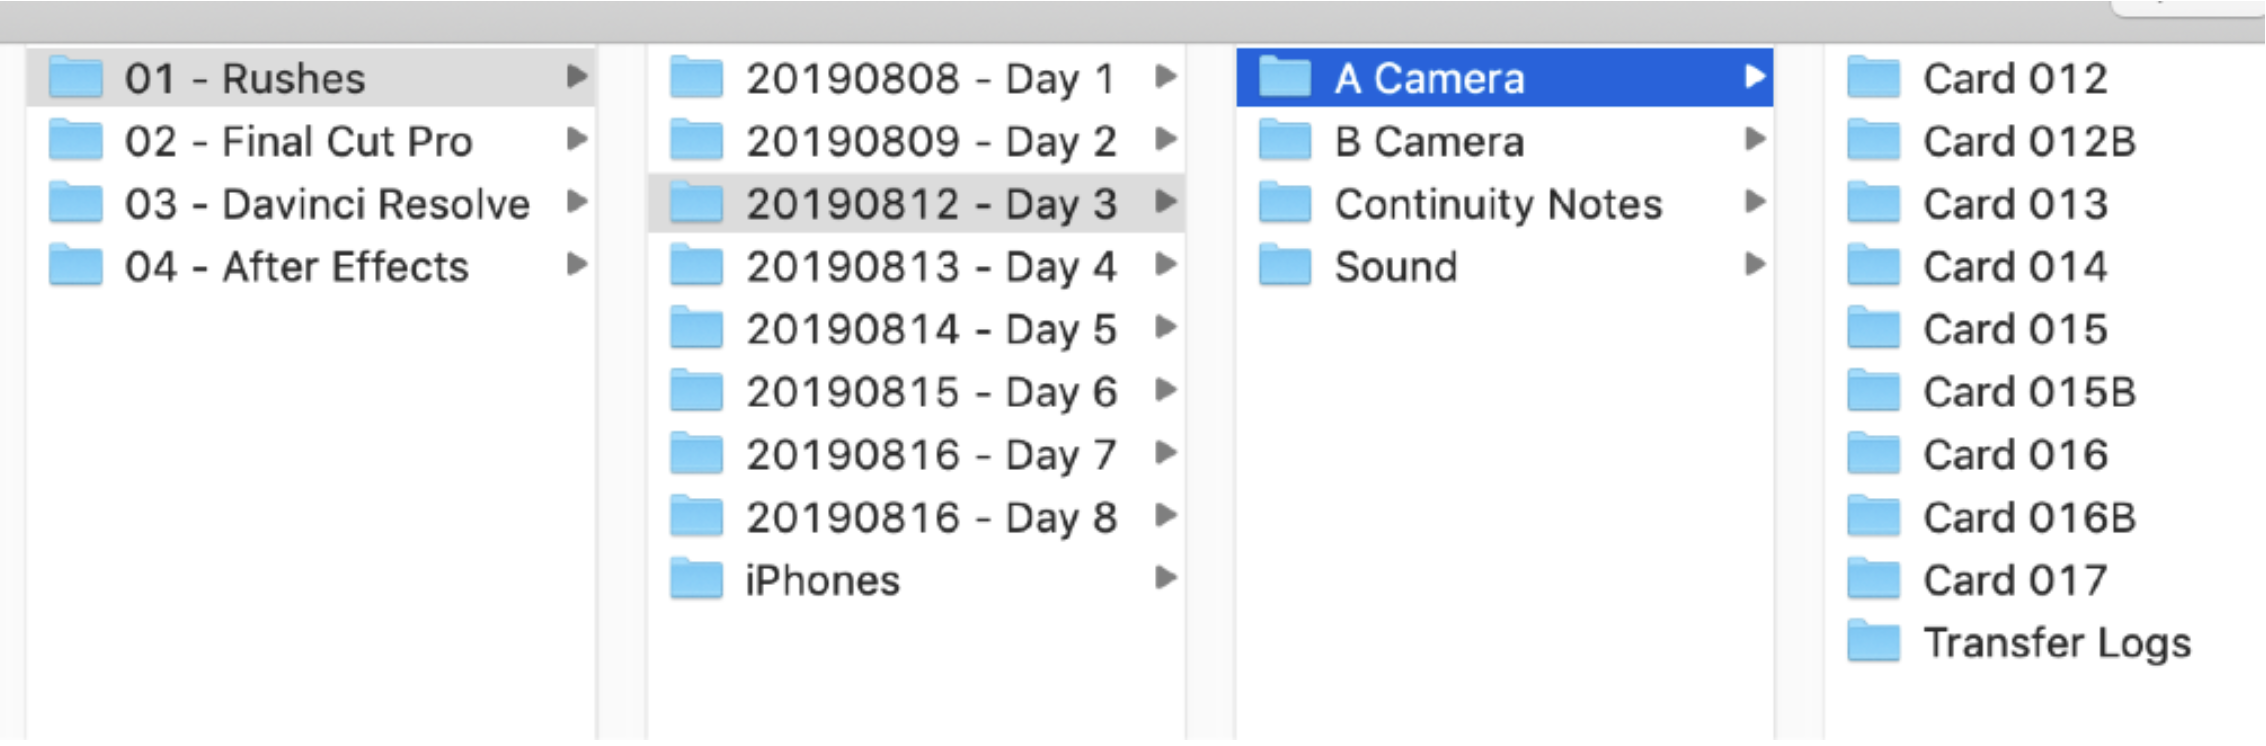
We used the same folder structure as we use for all jobs. We have a folder for rushes, and then have sub- folders for each application. We don’t use a template or Post Haste, as I don’t like having a bunch of empty folders making things messy. Instead we just have a standard procedure that all our staff follow, so everything’s consistent.
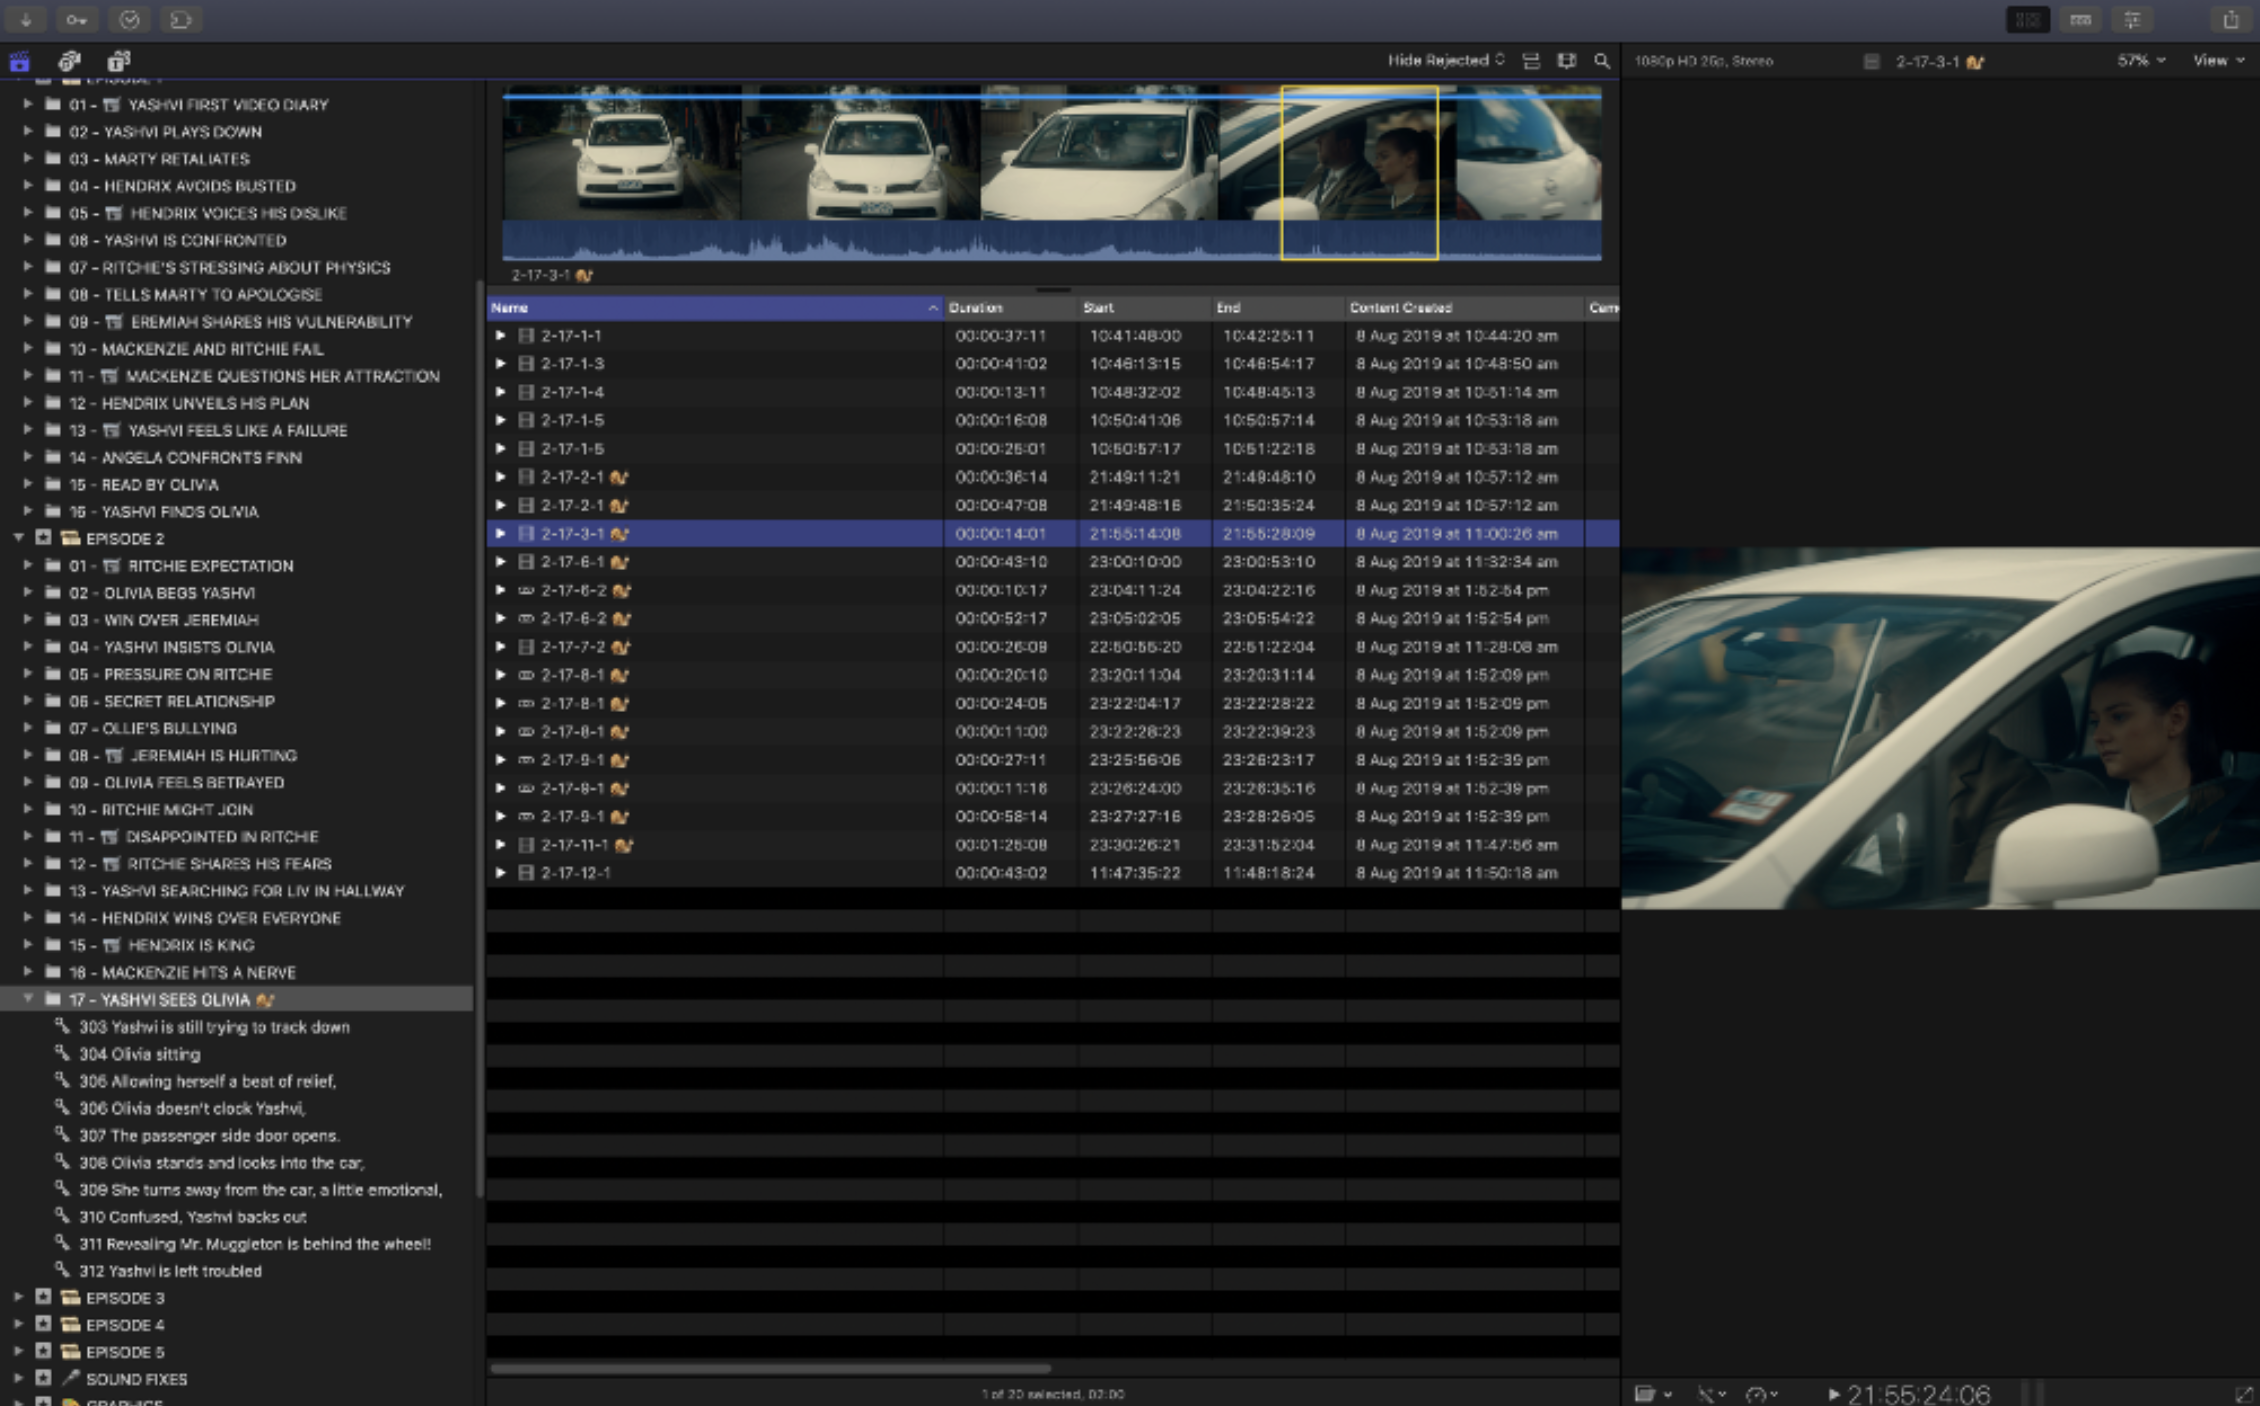
As you can see in the screenshot below, we group everything by shoot day (in the year, month, day format so it’s listed alphabetically), then a sub-folder for individual cameras, sound and continuity notes, and then separated by card. We were sometimes shooting 50fps on the Odyssey 7Q+, so the “B” cards listed below are from those.
Once we had copied the rushes to three drives, we then used good old drag and drop to bring the media into FCP. We would create a new temporary library for each card dump, where we’d bring in the media, give the two cameras an angle label, then use Sync-N-Link to sync them up, using the filename from the audio files.
For the few Odyssey 50fps clips that spanned multiple files, we decided to just manually combine them within a synchronized clip in FCP. We also manually synced the slowed-down audio using a clapperboard, so we had that as a reference.
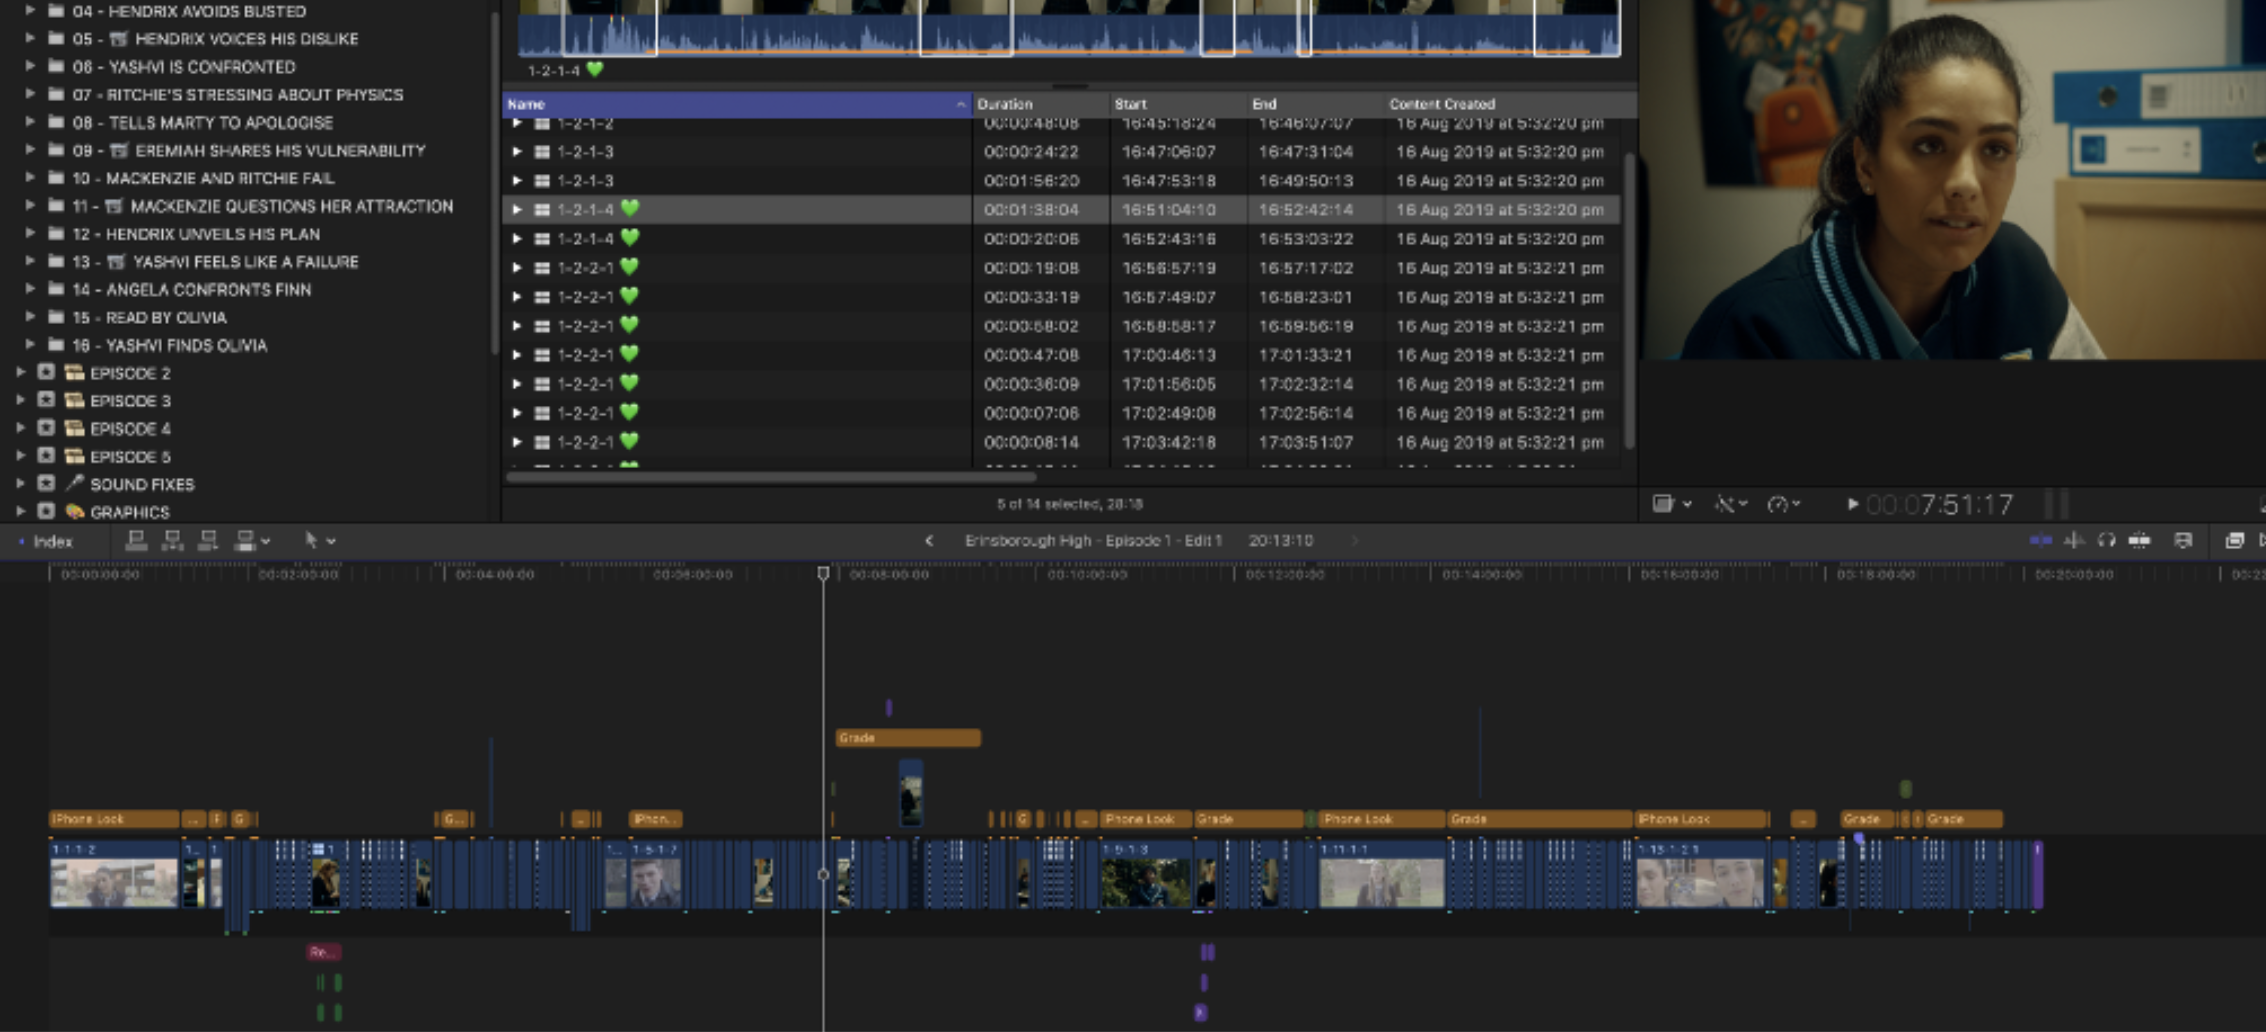
We’d then go through and keyword everything into ScriptSync-style keywords for easy access. Kevin built these keywords based off the script prior to the shoot, and we modified them as needed.
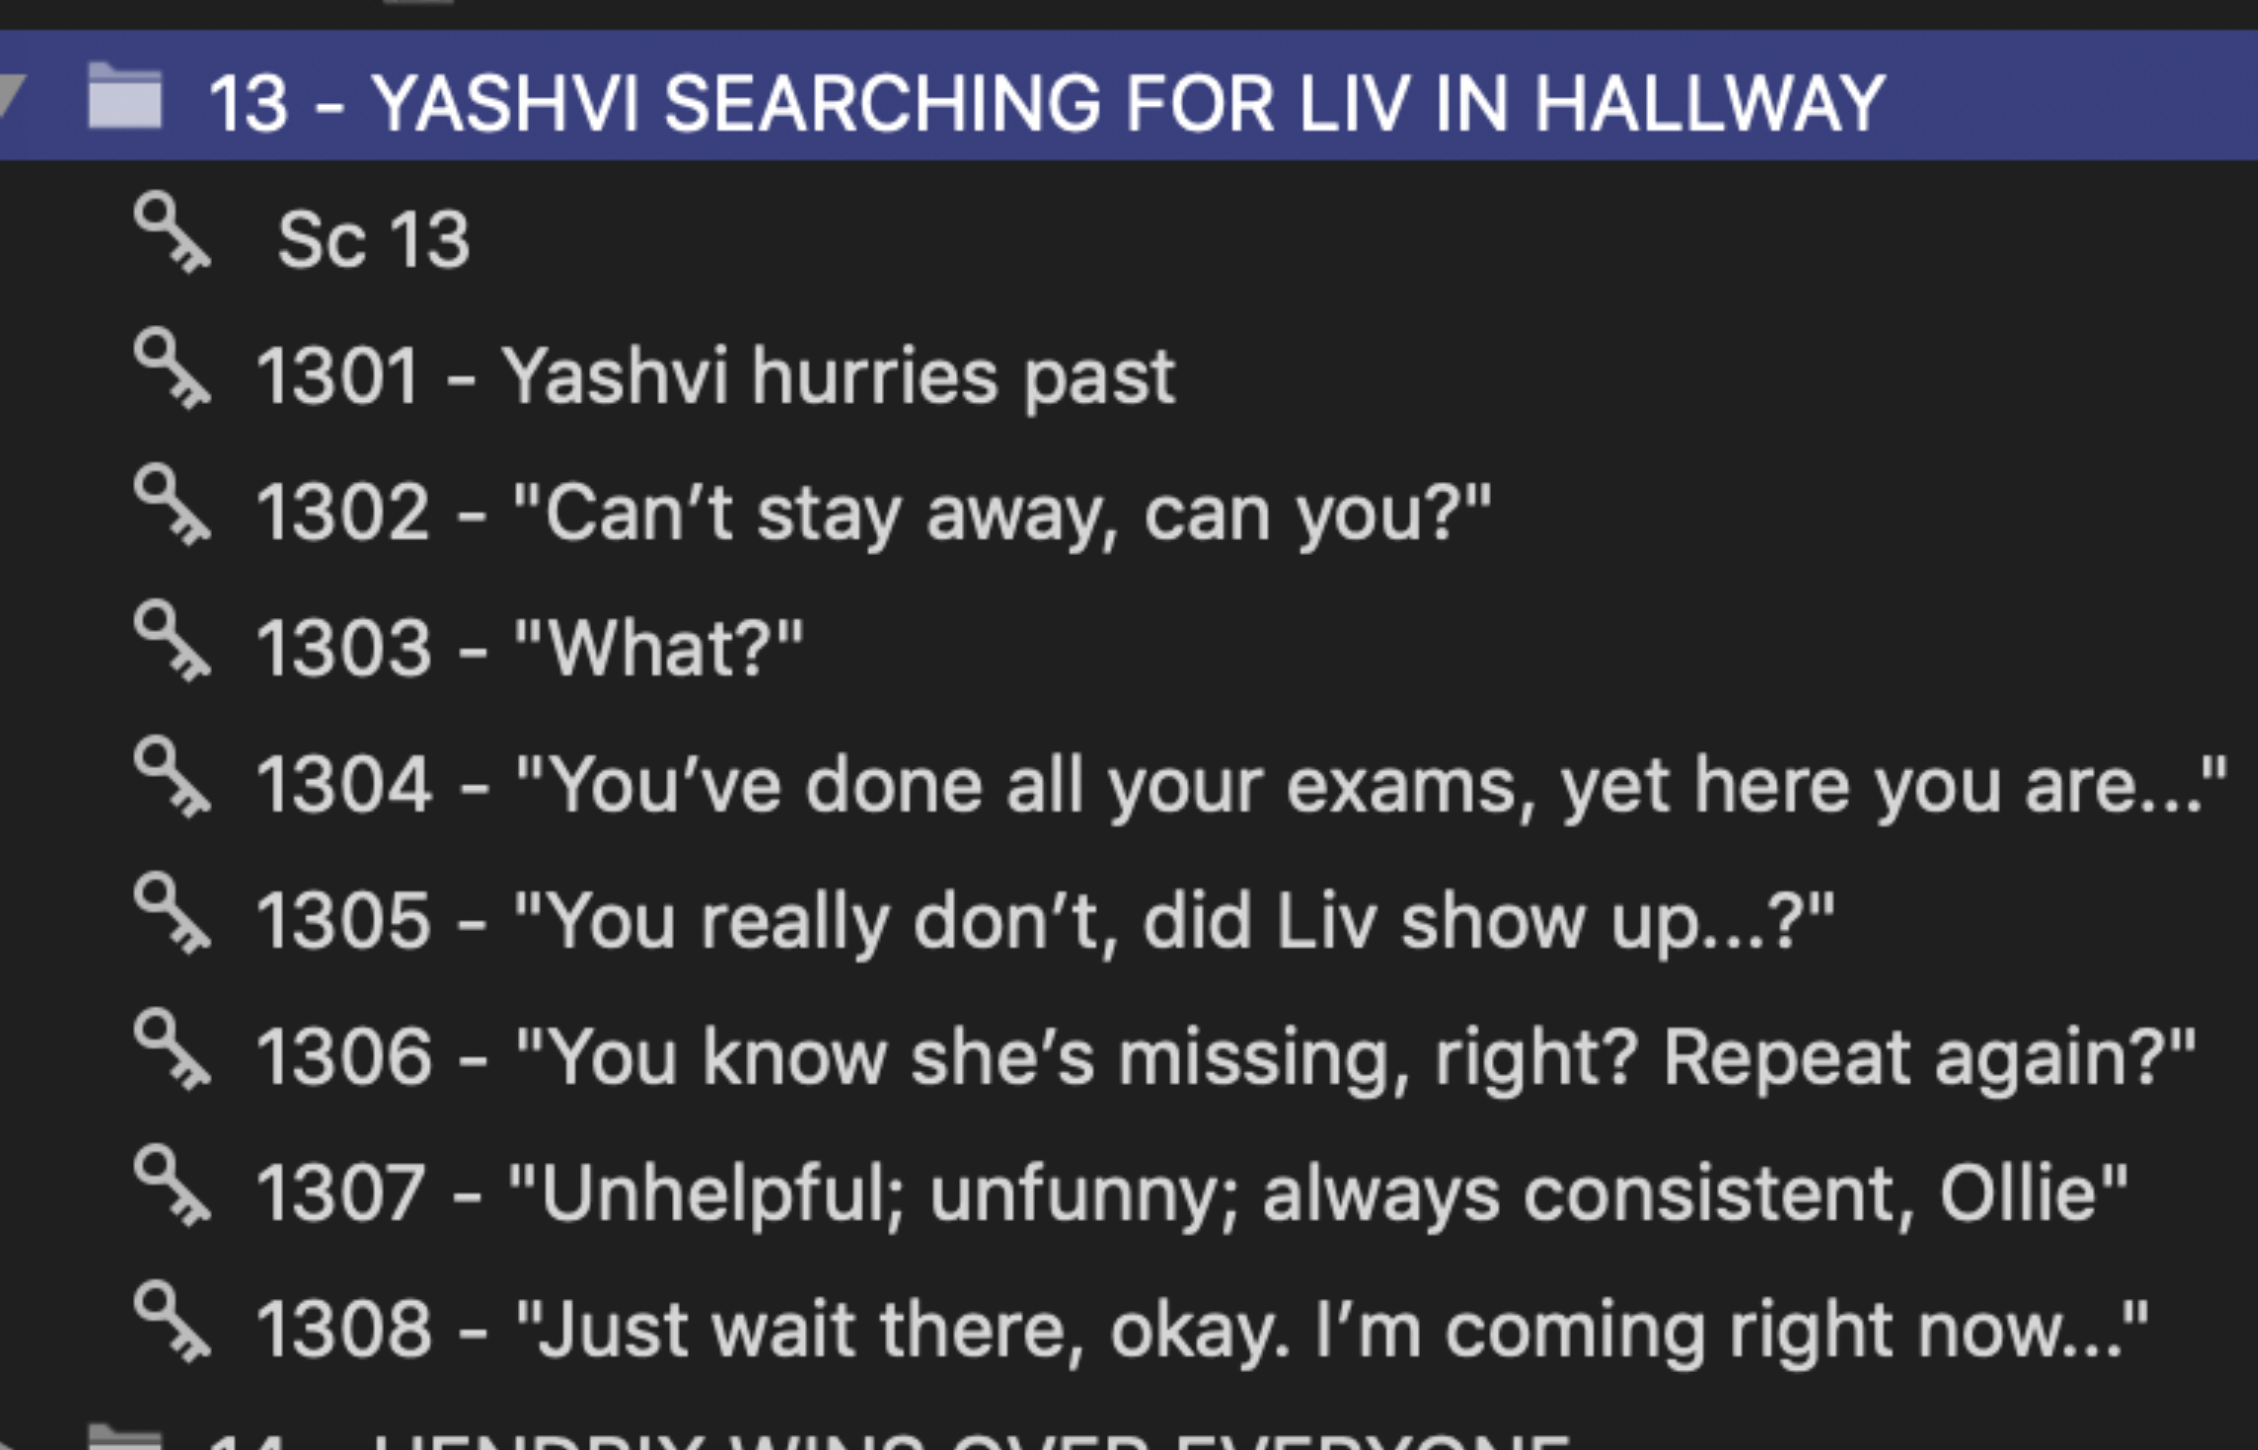
Once in keyword collections, we reject any unusable bits of footage, and favourite anything that stands out. The great thing about the Sound Devices 788T is that you can set it up to prefix filenames with an @ symbol if they’re “circled takes”. We’d then manually rename these clips after they’ve been synced to use an emoji for an easy visual cue:
Once a card dump was synced, keywords applied, clips rejected and favourited, we’d then merge these events into our master library on the Jellyfish and delete the temporary library. In terms of splitting the workload between Kevin & myself, generally I would do all the data wrangling and syncing, then either Kevin or myself would do the keywords and rejection/favourites.
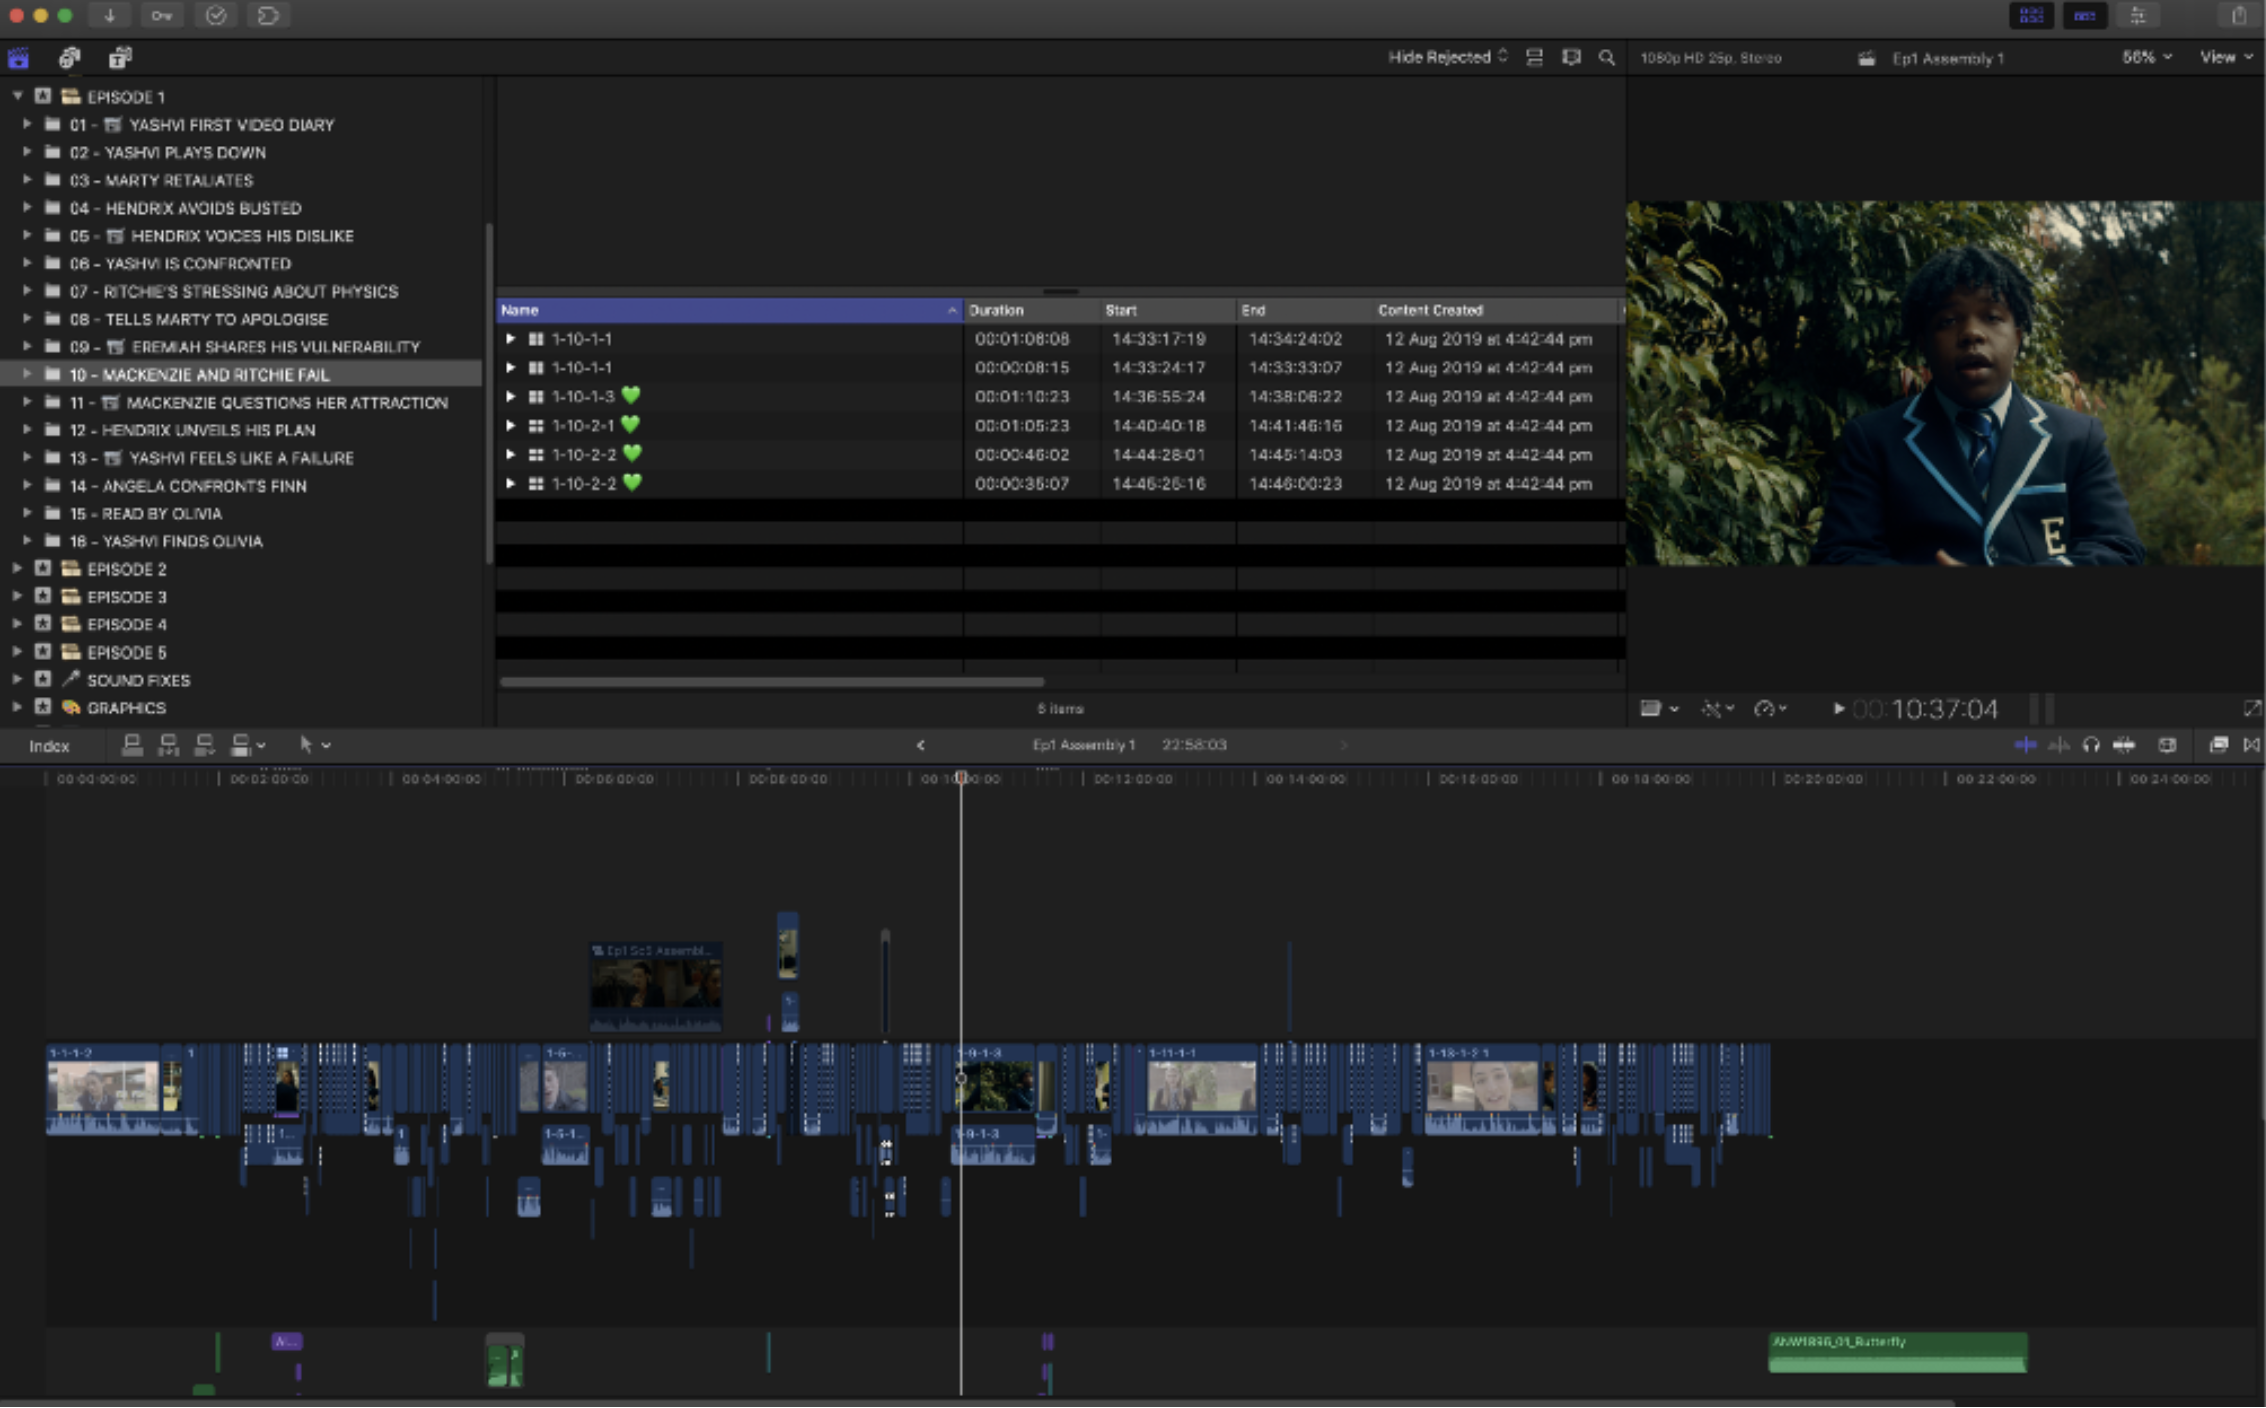
When a card dump was all organised and in the master library, Kevin would start putting together an assembly edit, with generator placeholders for missing scenes based on the script.
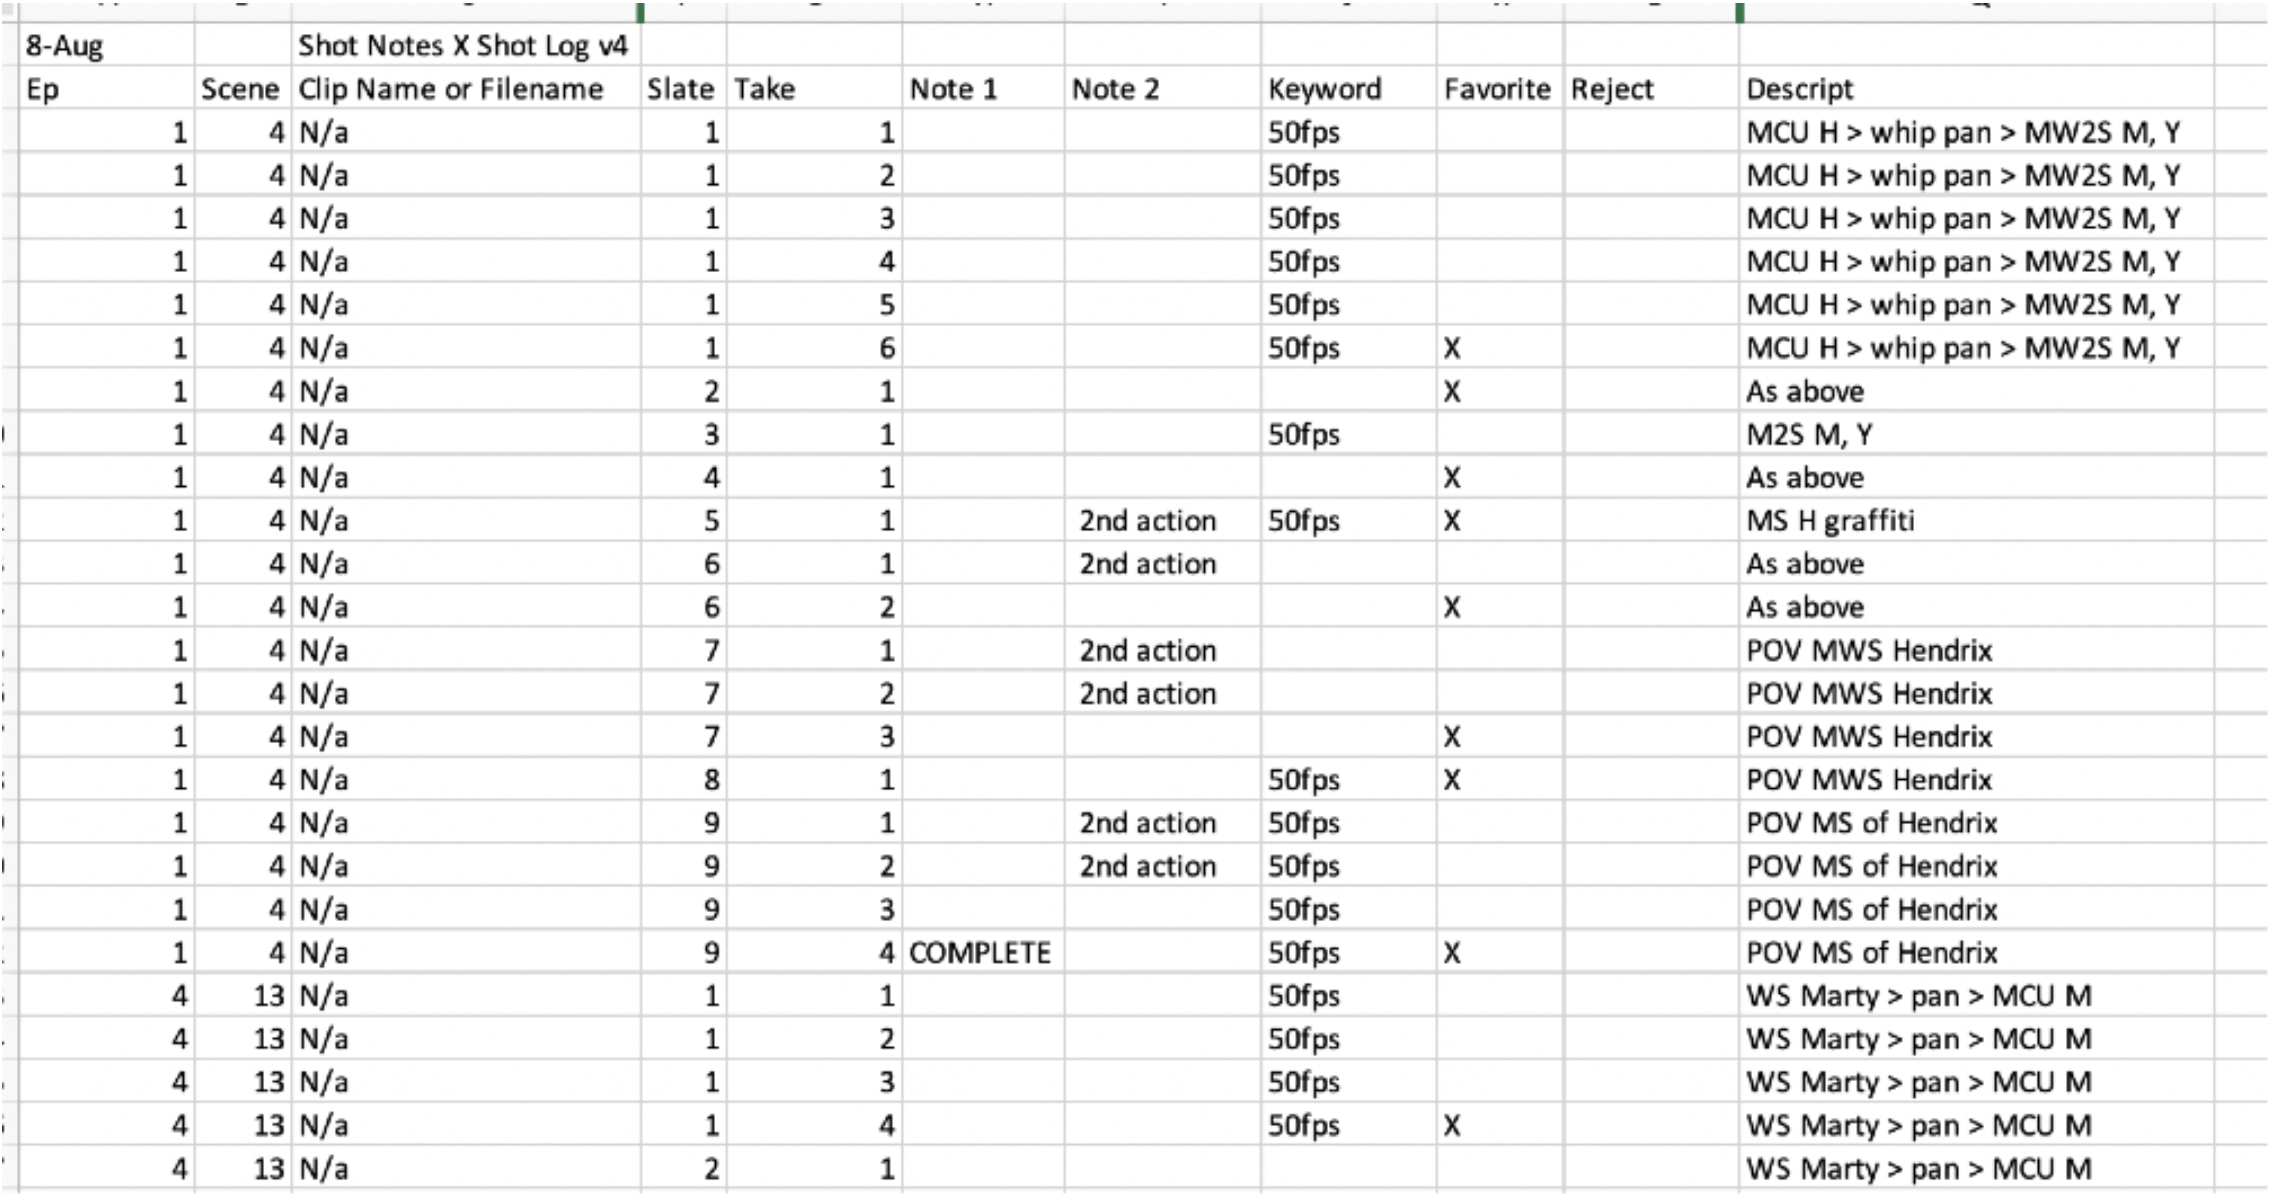
When we first started shooting, we had Daryl Watson (the incredible script supervisor) working off a Shot Notes X Excel template, which we intended to import back in as metadata. However, after the first couple of card dumps we decided against this, as we were getting “circle takes” and scene/shot/take in the sound metadata anyway. Rather than go off his “favourites”, we had time to do our own selects when reviewing and assembling the footage anyway. We still got Daryl to email us the Excel documents at each card dump as a reference if needed, but we didn’t actually use Shot Notes X in the end.
The main show has a very traditional paper-based workflow, with lots of marked up scripts for the editors, continuity notes, camera reports, sound reports, etc. and they’re used to doing a maximum of two card dumps a day - so it was definitely a little bit of a shock to the system for the 1st AD when we demanded much more regular card dumps, and requested no physical paper of anything.
Luckily, as I’ve worked with Jaque the cinematographer before, we had a really good on-set relationship. So he was happy for me to essentially act as a 2nd AC in a lot of ways. We were also very fortunate that we’ve worked with a lot of the other crew on various other jobs over the years, so every one was very happy and excited to be mixing things up.
Because we were doing regular card dumps, we were only really ever a card dump or two behind the shoot. Within a couple of hours after wrapping the whole shoot, we had rough assembly edits of all episodes in Final Cut Pro.
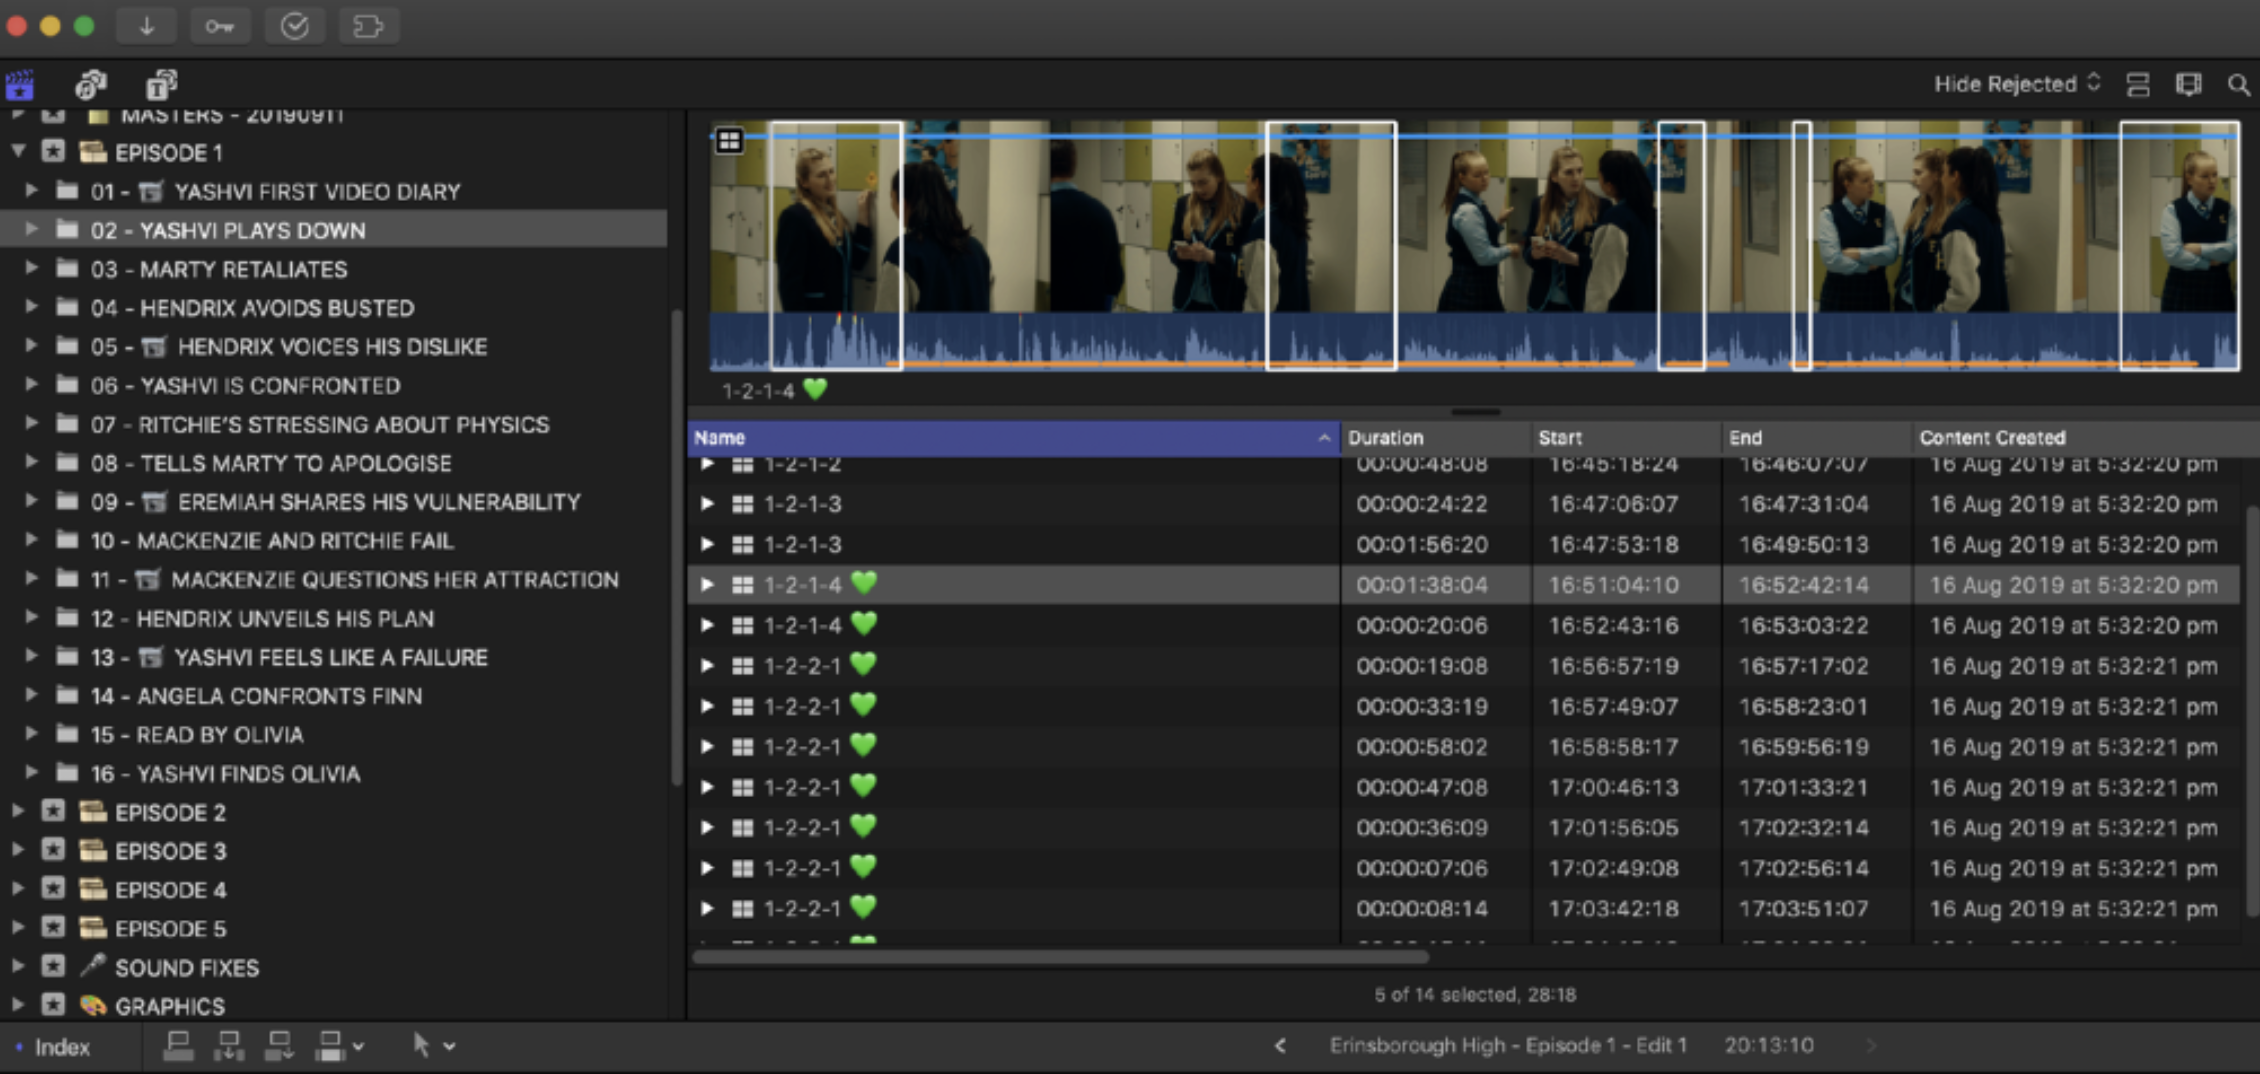
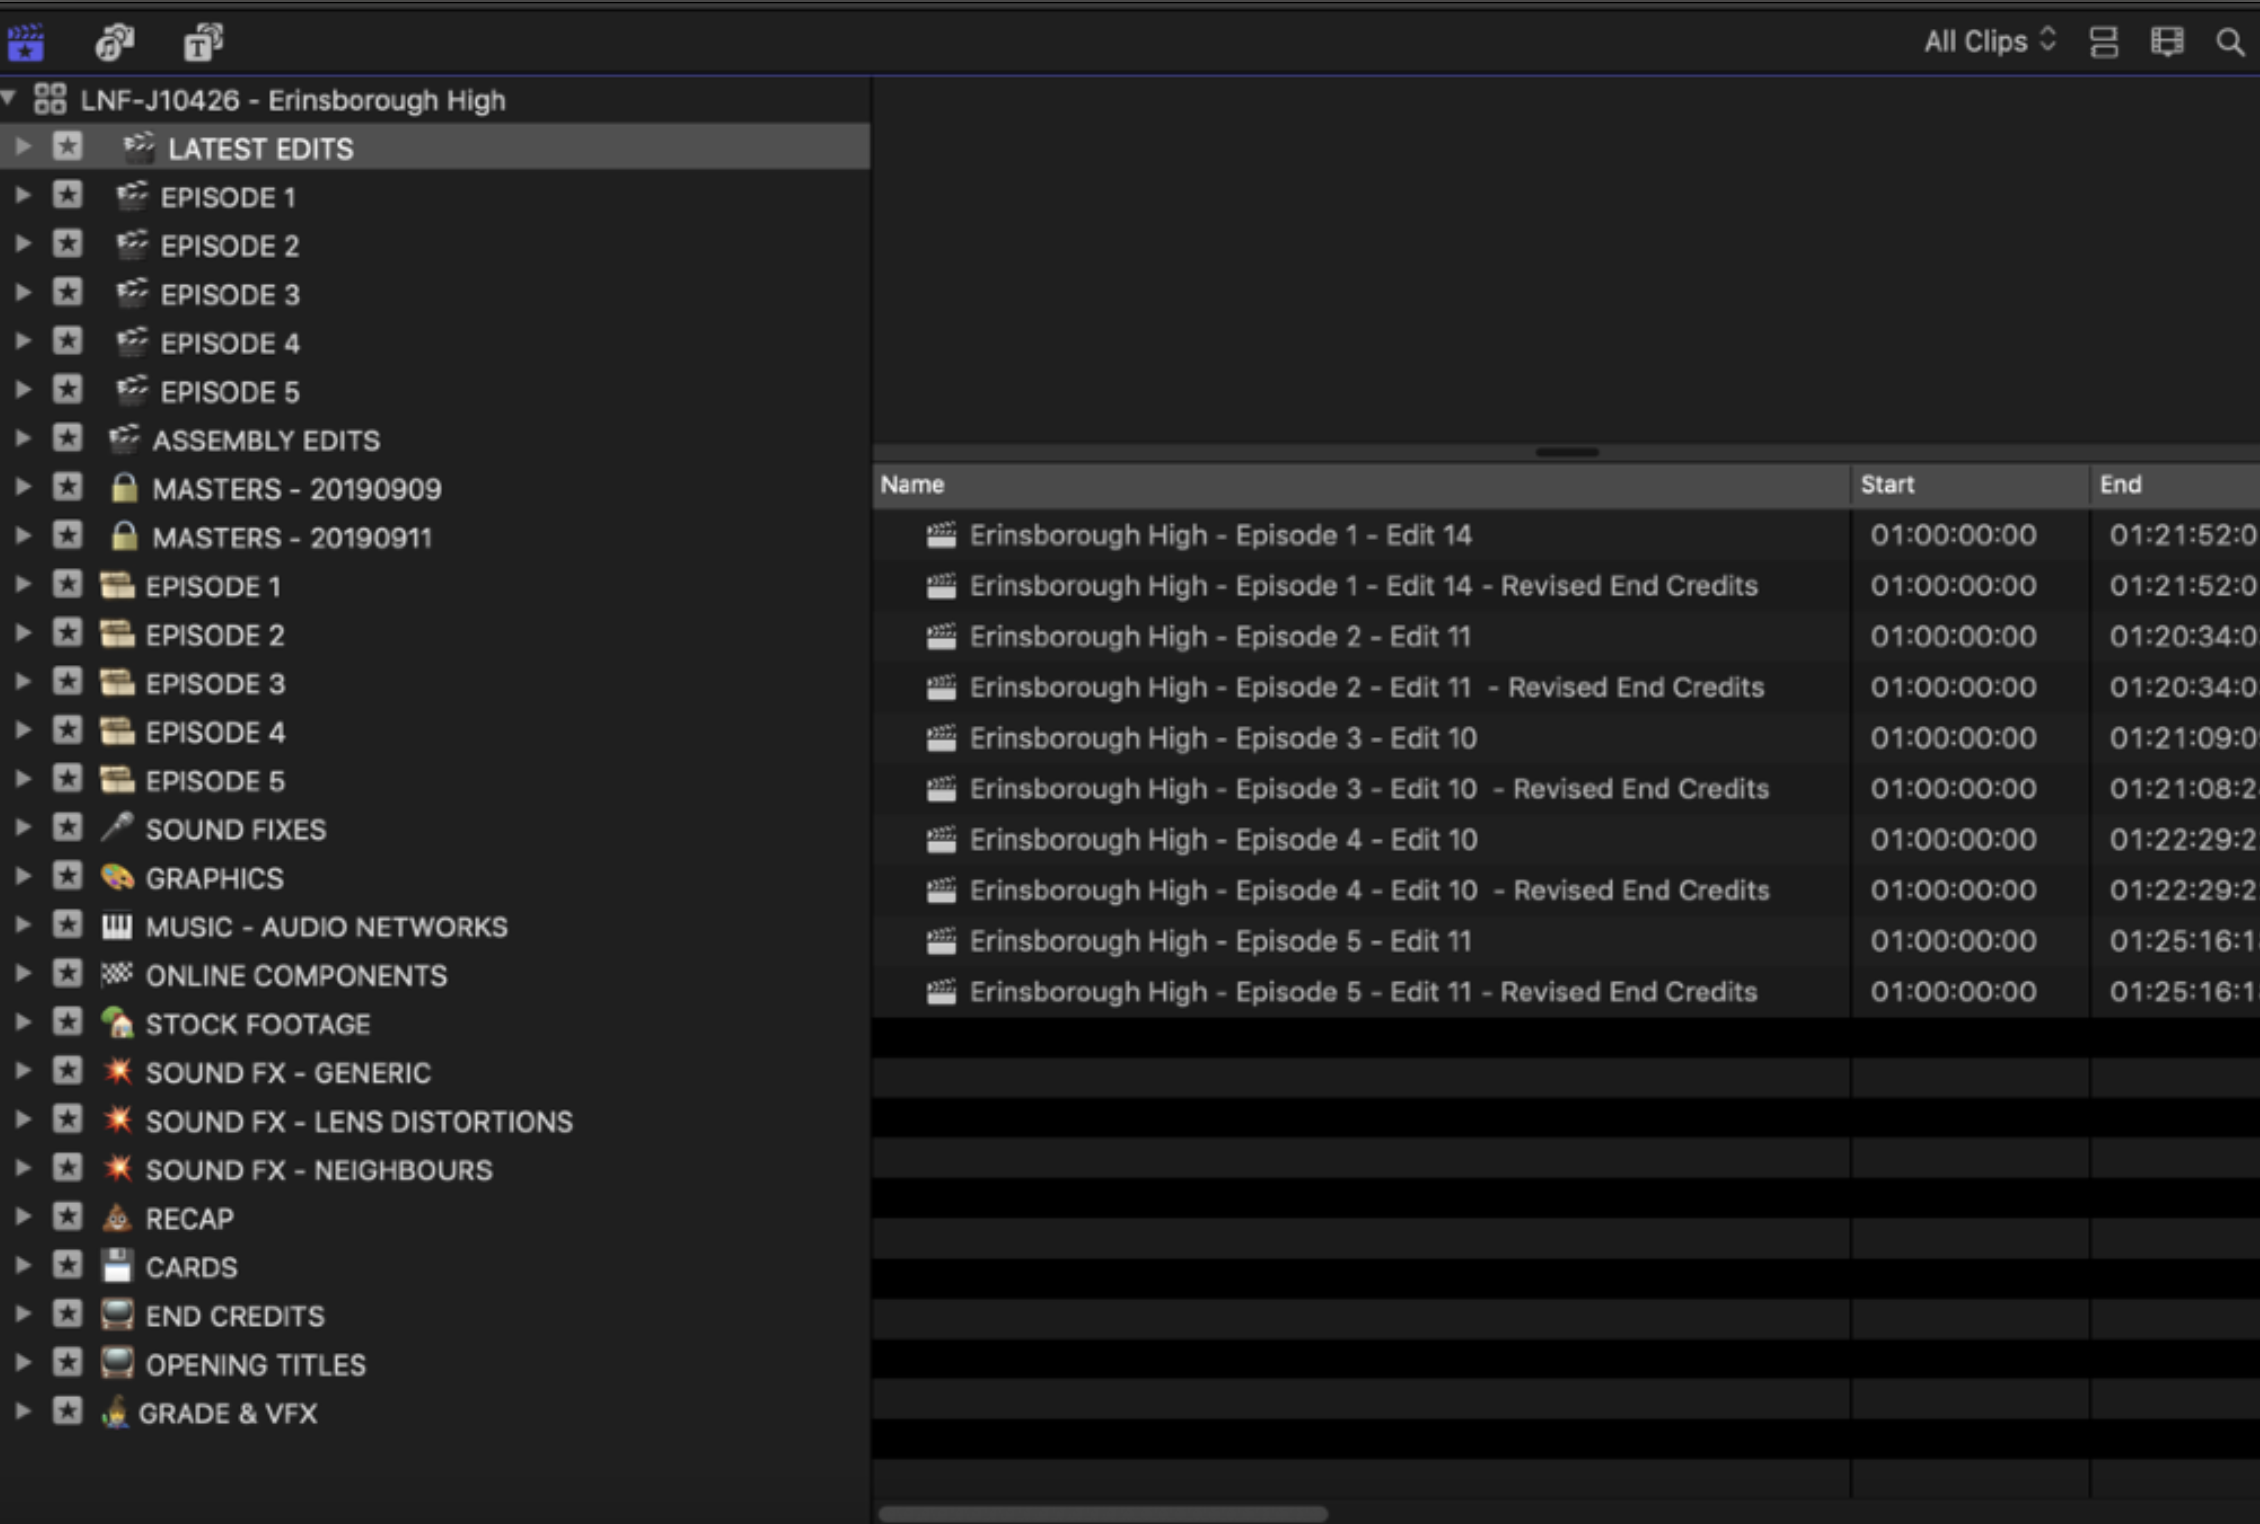
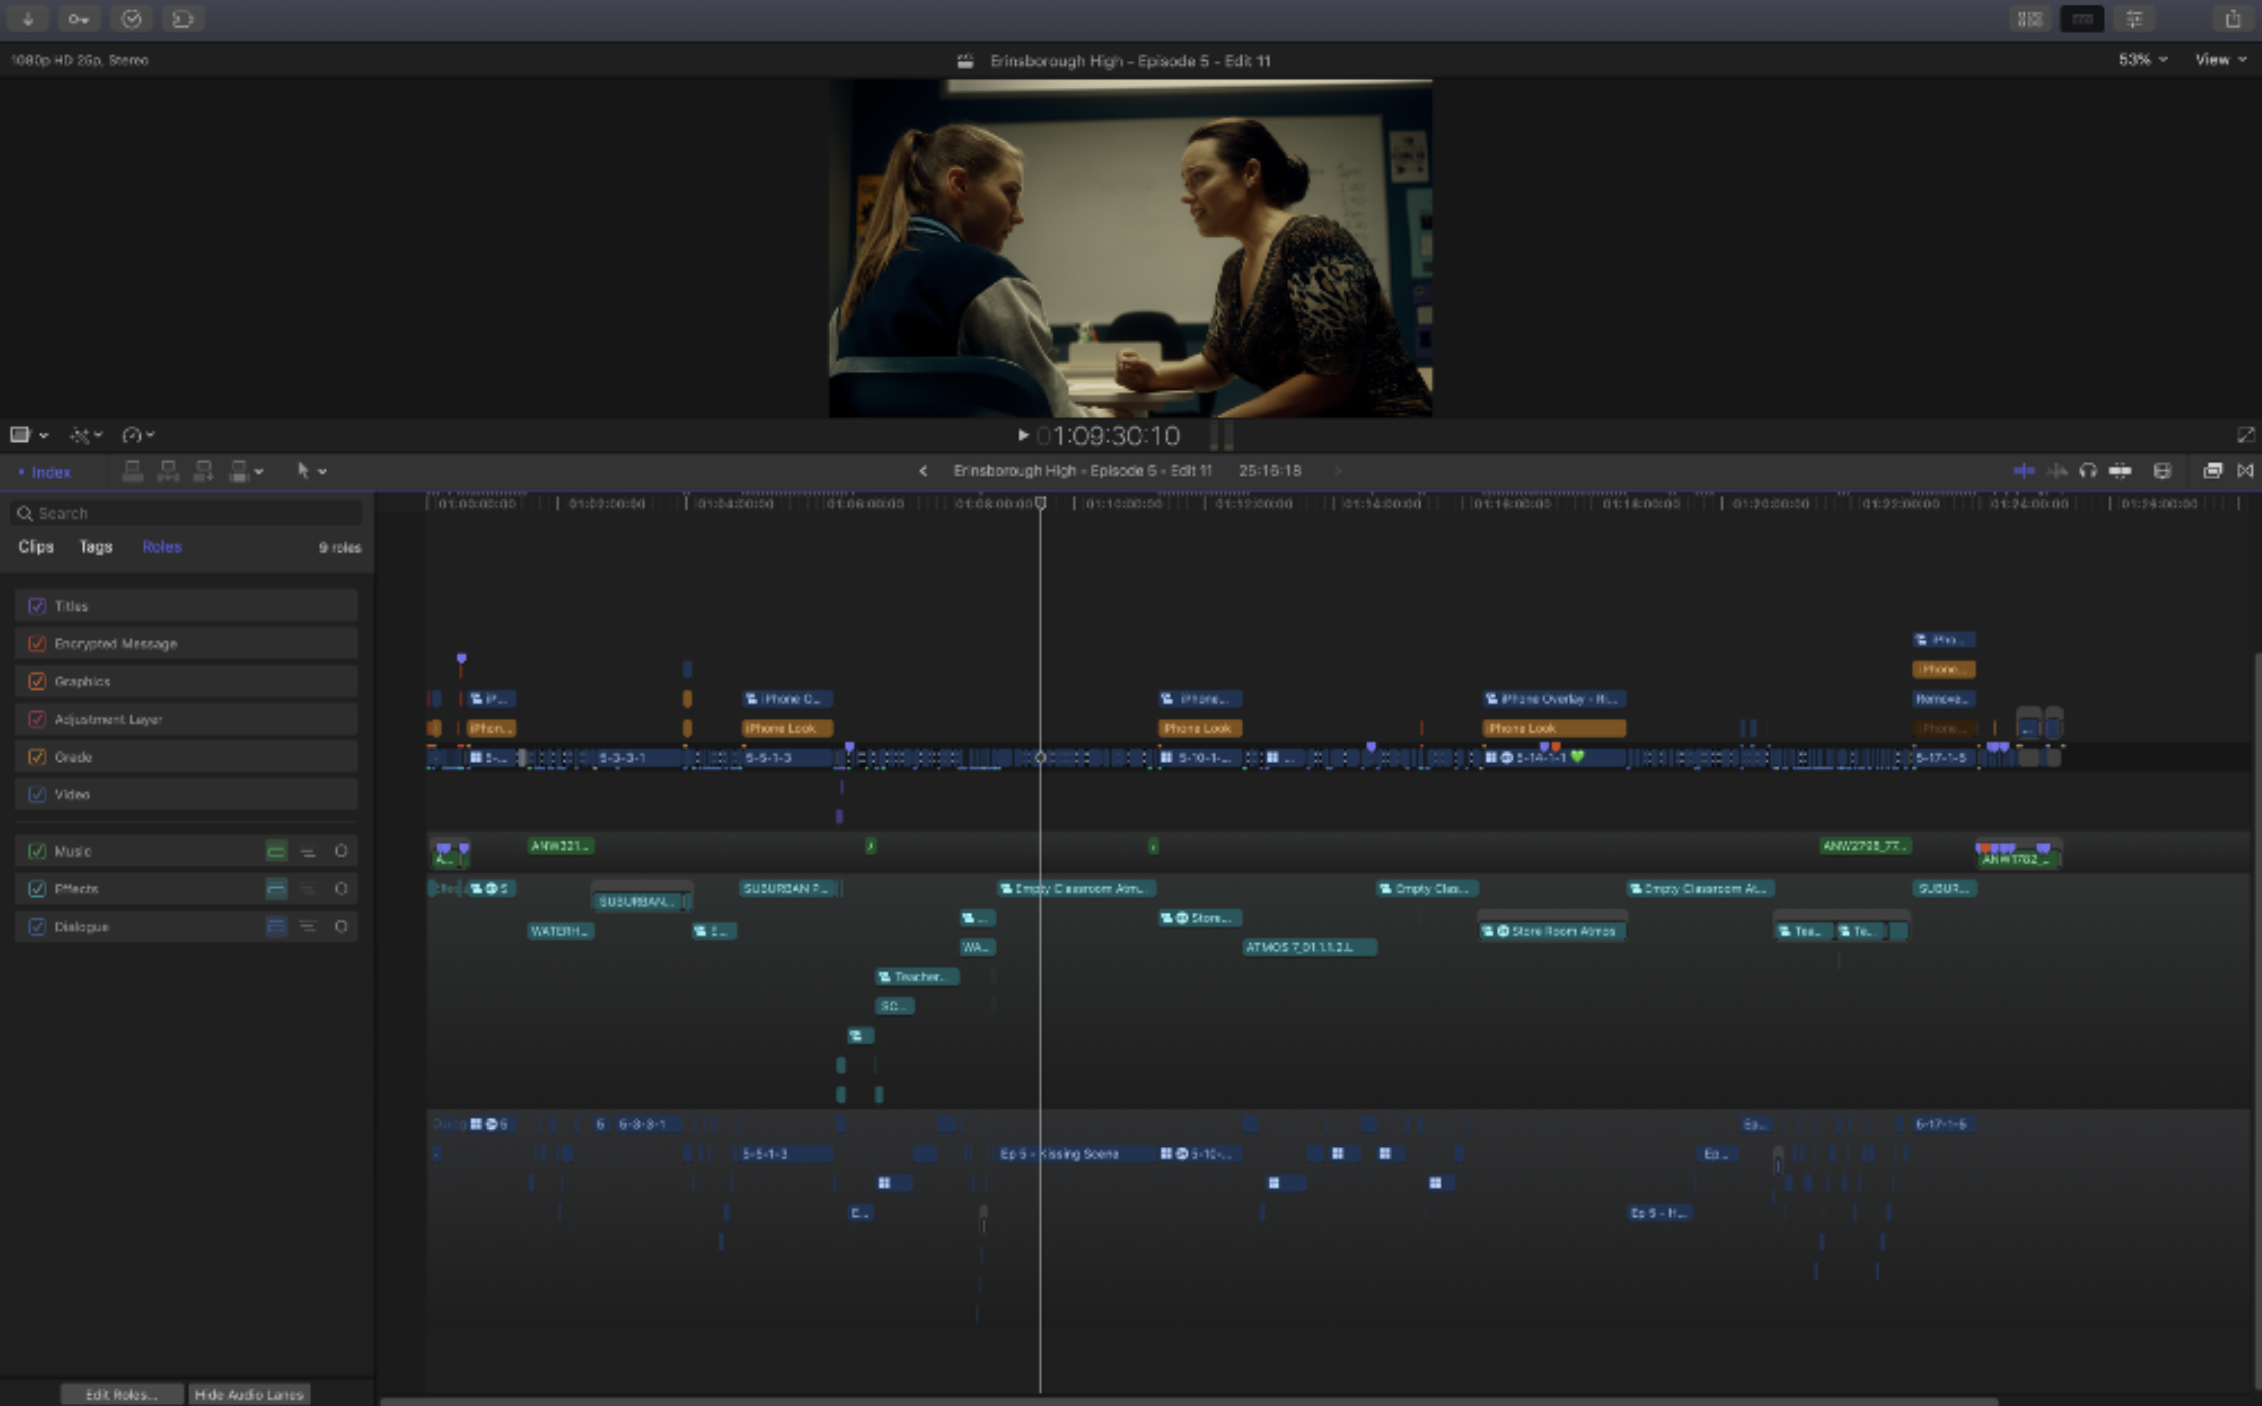
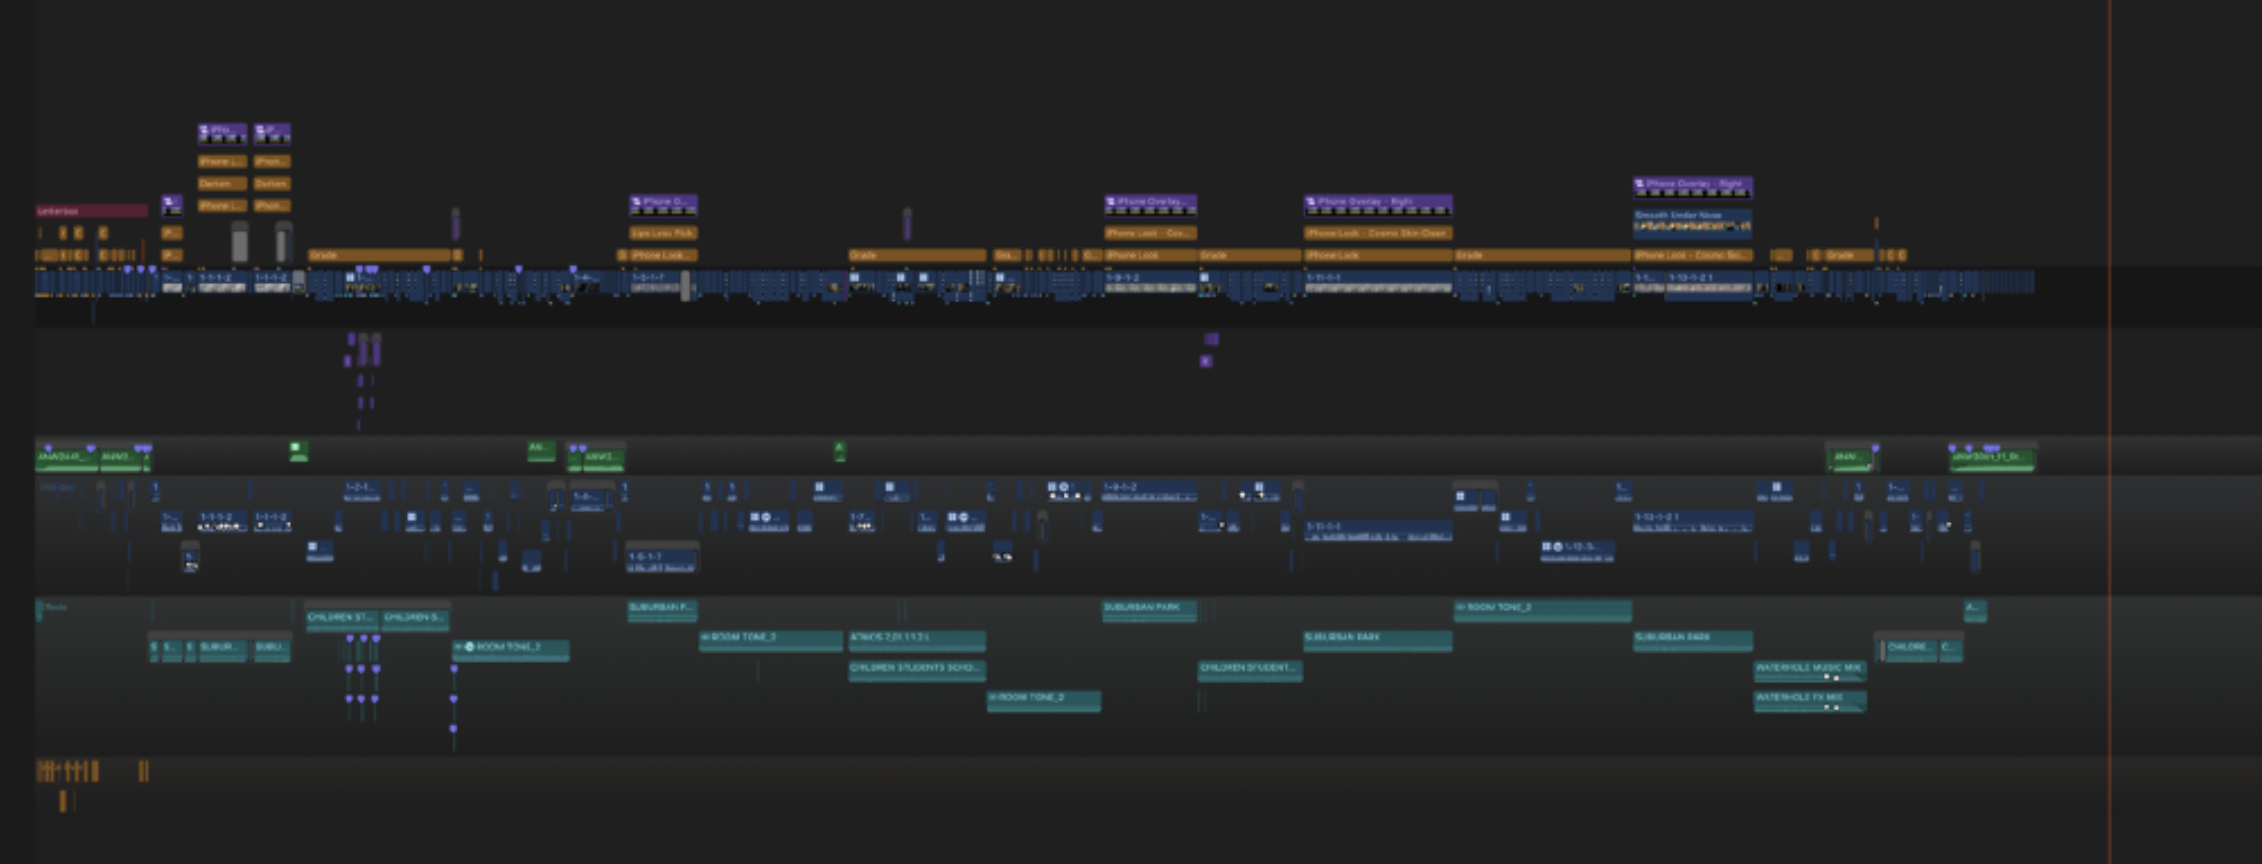
In terms of our master library layout, this is how it ended up:
I have a huge hatred of emoji’s in general, and refuse to use them on my phone, however, they’re a massive help in FCP to allow you eye to easily navigate to something. We also used other emoji’s as a visual aid, for example we used a snail to easily highlight 50fps shots and a camera to highlight video diary scenes.
We ended up with a tiny 2.17 TB of rushes at the end of the production. Because the shooting schedule was so intense, there was no time for the director or cinematographer to review rushes. When shooting in the studios, the producers had camera feeds into their production offices so they could review throughout the day.
Most of the cast were still also working on the main show simultaneously, which made this project a massive logistical endeavour for the production team. As we were constantly jumping back and forth between locations due to cast availabilities, we uploaded frame grabs of each scene to Dropbox so that our DP could easily compare lighting setups. To do this, Kevin would just insert a shot from each scene into a temporary timeline, bulk change the duration to one frame, then use CommandPost’s Timeline Batch Export feature to export individual stills with the same clip naming.
Jaque had developed his own LUTs for each scene after doing camera tests prior to the shoot, which he was using both on-set for the directors monitor, which we also used in post for the offline edit. At the end of each day, if there were any LUTs that didn’t feel right when he was shooting, we would send him a still at the end of the day, and he would create a new LUT at home in Resolve and send it to us to replace in Final Cut Pro.
This was fantastic, as it meant we were cutting with pictures that looked the way the DOP intended. Kevin also had a calibrated Eizo monitor connected to his iMac, which meant we could accurately judge the footage on-set.
We did one final half day of pickups on a Monday, then we packed up our temporary office and moved back into the LateNite office. Kevin spent the afternoon finishing off the assemblies of all episode, then he handed over the controls to me to take over editing.
We then had Tuesday, Wednesday & Thursday morning to do a directors cut of all Episodes ready for a producers screening on the Thursday at 3pm. Over the years, we’ve competed in and won quite a few 48 Hour Film Project competitions. So, whilst the schedule was fairly intense, it wasn’t as scary or stressful as some projects we’ve done in the past.
Because we’d done so much organisation and prep-work both before the shoot and during the shooting, it meant we could spend our editing days just being creative, which was so much fun. During the producers screening, the feedback was incredibly positive, and we were able to action of lot of the feedback straight away. This is where Final Cut Pro really shines.
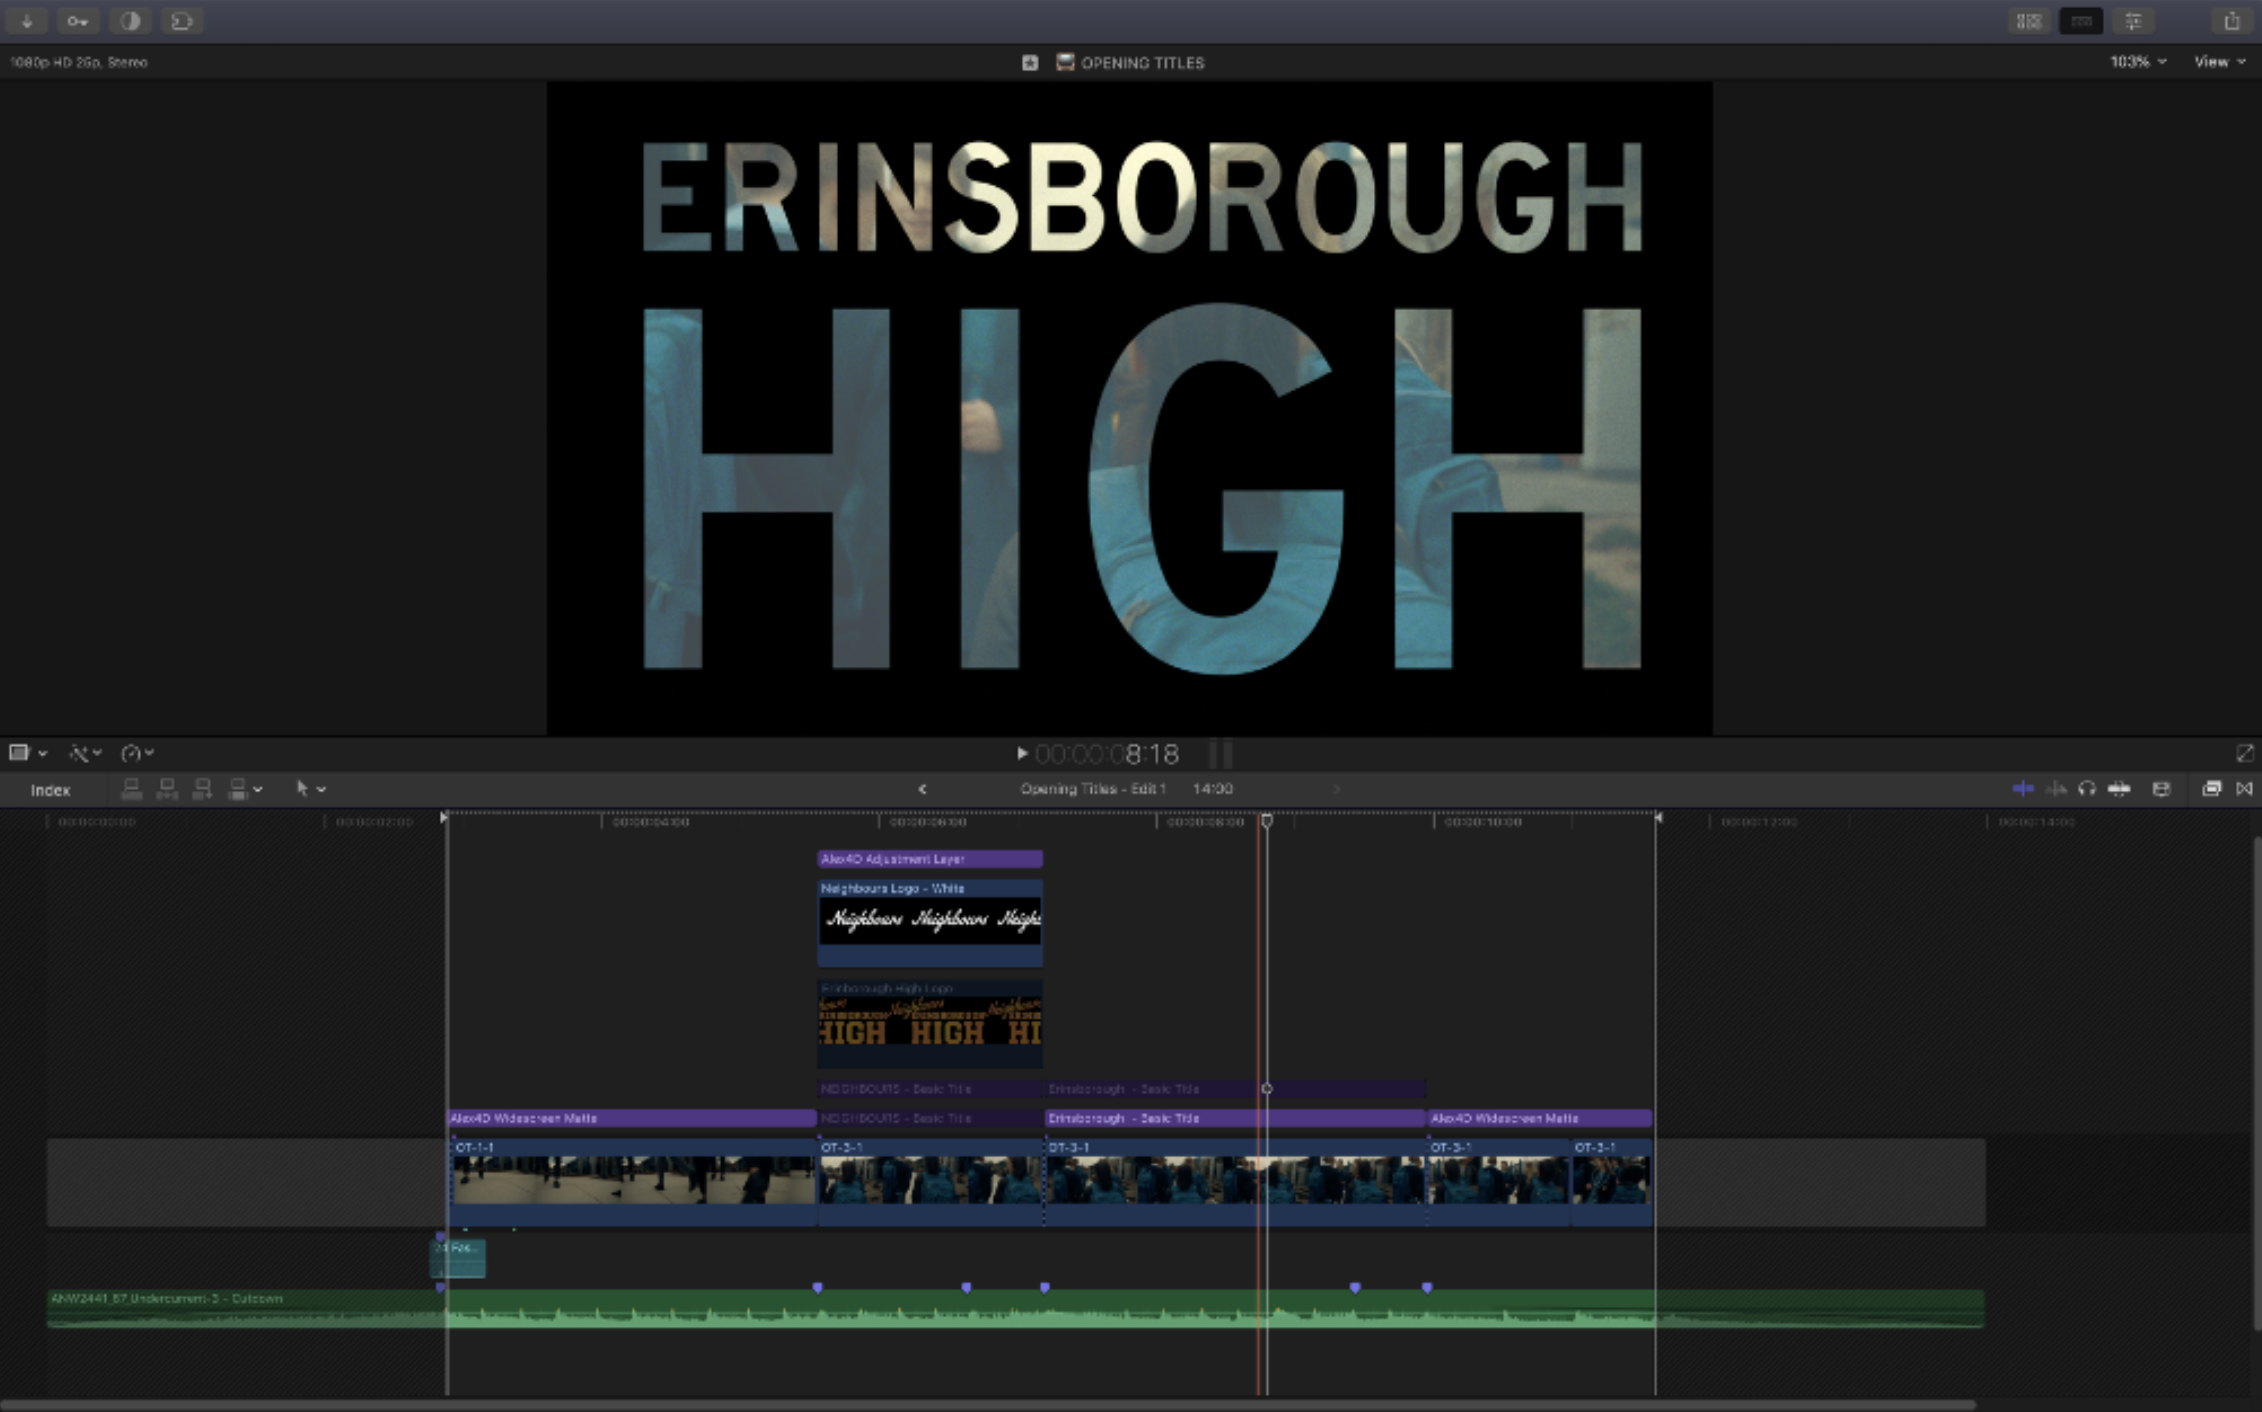
Just little things like having the opening titles as Compound Clips meant that I could quickly adjust something and all edits would update instantly, or if I needed to tweak a temporary grade, I could just do it within the Multicam clip to automatically update all other instances of the clip.
The next week, we had one more day with the director to do any final tweaks that he wanted to do, and another day with him to build recaps for each episode, then it was straight into finishing.
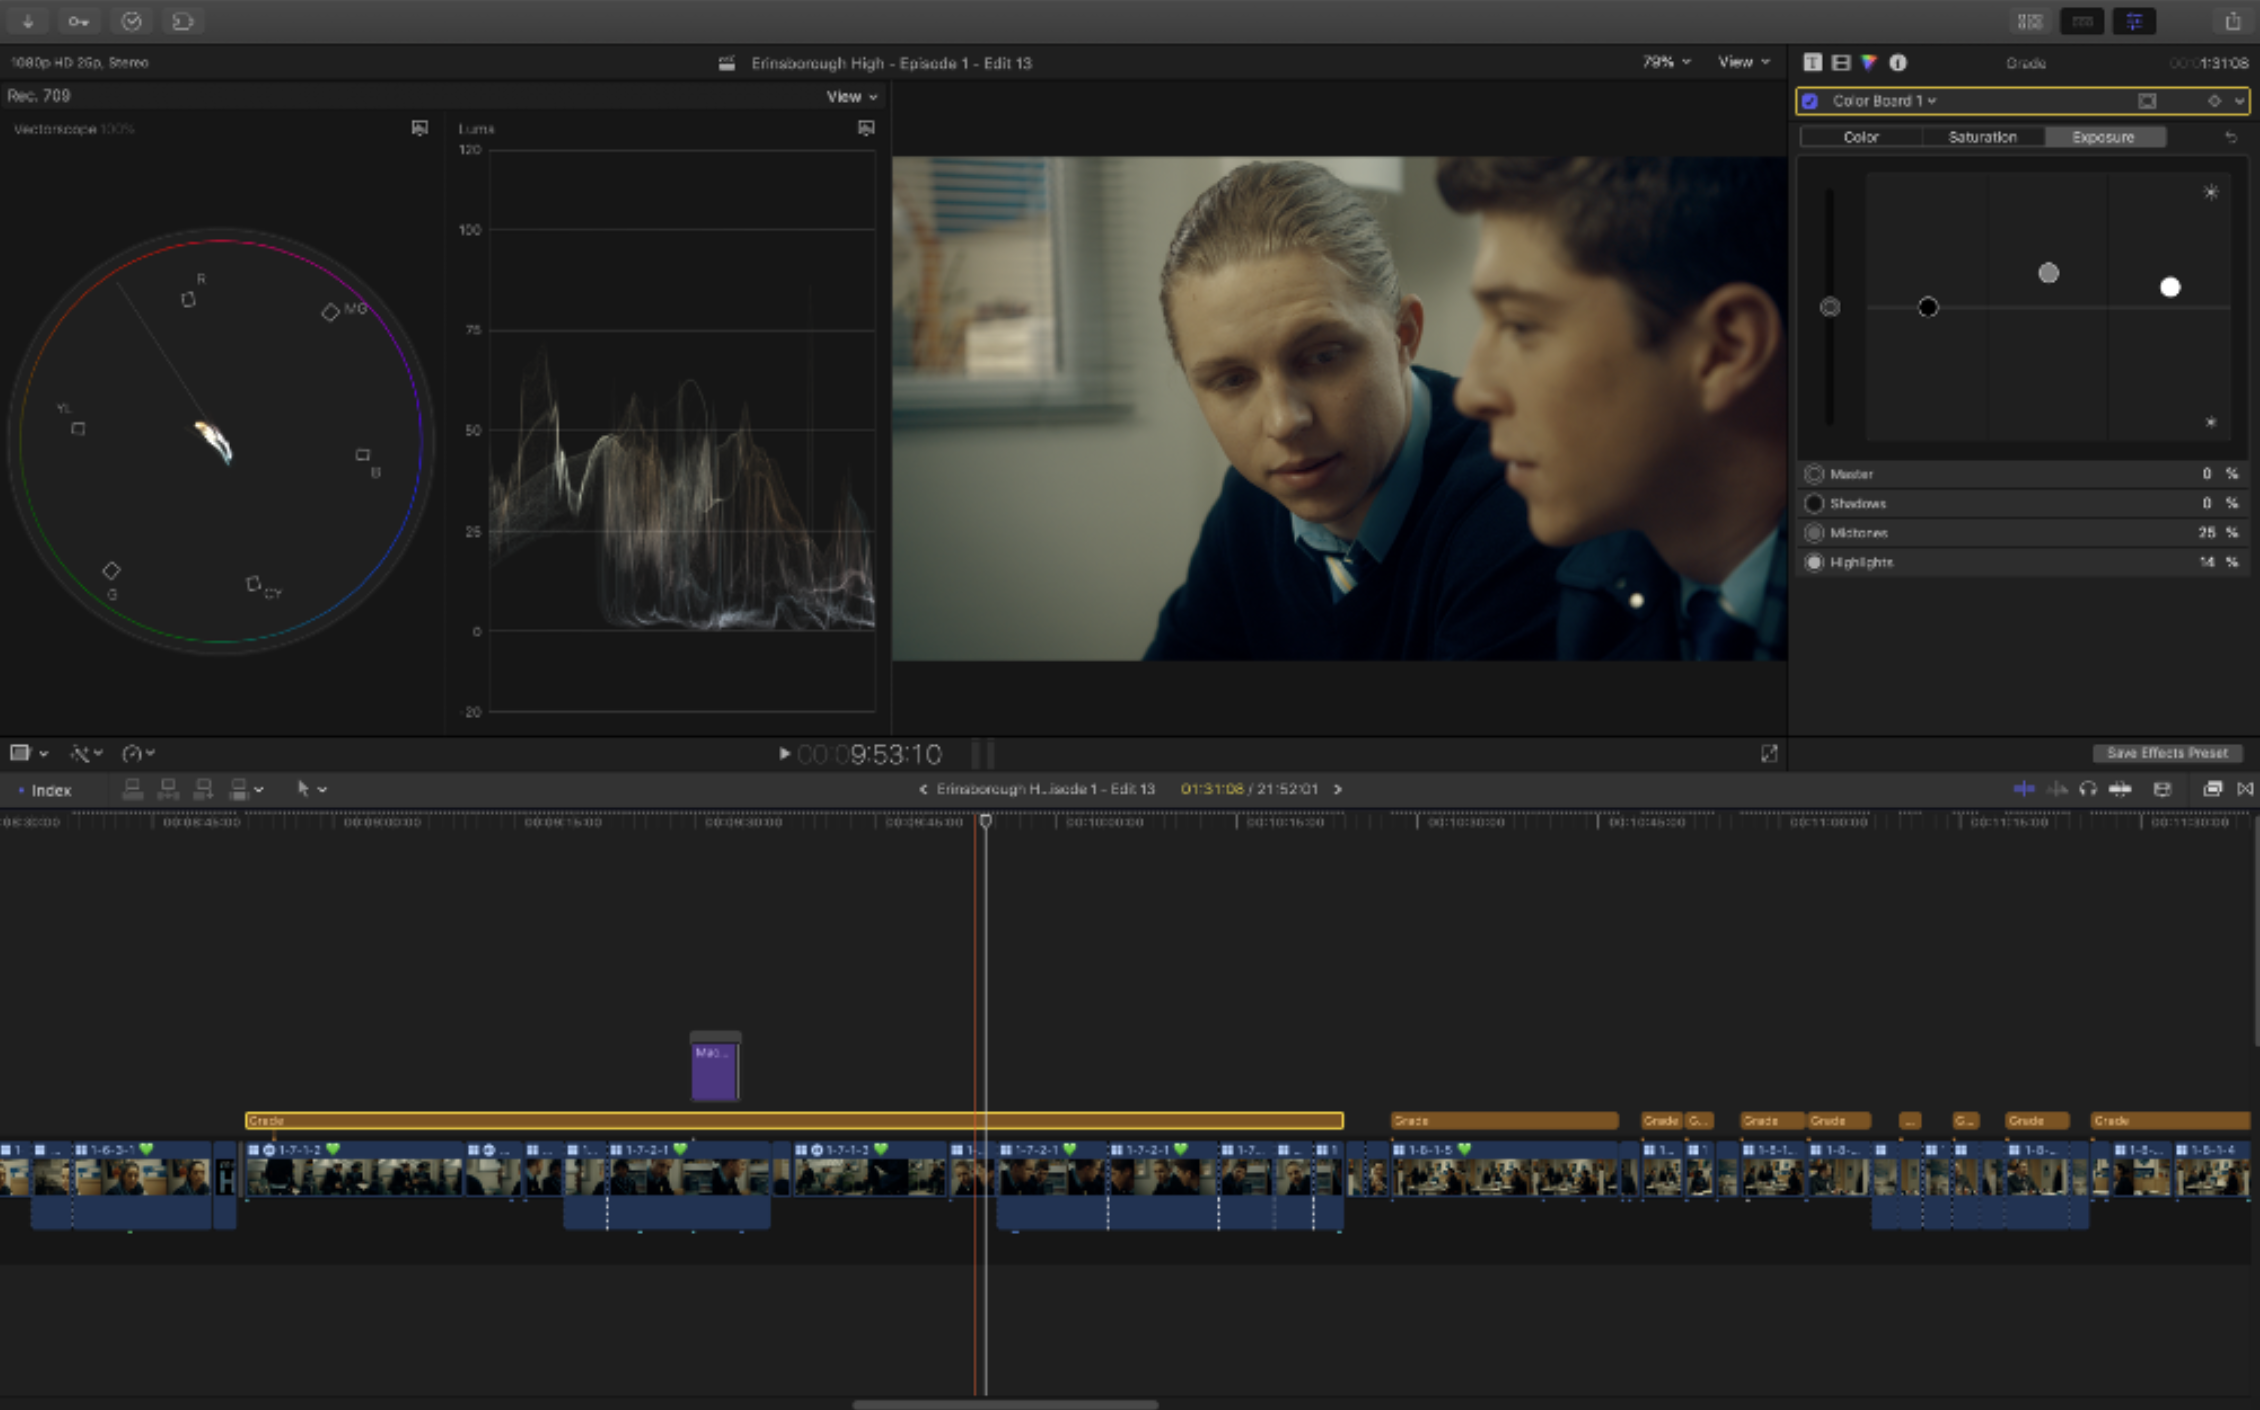
We decided early on to attempt to do the grade, sound design and delivery all within Final Cut Pro for both schedule and budget reasons, but also to creative flexibility as we could adjust the edit as needed when doing both sound design.
Kevin ended up doing the grade all within Final Cut Pro. We used a mixture of all the built-in colour tools (wheels, board, curves, etc), Magic Bullet Cosmo II, FilmConvertPro2, Colorista III, mLut by motionVFX, and the CoreMelt Everything bundle. We also used Alex4D’s adjustment layer and Grow/Shrink and SmoothMove extensively.
In terms of visual effects, there was a bunch of general cleanup work we did in FCP, and a handful of shots that we took to Adobe After Effects & Mocha Pro for things like object removal, digital makeup and cleanup.
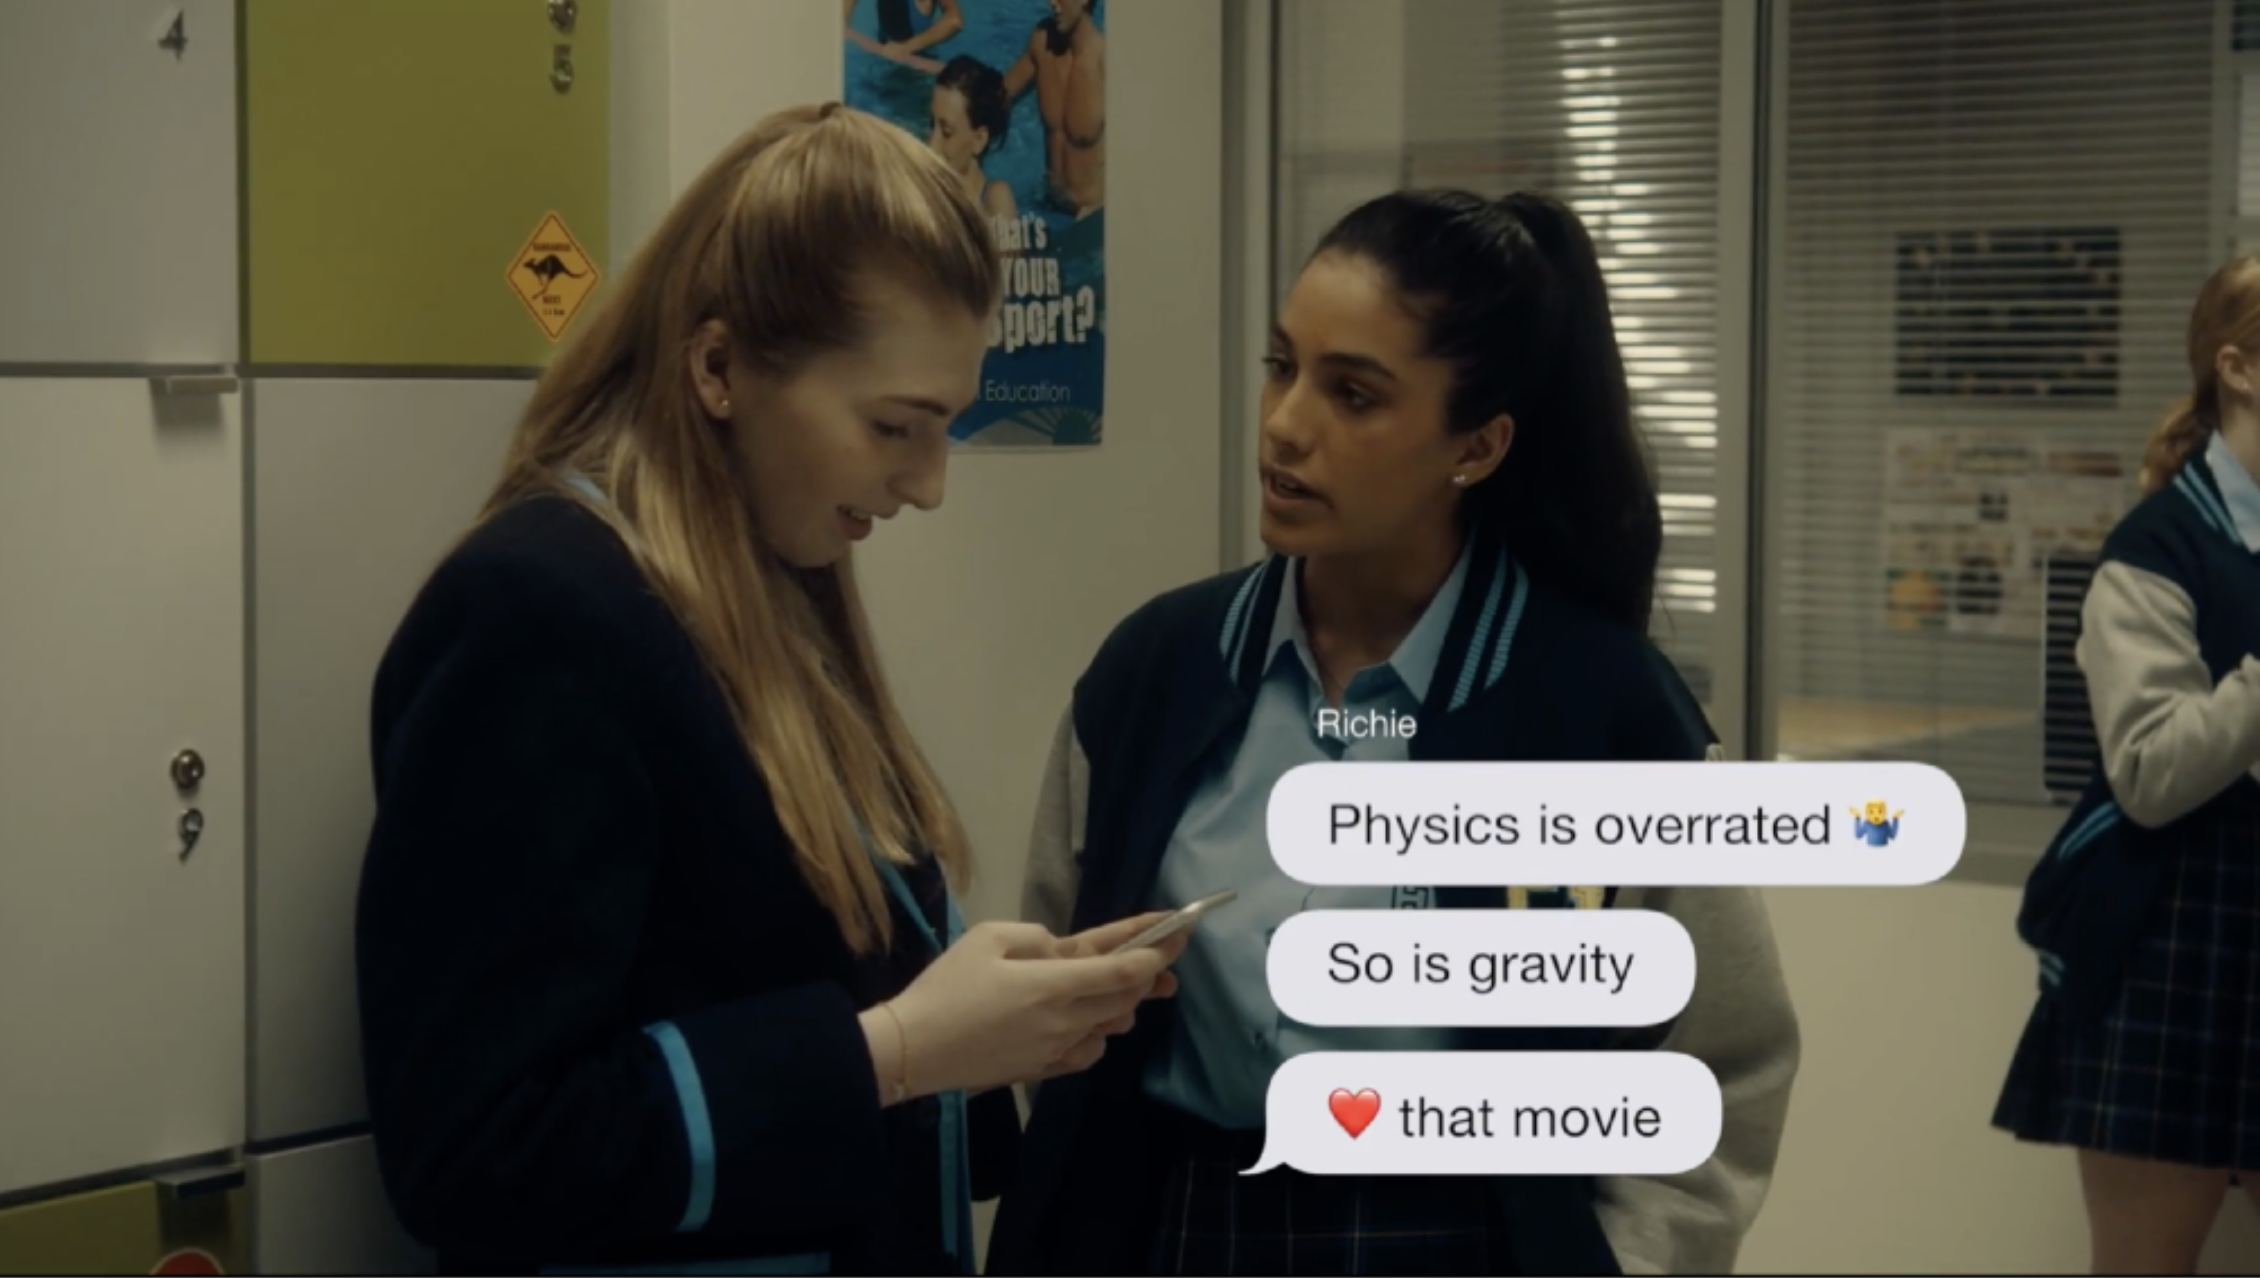
In the series, the characters are constantly communicating with each other via iMessages. For the graphics for this, after testing a bunch of other products, and experimenting with our own Motion template, we ended up using the incredible “Text Message 2” Motion Template from BretFX. Bret Williams was absolutely fantastic in terms of addressing some special feature requests we had, and gave us access to a pre-release of “Text Message 2” for this show.
I did all of the sound design myself directly within FCP with the help of iZotope RX7, ERA 4 Bundle Pro, and a handful of other Waves plugins. There were a couple of tricky lines that I needed to take out to RX7 standalone to cleanup, but most of the time I could do any noise reduction right on the FCP timeline with RX7.
Mixing 5 x TV half episodes all within FCP was more time consuming for me compared to using a DAW such as Protools or Logic Pro. However, the benefit was that if I couldn’t fix something easily in the sound design stage (we didn’t have time to do ADR for example), I could simply adjust the edit there and then. If I came up with an audio-based gag, I could also adjust the edit to make things work.
For final delivery, we needed to deliver ProRes masters with bars and tone, countdown and slate and OP-59 compliant audio. To create the legal audio, we exported each episode out as a AIFF, then brought it into RX7 to make compliant then brought back into FCP. We prefer this method, rather than using a compound clip and a loudness plugin within FCP.
The ProRes masters were delivered the post team at the main show who use Technicolor to do a final QC and review prior to dispatch. We used Producers Best Friend to generate music reports that were used to create music cue sheets.
In hindsight, what was your experience doing everything inside FCP from ingest to delivery?
Everything went fairly smoothly. There are some things that Apple could definitely implement to make our lives easier, such as mask tracking in the colour tools, better sharing and relinking in relation to Camera & Custom LUTs, the option to turn on a timecode overlay on the A/V Output for client reviews without putting a timecode generator on the top of your project.
It would also be awesome if FCP or Compressor had audio loudness and compliance tools built-in, and it would be amazing if you could apply effects and adjust the master gain on audio Roles and Subroles. The way I see this working is you’d select the role in the Timeline Index, then adjust it in the Inspector.
CommandPost
To wrap this up, we cannot chat with Chris Hocking without talking about CommandPost. Why did you develop this utility?
CommandPost is a free and open source Mac application that extends and accelerates the function of post-production software. Currently focusing on Final Cut Pro, it adds support for custom keyboard shortcuts, hardware controller support, watch folders, and lots more. Think Apple’s Automator, with a little bit of BetterTouchTool and Keyboard Maestro thrown in, but specifically designed for creative professionals.
The utility is very popular among the FCP community. CommandPost now has over 3300 active monthly users and over 1226 users in our Facebook Group. After 91 beta releases of CommandPost, we have now finally removed the beta label, and CommandPost 1.0.0 was released into the wild.
Give a few examples where CommandPost enhances the FCP workflows:
CommandPost literally has hundreds of features, all of which have come from the passionate Final Cut Pro community.
Some of my favourite features include:
- Tangent Panel support - allowing you to use Tangent Panels (or their iPad app) to control FCP’s Colour Board & Colour Wheels.
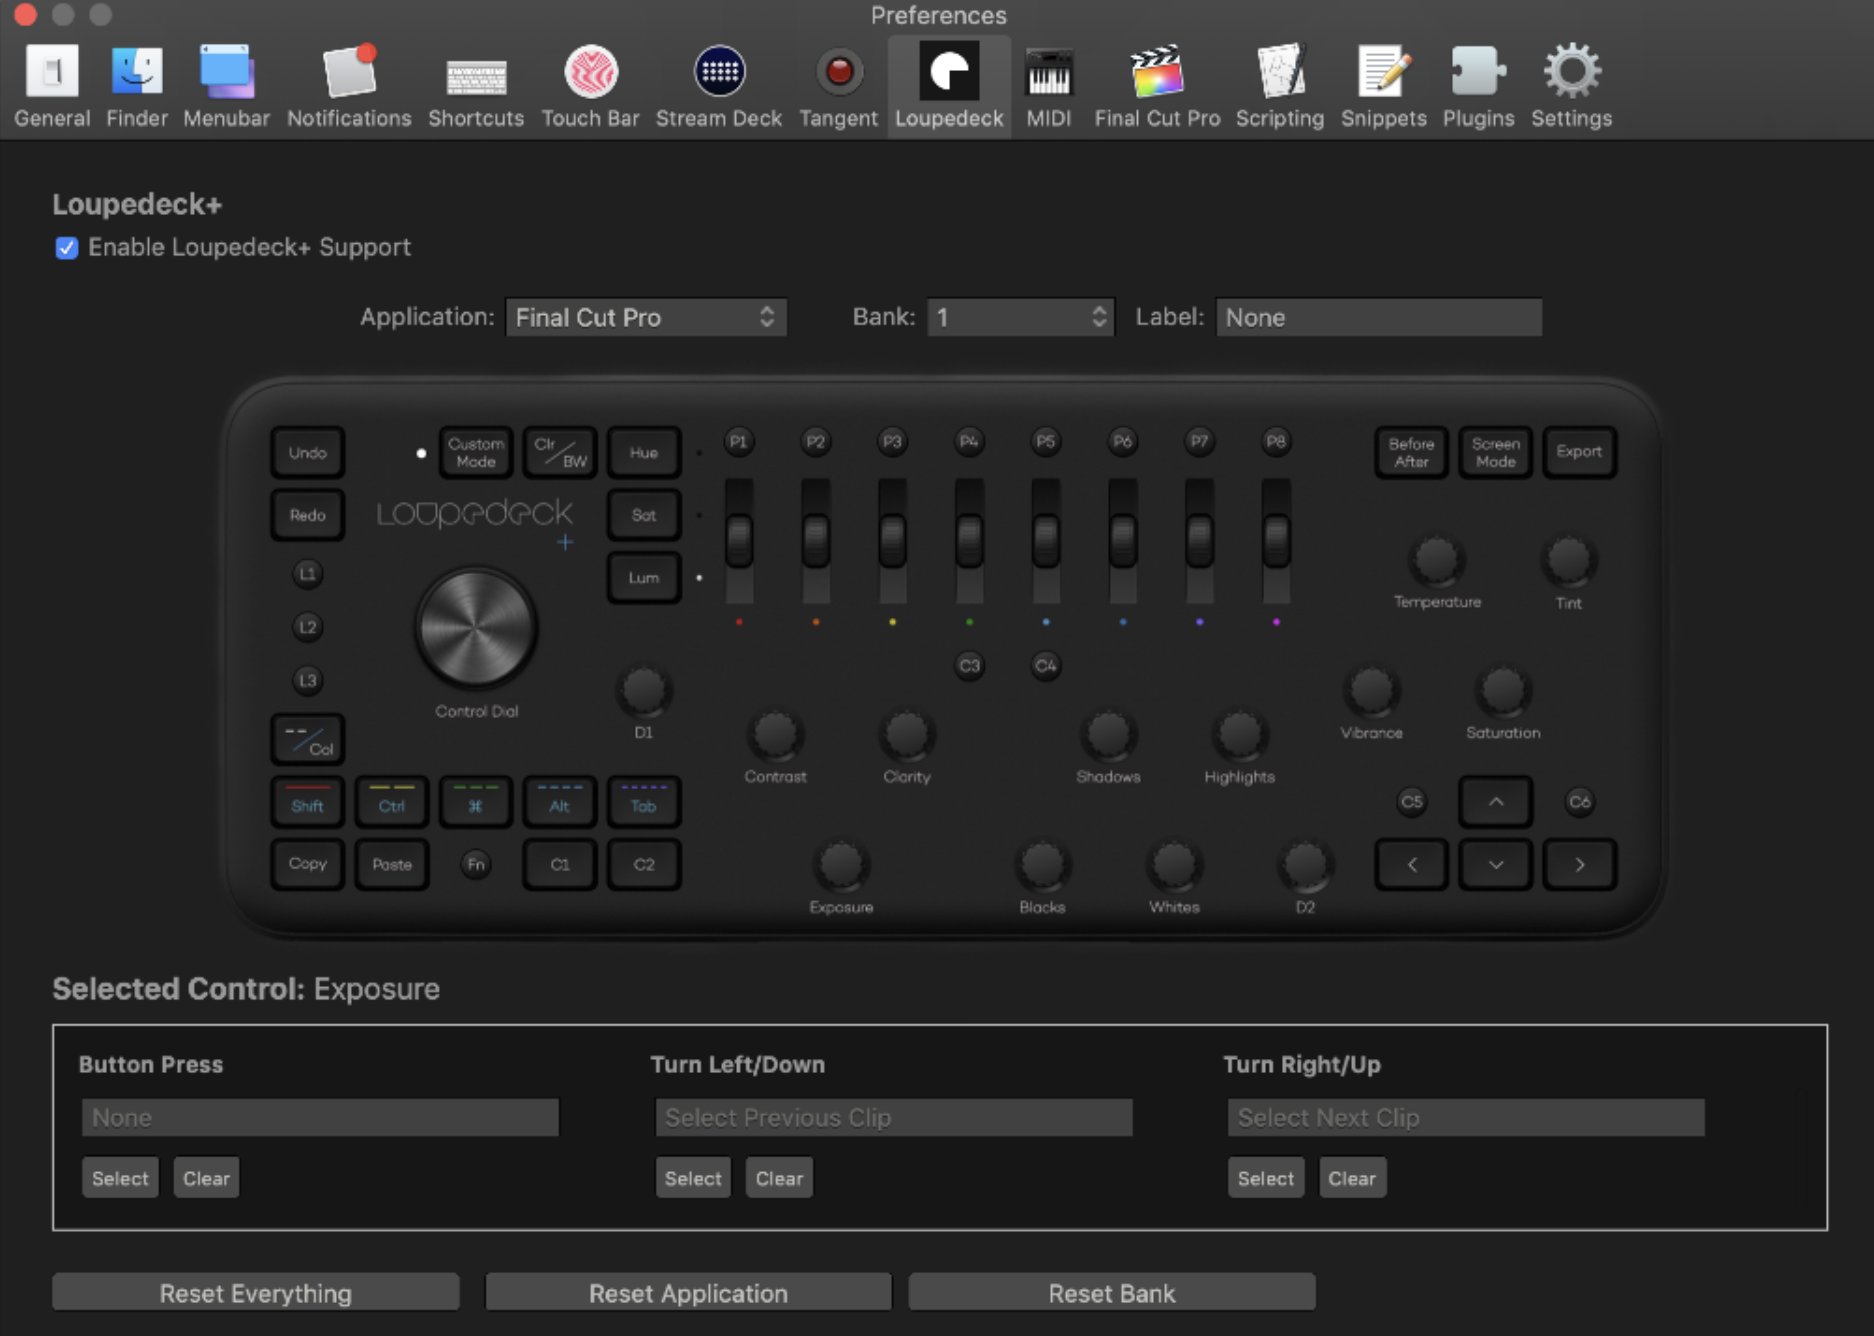
- MIDI device support (including the Loupedeck+) - allowing you to use off-the-shelf MIDI devices and MIDI iOS apps to control Final Cut Pro.
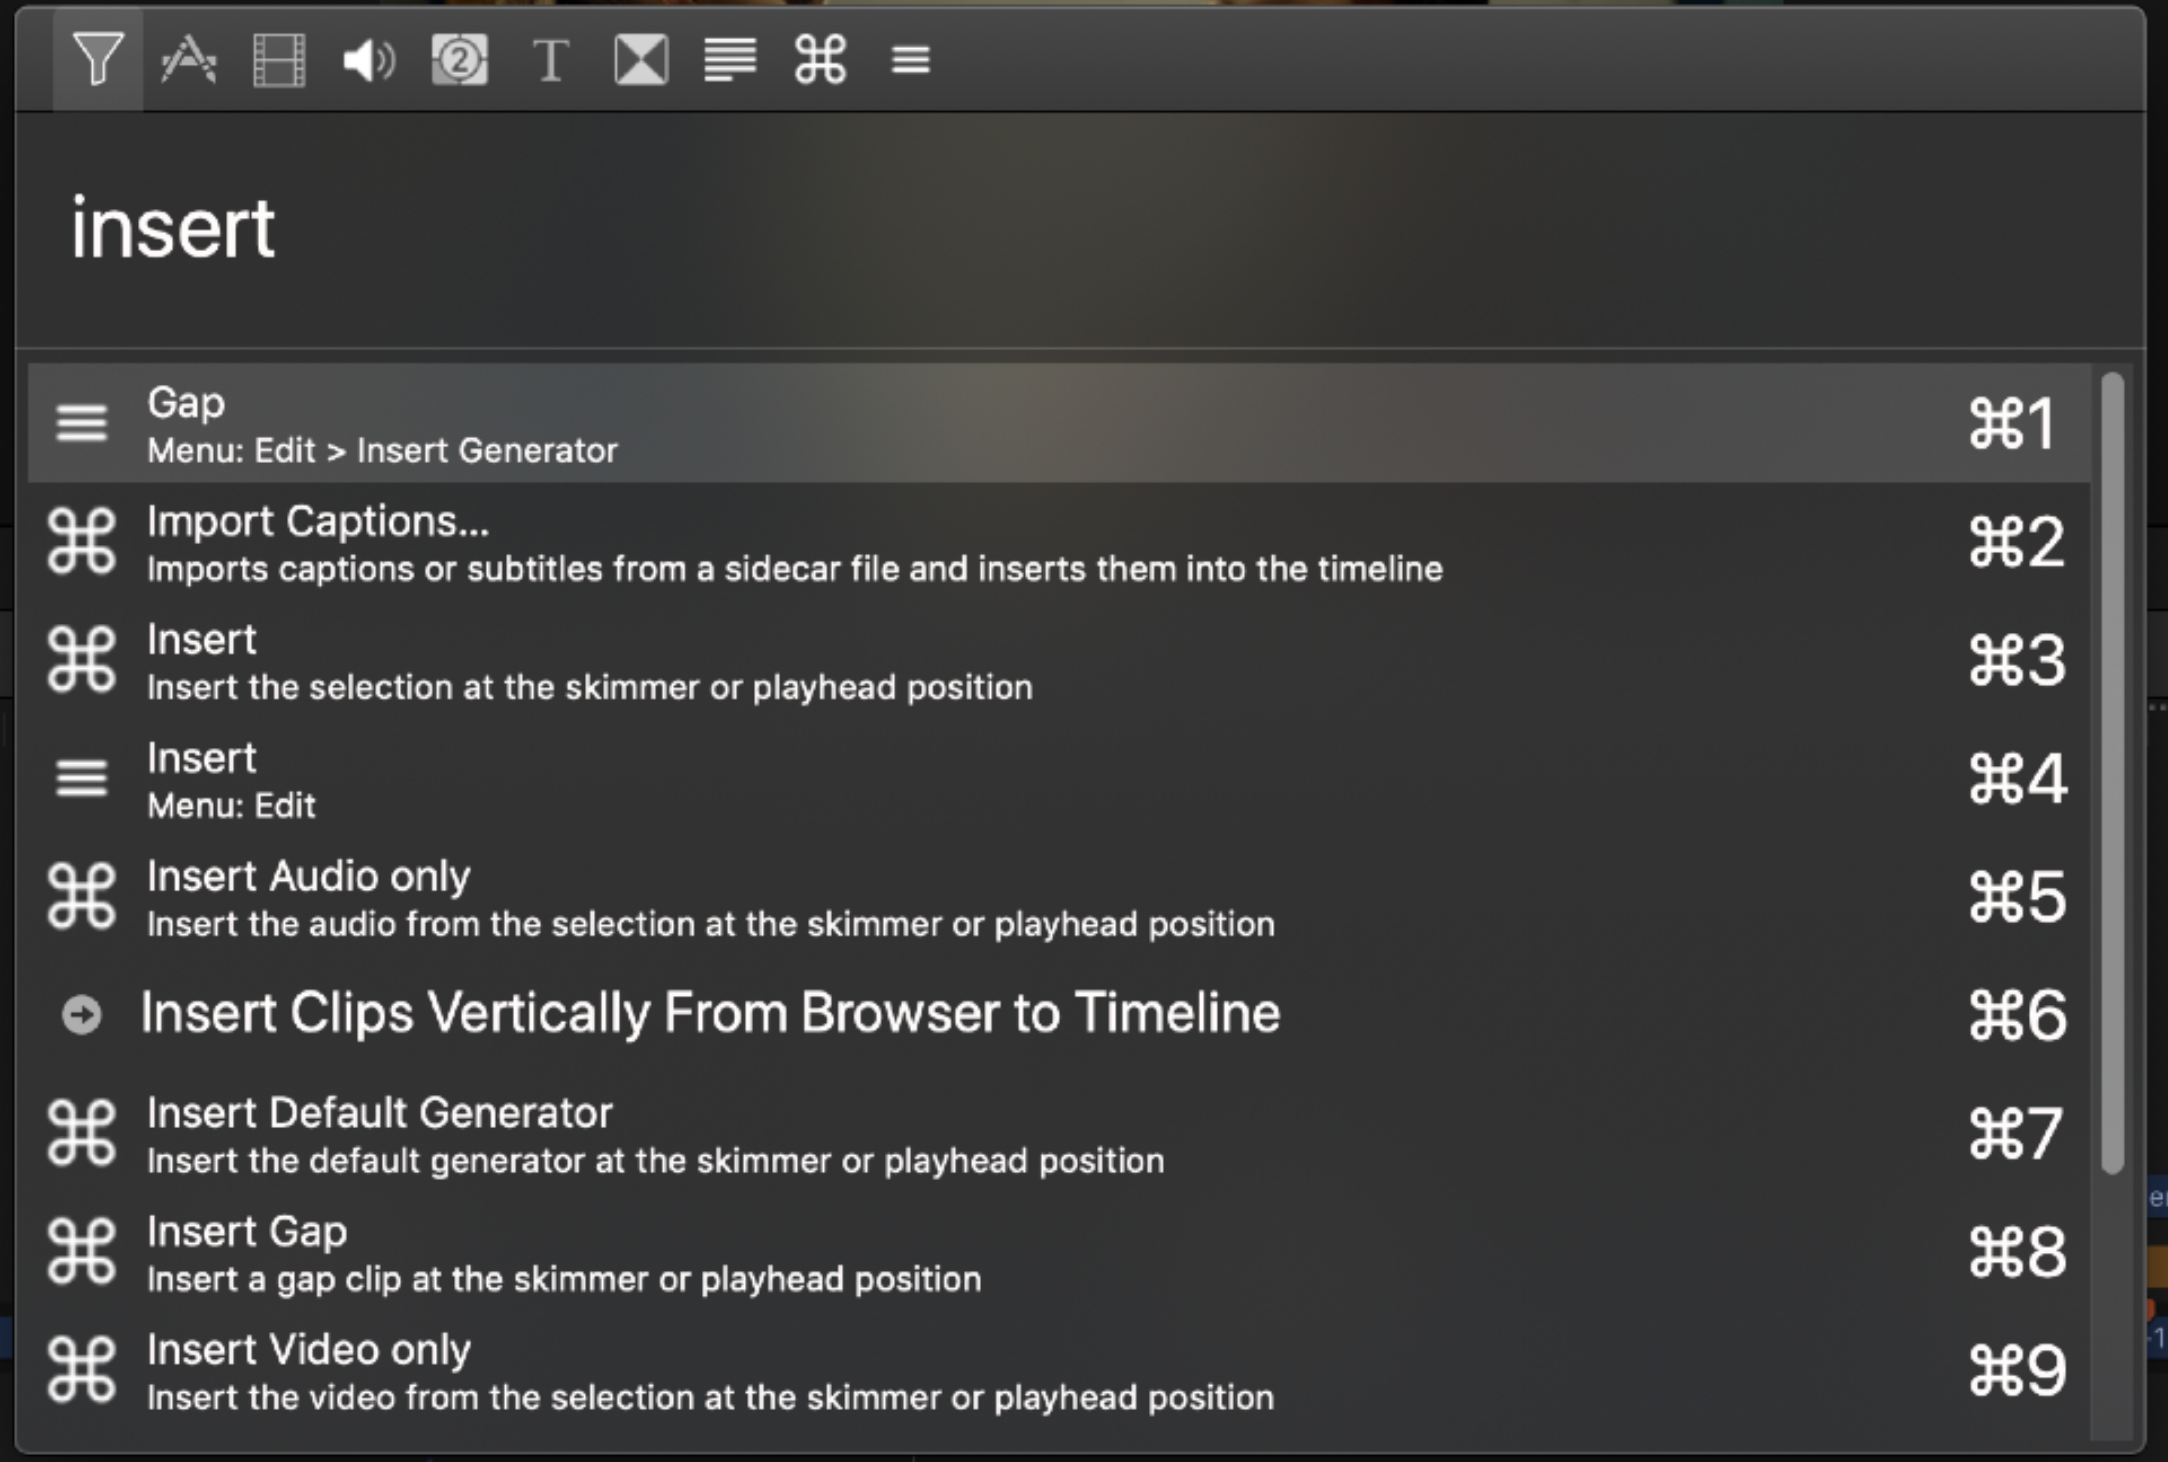
- Spotlight-like Search Console, allowing you to easily apply individual effects, transitions, generators and titles without using the mouse.
- A scrolling timeline.
- An action for “Reveal in Keyword Collection” - so that you can “match frame” back to a keyword collection from the timeline.
- Batch Export from Timeline.
- Shared Clipboard & Clipboard History - allowing you to CMD+C on one machine then CMD+V on another machine on the other side of the world.
- Mobile Notifications (Prowl, Pushover & iMessage) as well as Apple Watch & Android Wear notifications.
- An option to “Enable Rendering During Playback” - which allows fast Mac’s to keep rendering whilst you’re playing back, and also keep updating waveforms and clip thumbnails whilst you’re playing back.
- Ability to Ignore Inserted Camera Cards.
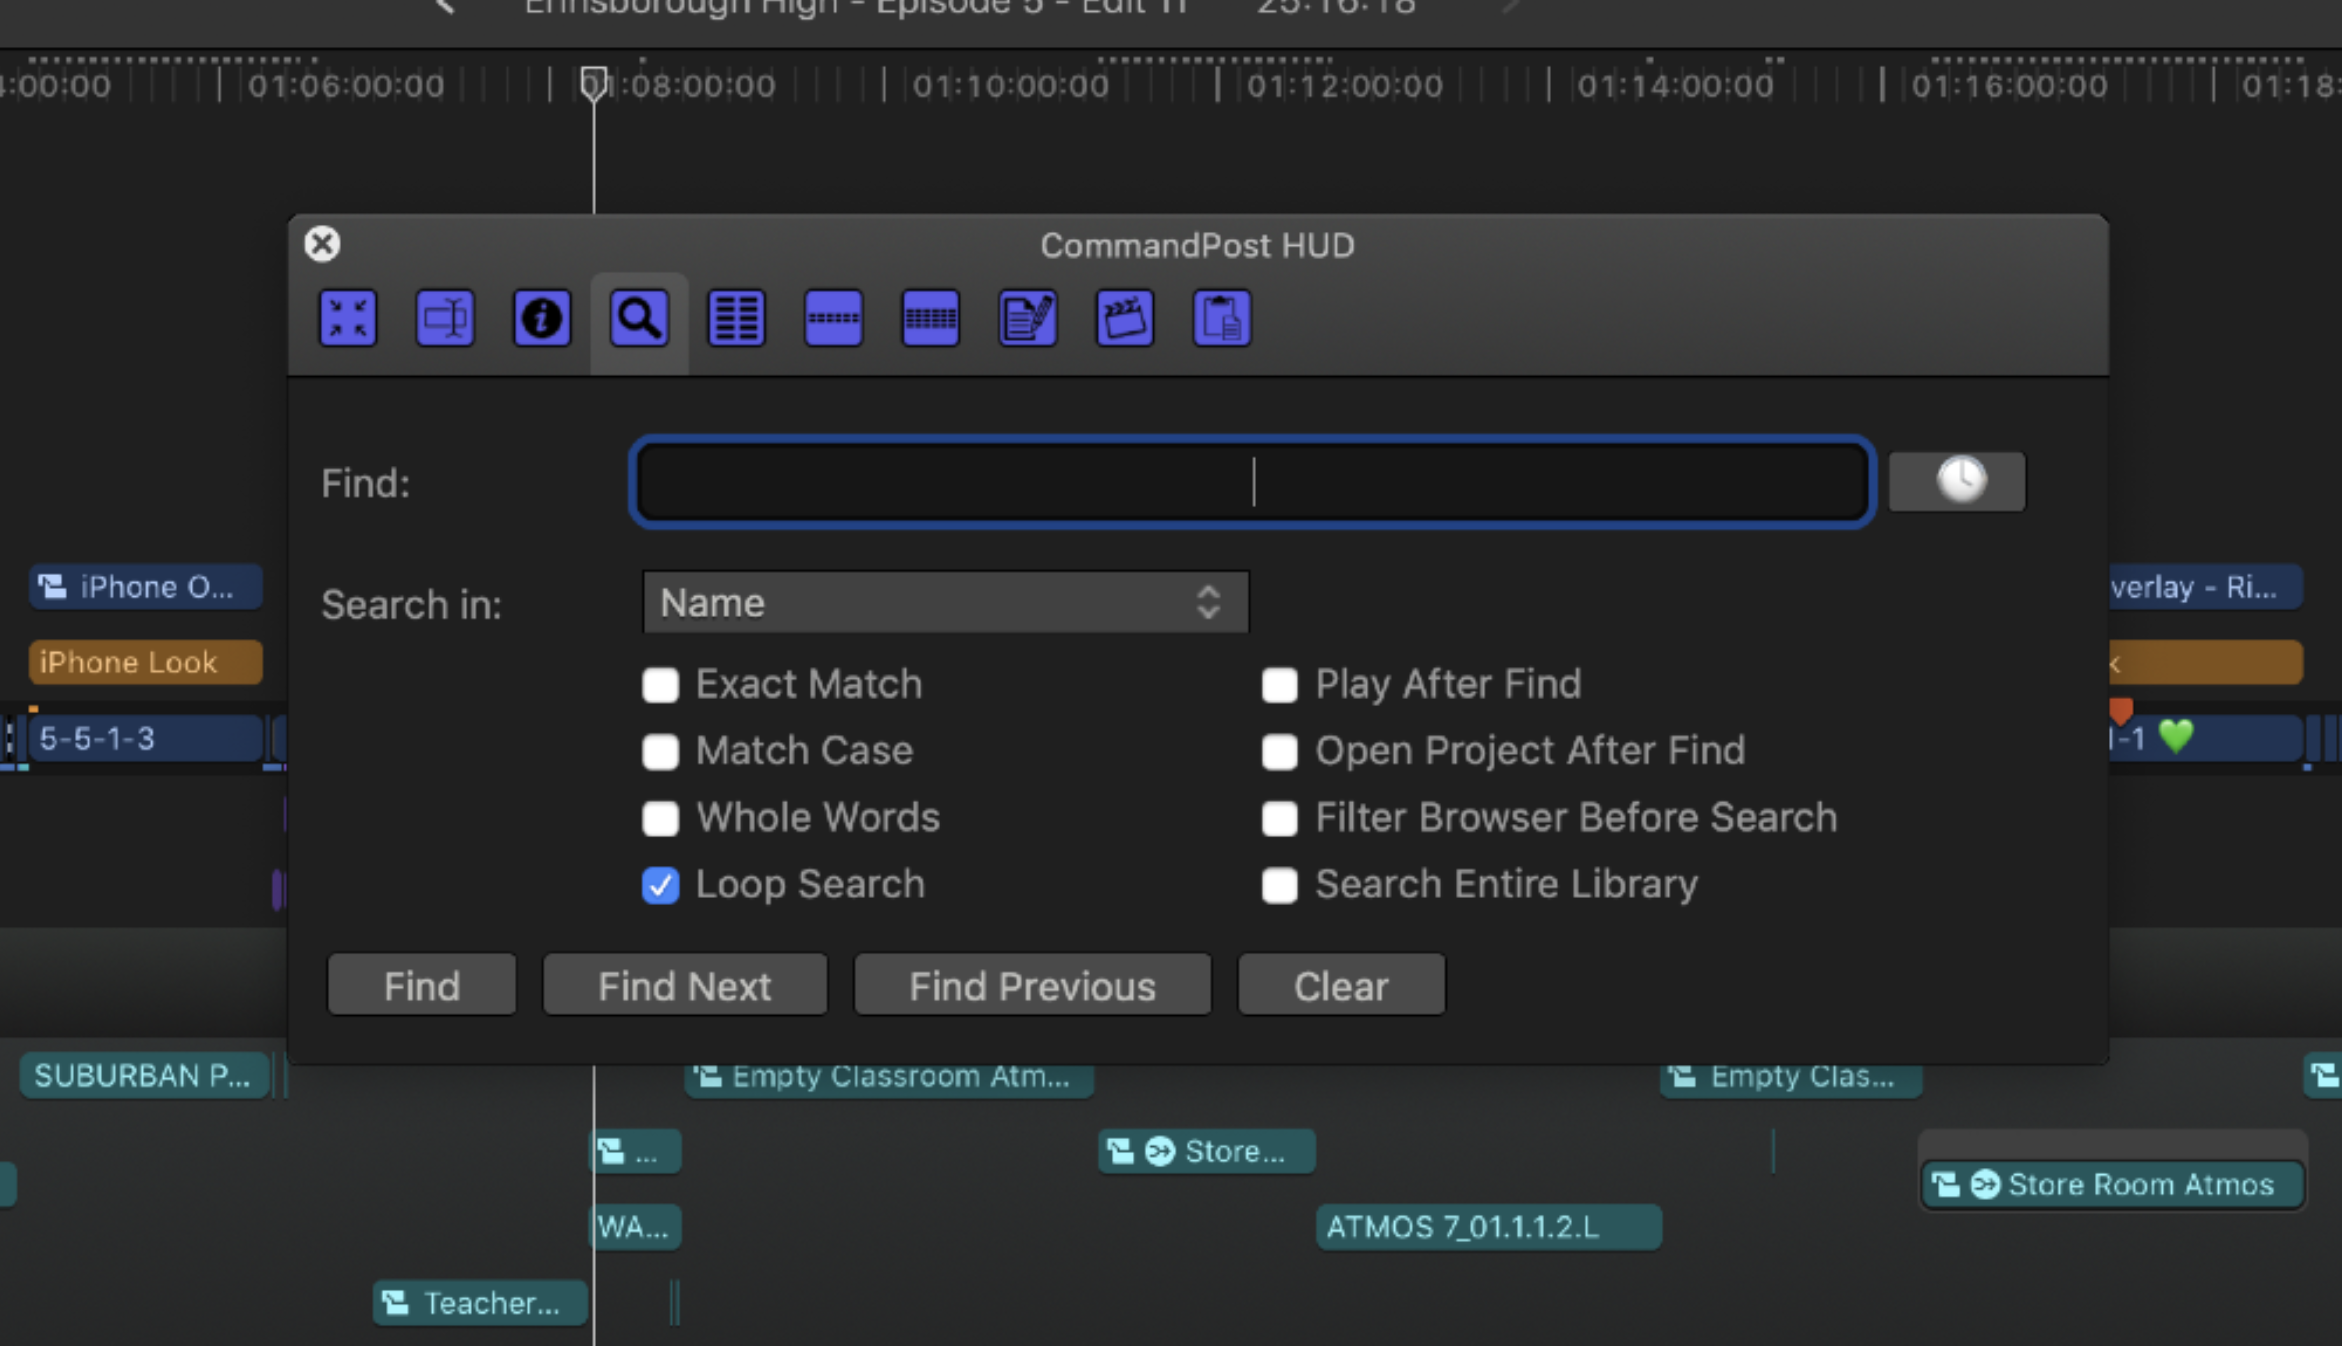
- An advanced HUD which allows you to search individual columns in the Browser, for instance.
Is CommandPost safe to use with Final Cut Pro?
Absolutely. The best way to think about CommandPost is as a virtual assistant editor - it literally just presses buttons and controls the mouse as a normal user would via the Accessibility Framework that Apple has built in to macOS. Because CommandPost is effectively “isolated” from FCP, there’s no way that CommandPost can crash Final Cut Pro.
Now that CommandPost is out of Beta what’s the plan for the future?
To help continue CommandPost to grow, evolve, and stay completely free and open-source, we now offer the ability to sponsor CommandPost directly through GitHub. What’s even better is that GitHub will kindly match user contributions up to USD$5,000 until November 2020, as well as cover all the transaction costs, so 200% of your contribution hits our bank account.
We’re hoping that the Final Cut Pro community will jump on-board and help support our CommandPost journey so that we can continue to experiment and innovate. Every day I get several emails, and social media messages from CommandPost users asking questions and/or requesting new features. Between running a small creative business, and supporting a young family, the amount of time I can devote to CommandPost is fairly limited. Being sponsored would mean I can set more time aside to focus on improving CommandPost. We have lots of cool ideas - now it’s just a matter of finding the free time to work on them.
About LateNite
LateNite Films is a highly accomplished production company with a reputation and passion for creating cinematic, innovative and unique content. From television shows to feature films, music videos to short films, documentaries to installations, their portfolio of work is bold and varied. In the online world, LateNite has built a reputation for telling big ambitious genre stories that find an audience both in Australia and abroad.
They’ve shot music videos for some of Australia’s biggest artists including Vera Blue, Gang of Youths, Samantha Jade & Guy Pearce. Their clip for Gang of Youths track The Deepest Sighs, The Frankest Shadows was nominated for an ARIA award and their clip for Peking Duk’s Let You Down was nominated for an ADG award.
Their fantasy comedy series The Wizards of Aus premiered on SBS2 before finding an audience of over 2.5 million worldwide on YouTube. Sci-fi shorts Time Trap & Rocketman have collectively had 3 million views online. And upcoming Screen Australia funded short Rebooted has recently been nominated for an AACTA and a SPA award for Best Short Film. Passionate about inclusive storytelling. //typo here?
LateNite has also recently completed post production on The Legend of Burnout Barry, a one off TV half hour as part of the ABCs DisRupted initiative. They have been nominated twice as Breakthrough Business of the Year at the Screen Producers Australia awards.
About Ronny
Ronny is a movie and tv veteran with over 44 years of experience in the industry. He has worked around the globe as an editor and a producer, and as a production manager for live television events such as the Olympic Games and Eurovision.
Today, Ronny is Head of Enterprise Solutions at Other World Computing, a global leader in storage solutions for creative professionals. At the age of 68, he still follows the latest trends in media techology and content creation. And he is proud to be working with many young filmmakers.